Setup AzureAD
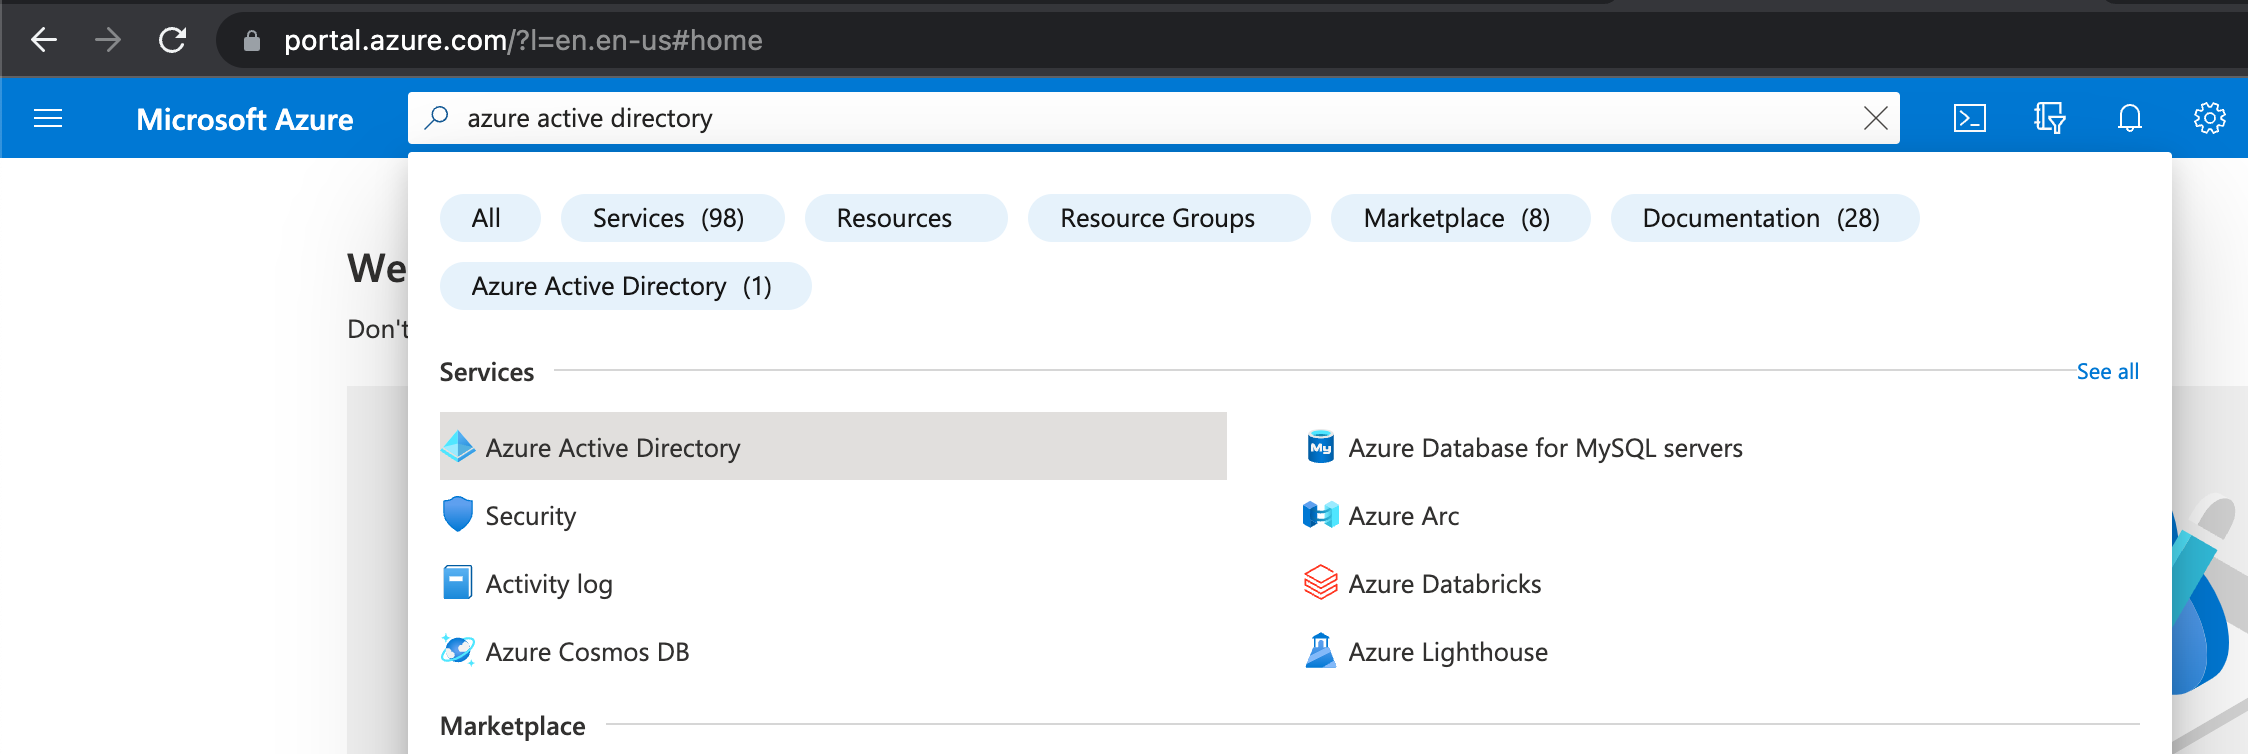
Navigate to “Azure Active Directory”
Add New App Registration
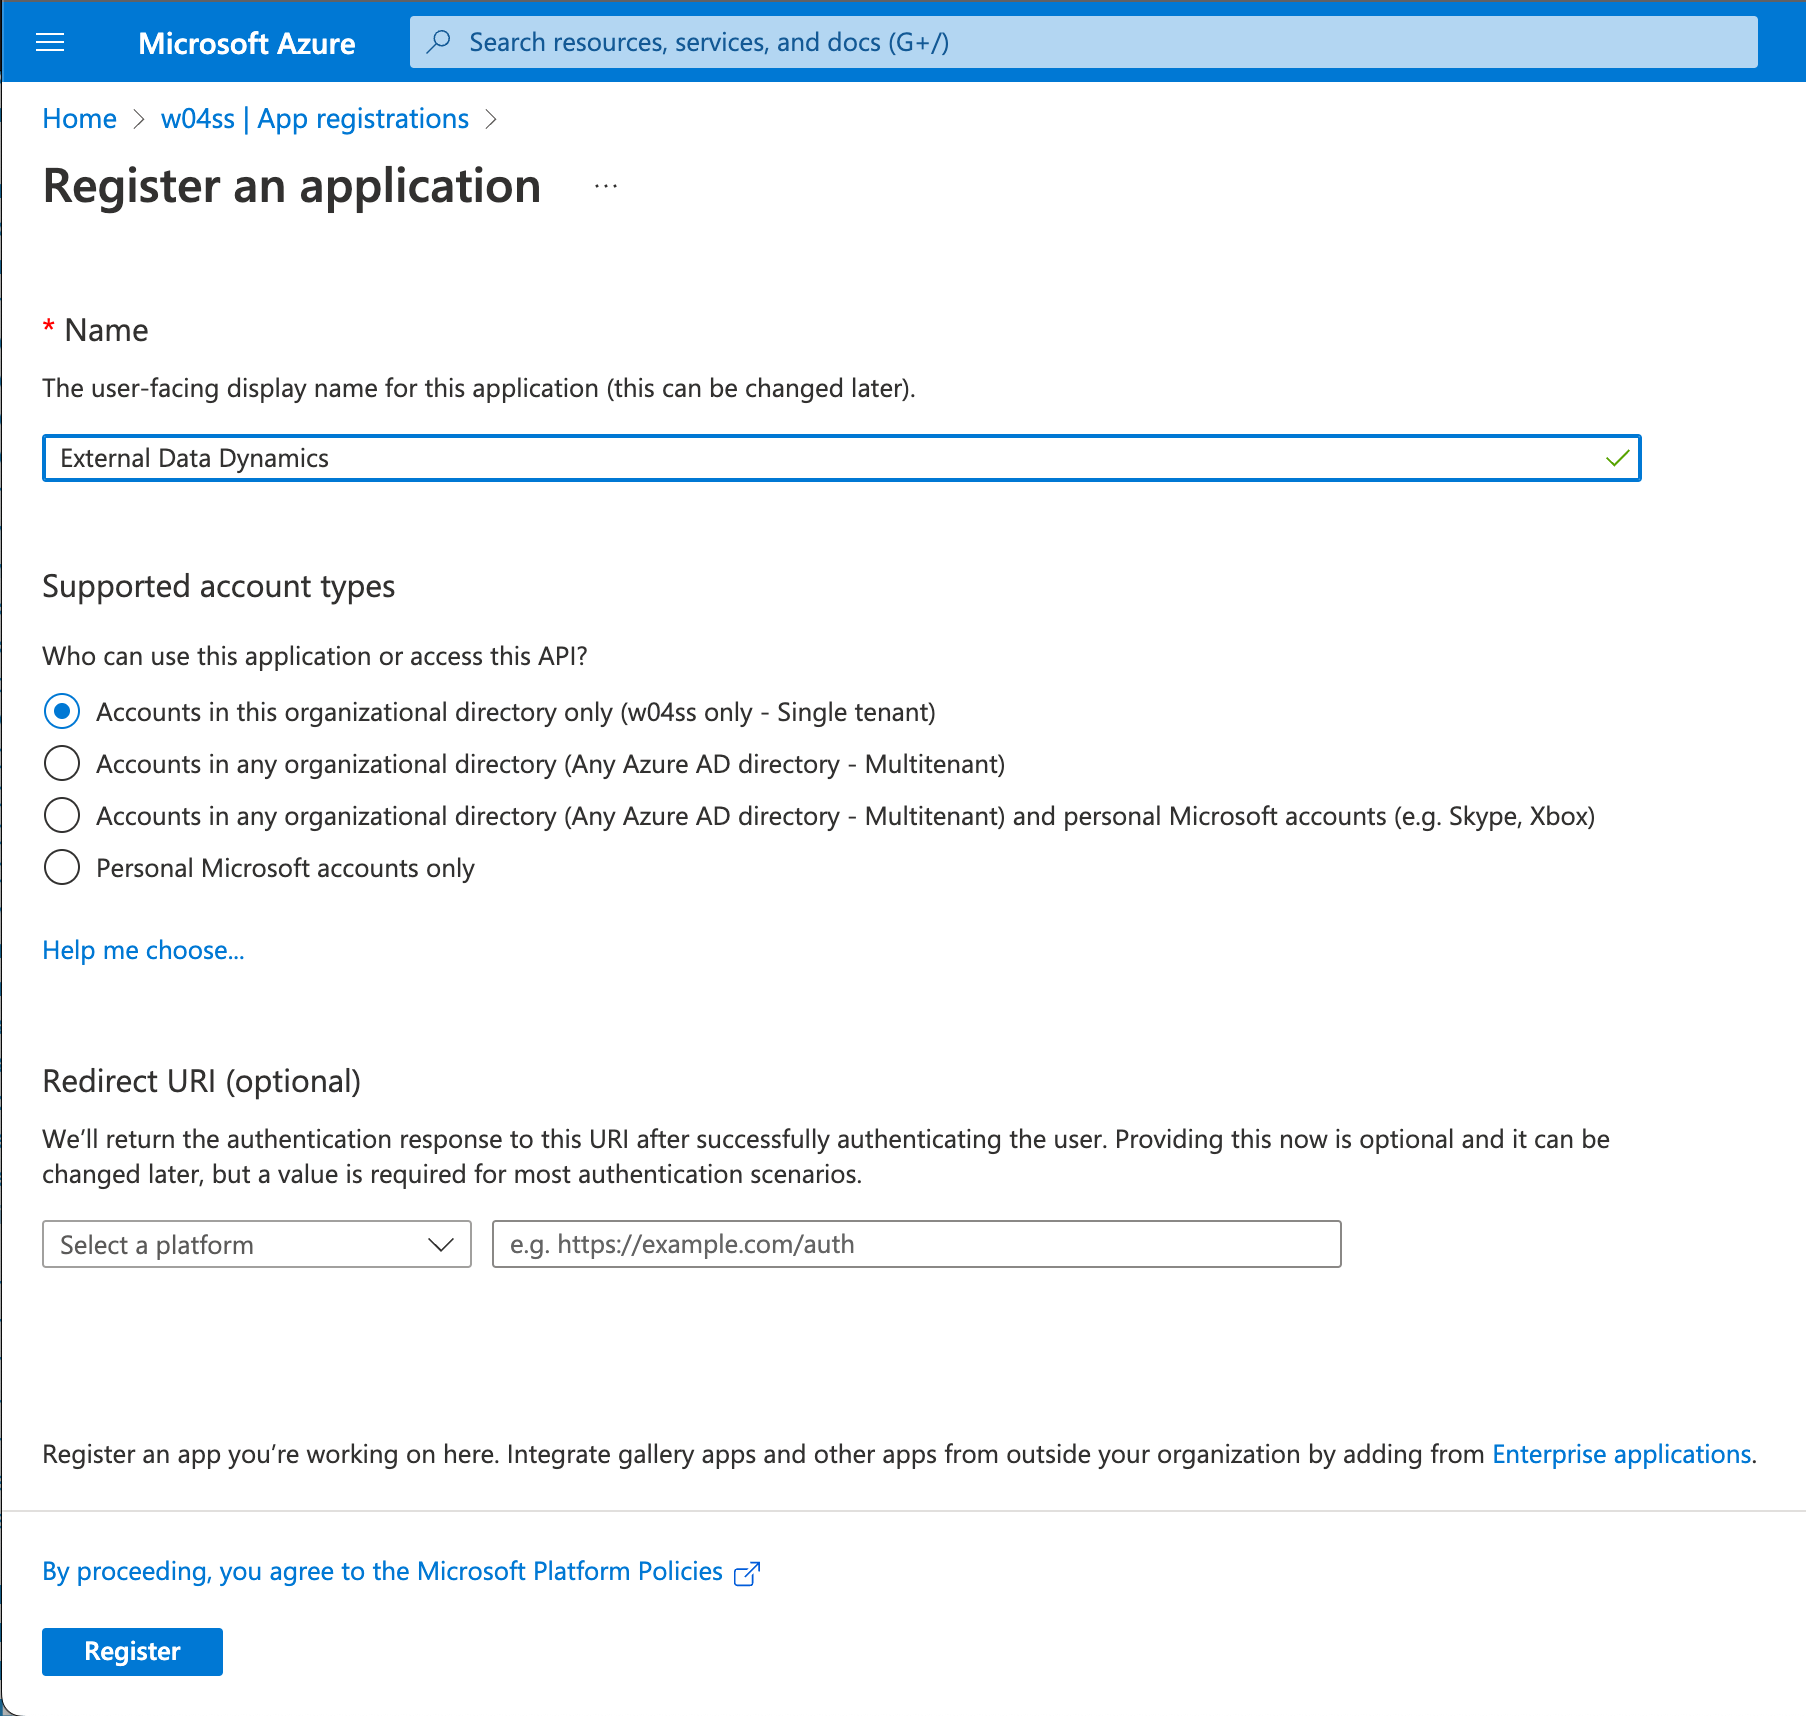
Add a new registration under App registrations > New registration.
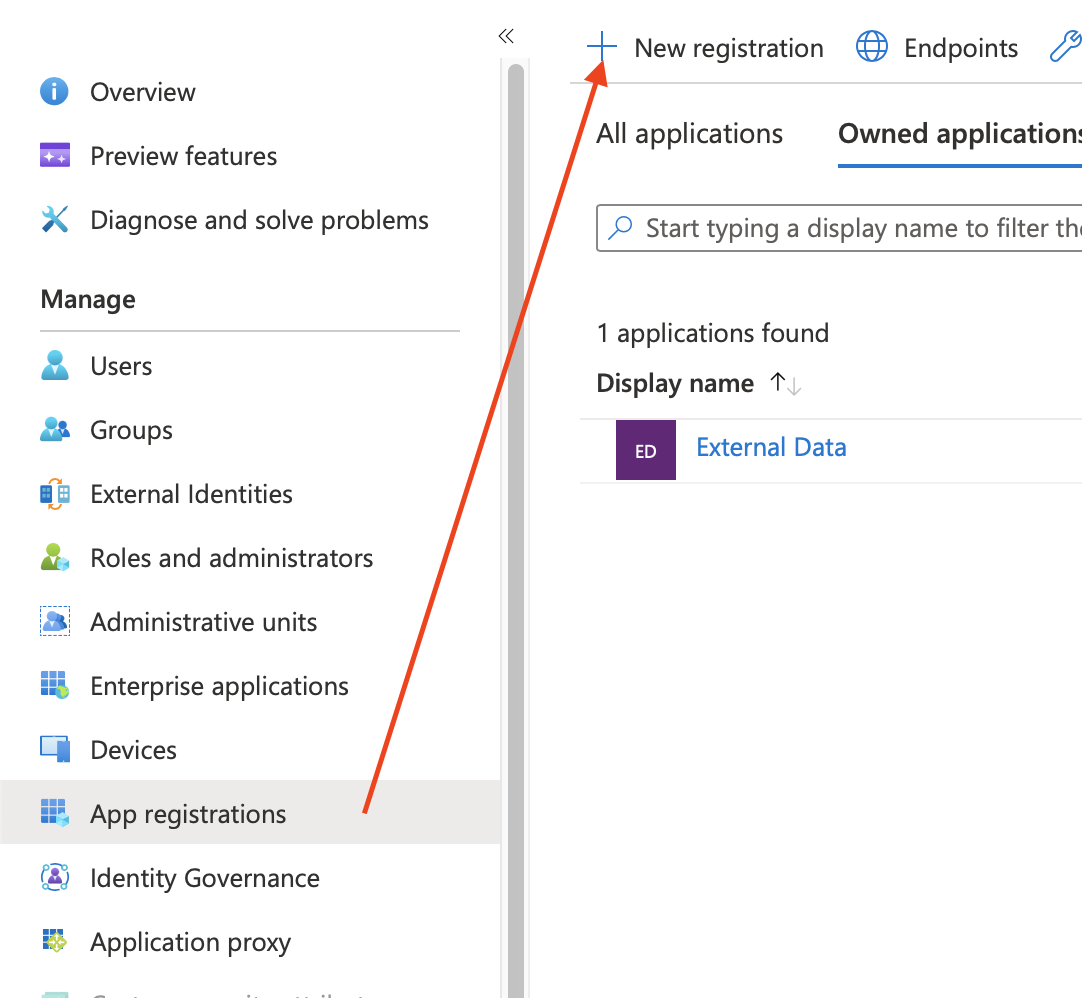
Tipp: When naming the new app, choosing a recognisable name like External Data for Jira Fields can help you to properly identify the application later.
Certificates & Secret
Go to Certificates & secrets > Client secrets > New client secret
Add a meaningful description and set an expiration date. Keep in mind that you’ll have to update the data source once the secret expires.
Important: Please make sure to note down the secret value, which is only visible immediately after creation. You will need this value later when setting up the data source

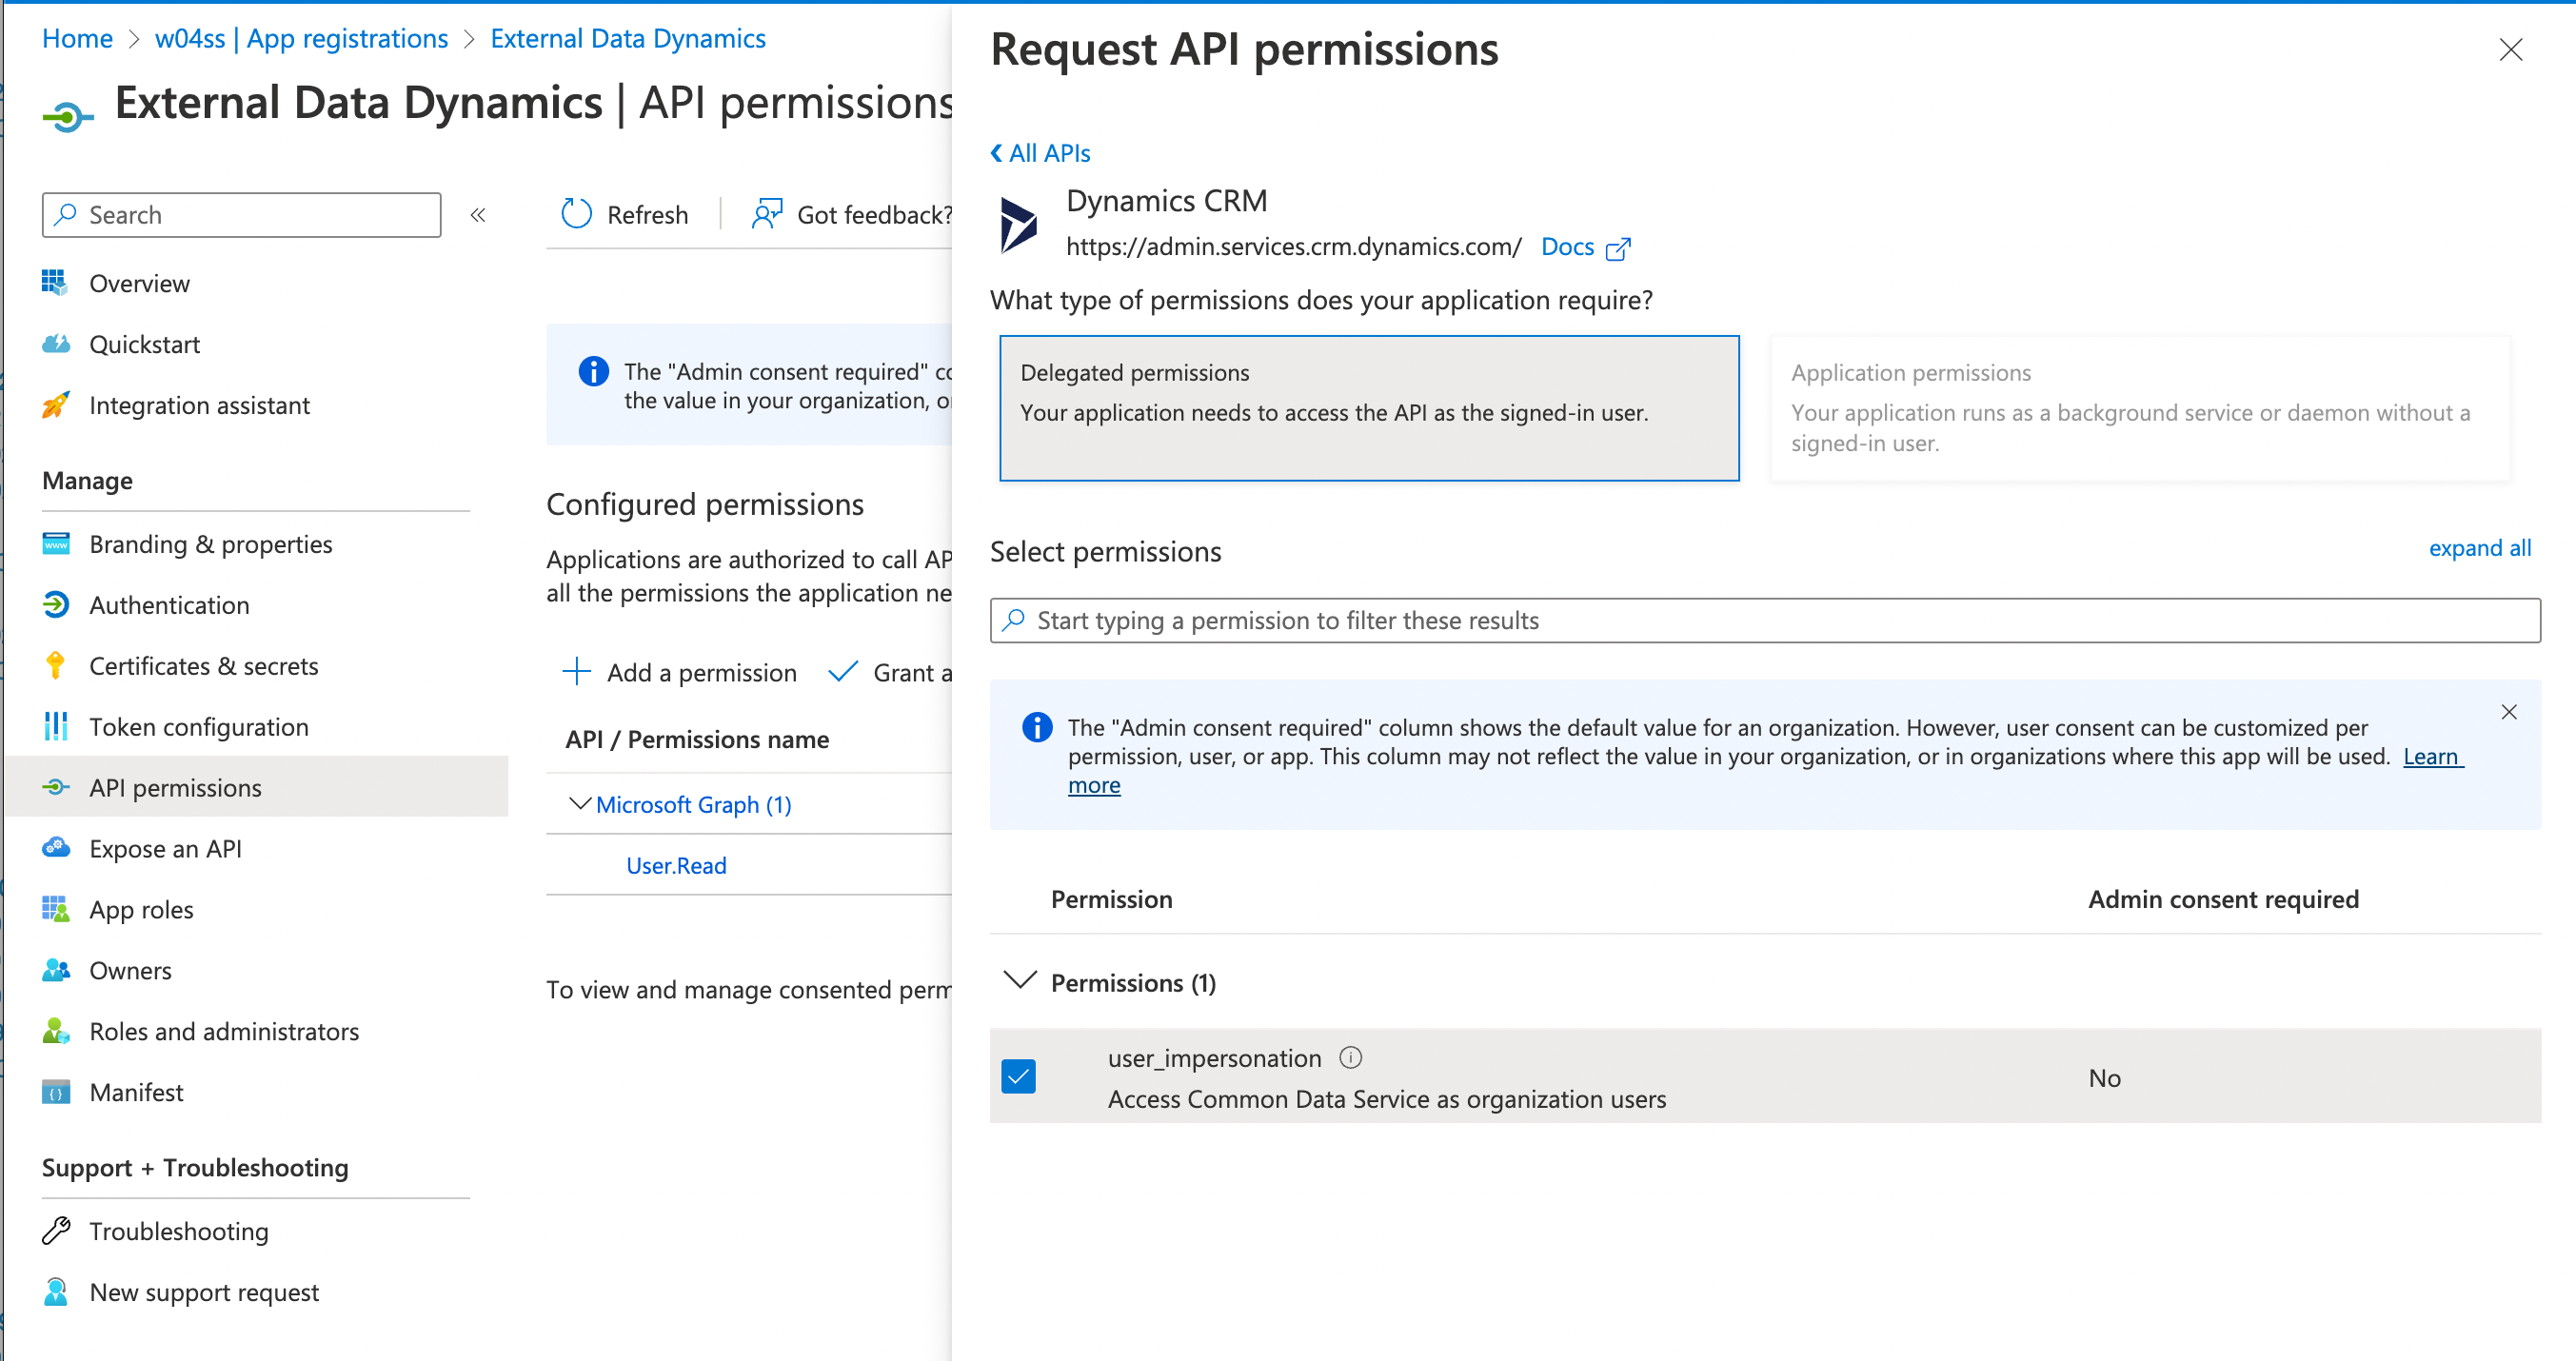
API Permissions
Go to API permissions > Add a permission
Select Dynamics CRM > Application permissions
Now select the API / Permission user_impersonation.
Collect Endpoint & ClientID
Go to Overview > Endpoints and copy the following endpoint:
OAuth 2.0 token endpoint (v2)
Go to Overview > Application (client) ID and note the value.
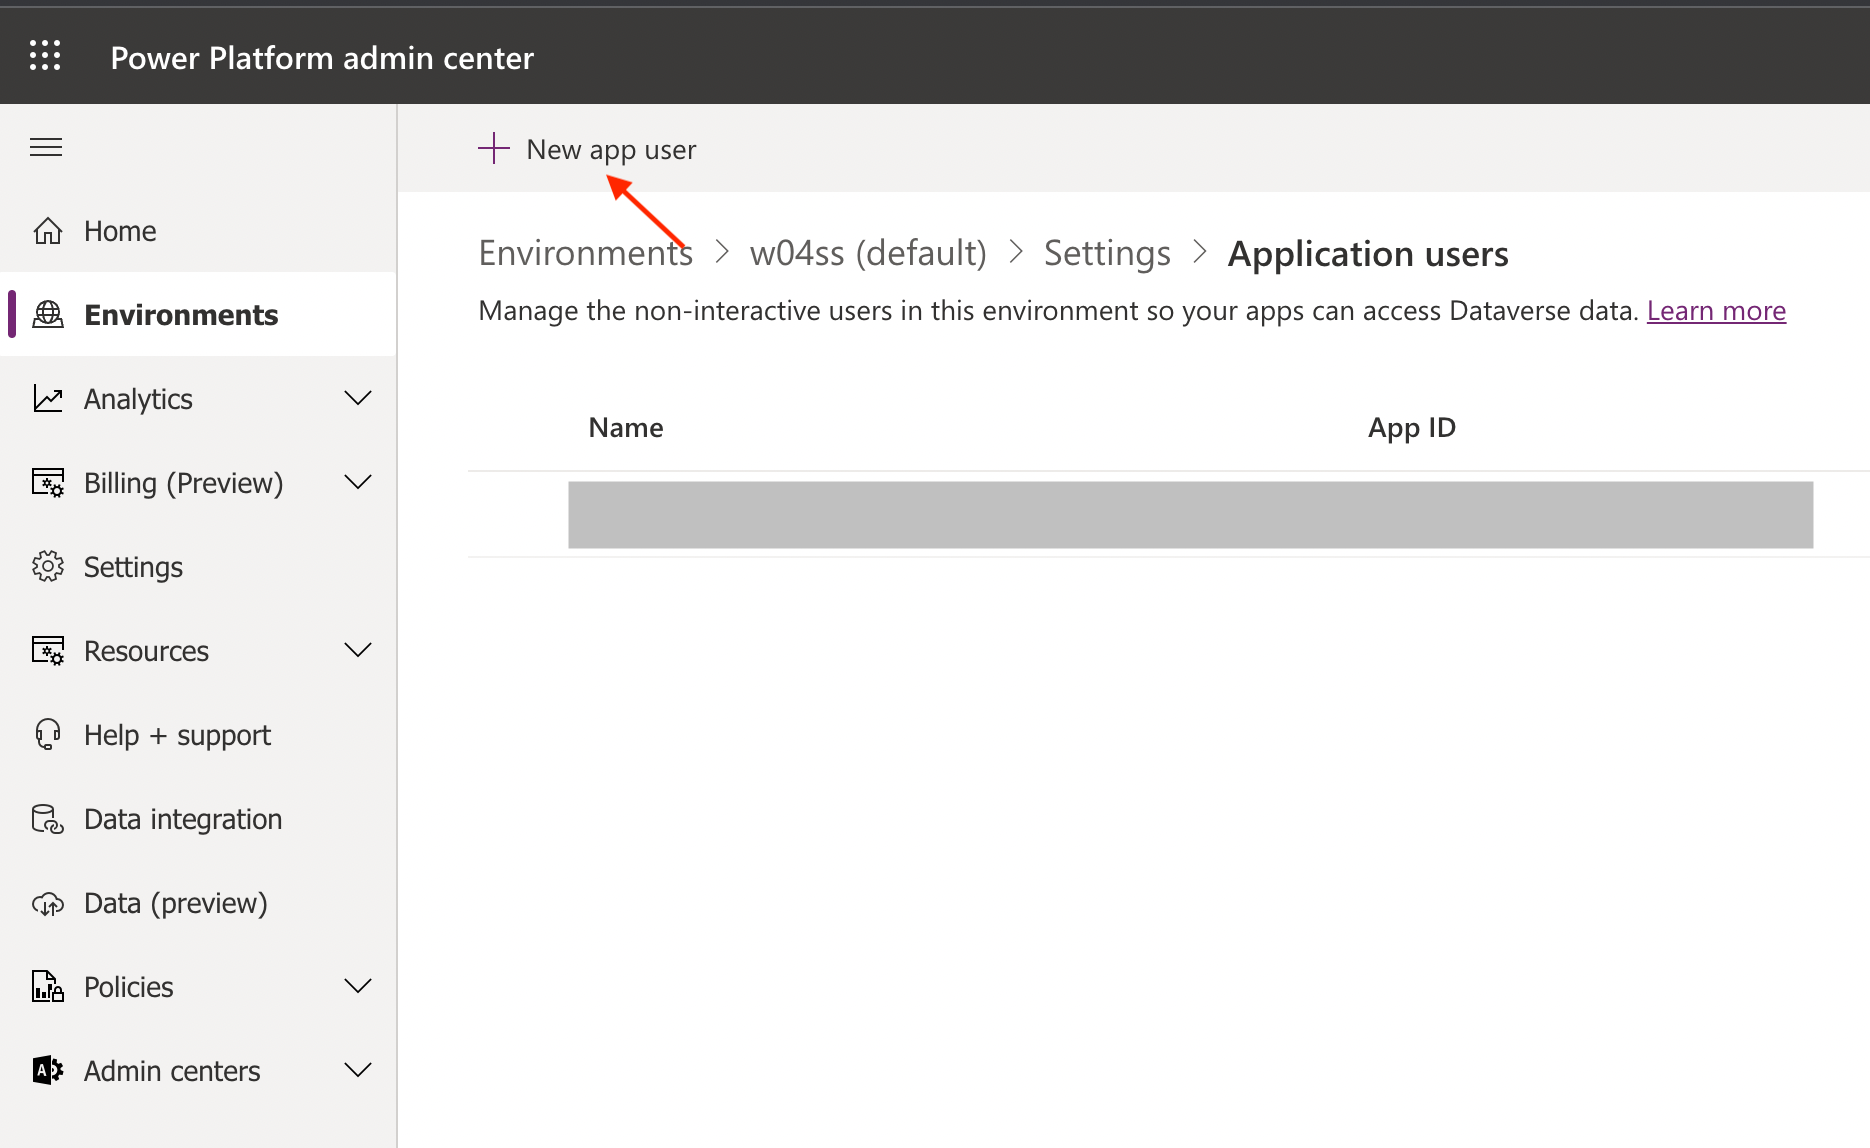
Associate App User / Set Roles in CRM 365 / Dataverse Environment
Sign in to the Power Platform admin center as a System Administrator.
Select your environment, in our sample “w04ss”

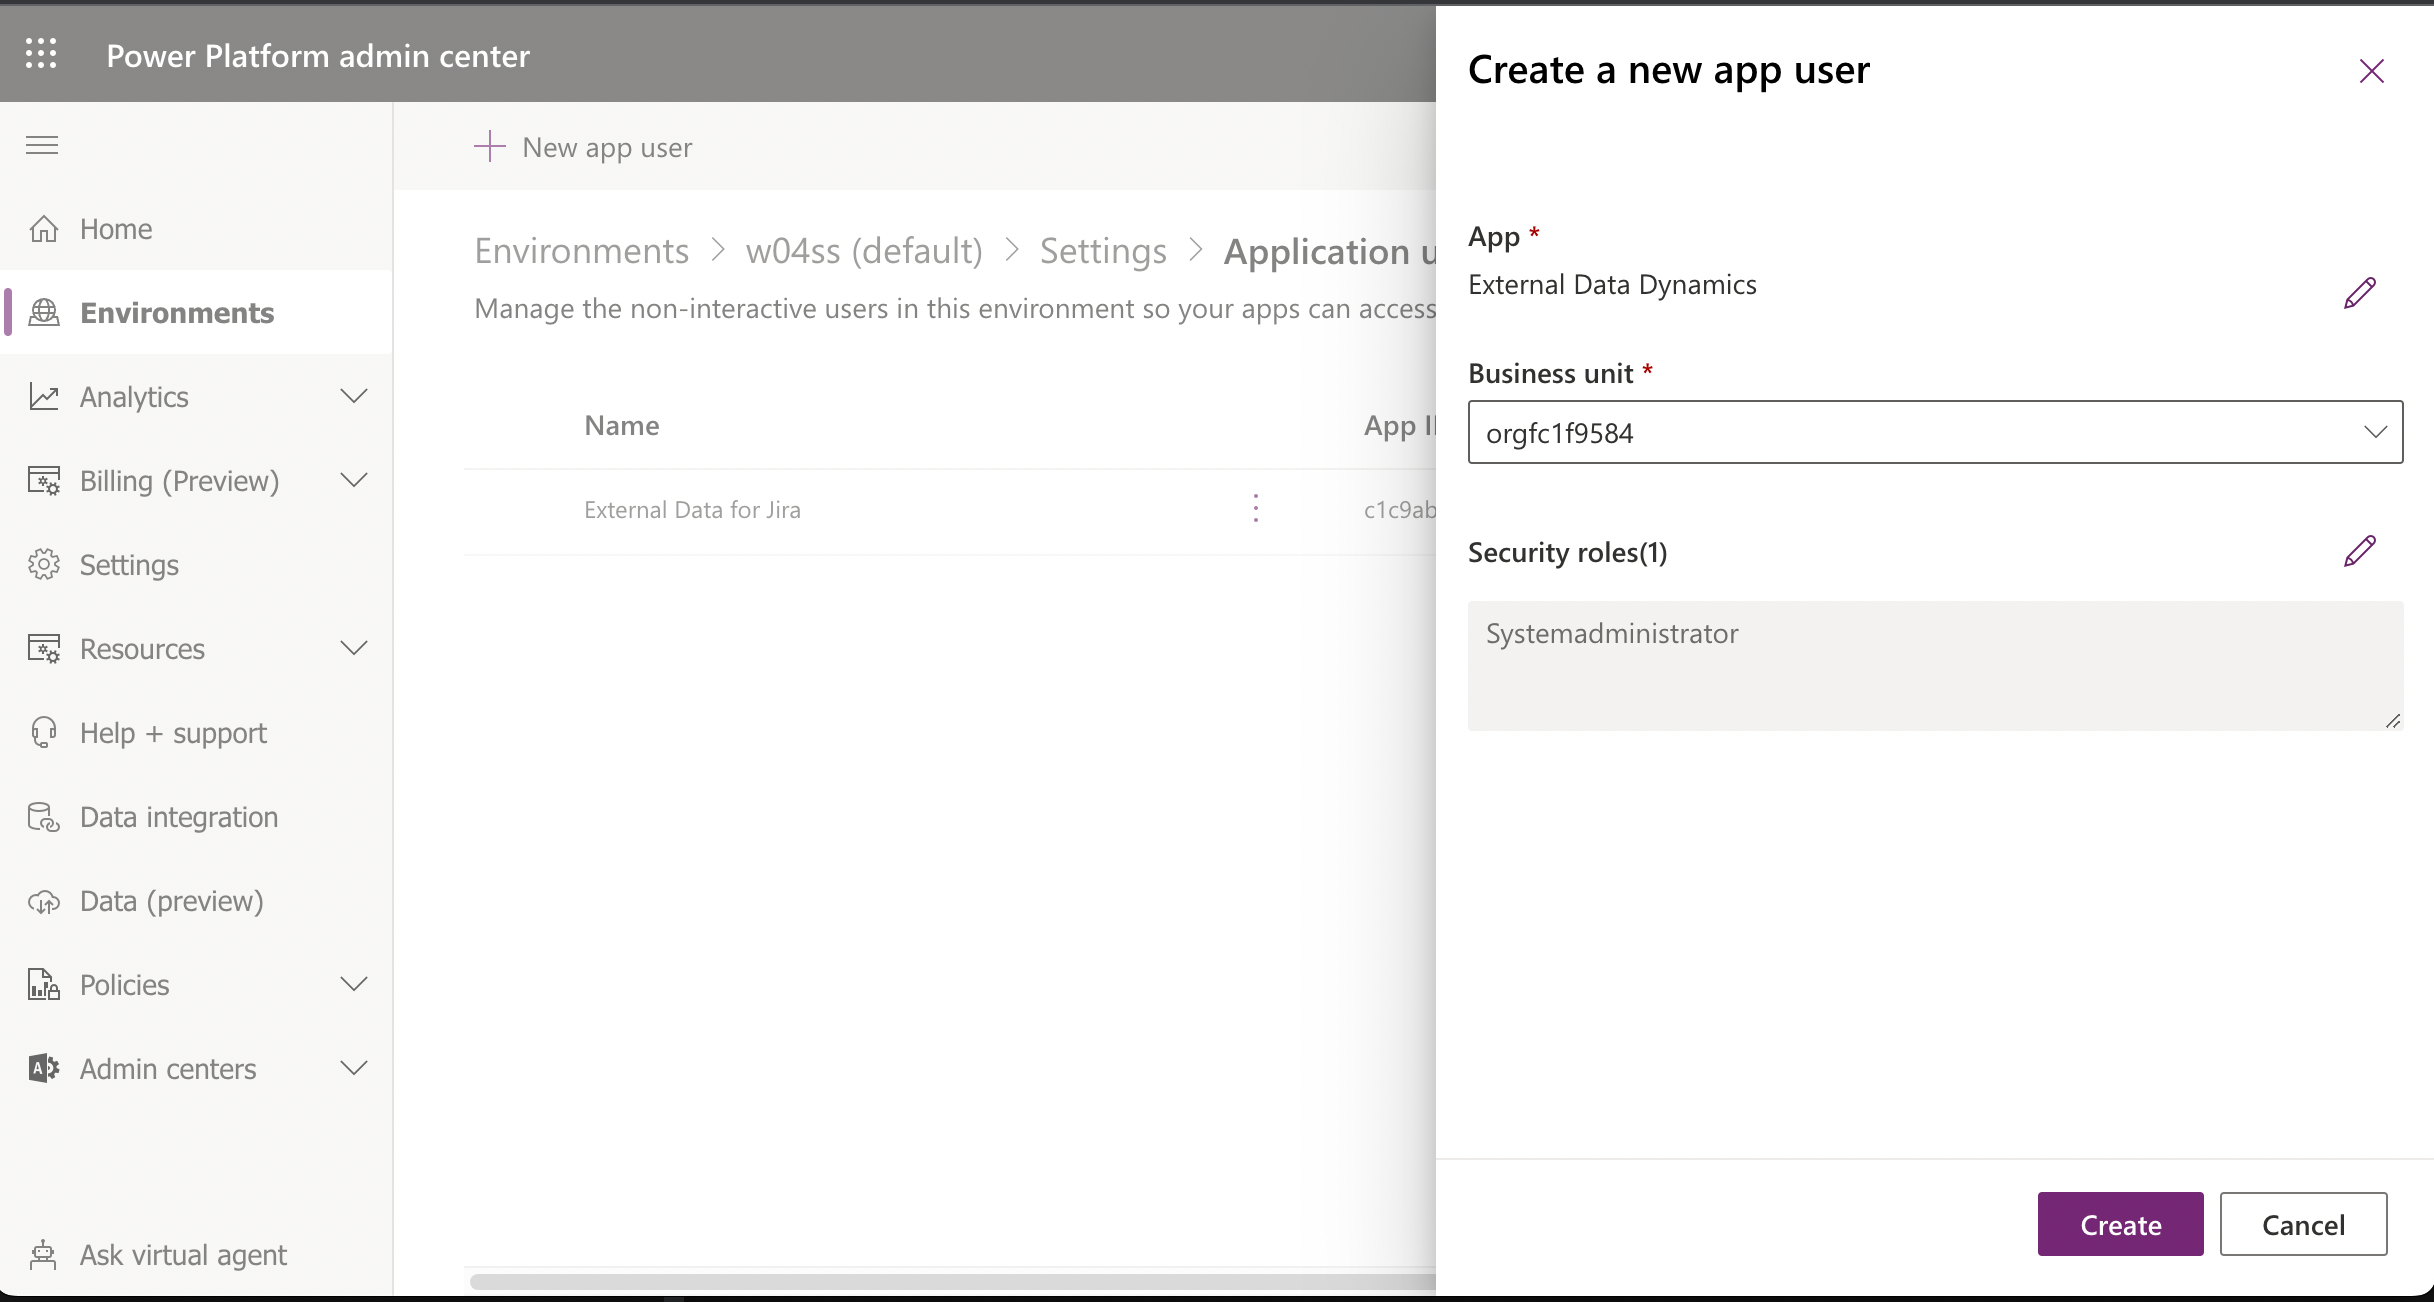
Got to Settings -> User + permissions -> Application users and create a new app user.
Choose the app we created earlier in Azure AD, your business unit and the right role for this user.
For demo purpose we selected Systemadministrator (sys admin), which should never be used in production!
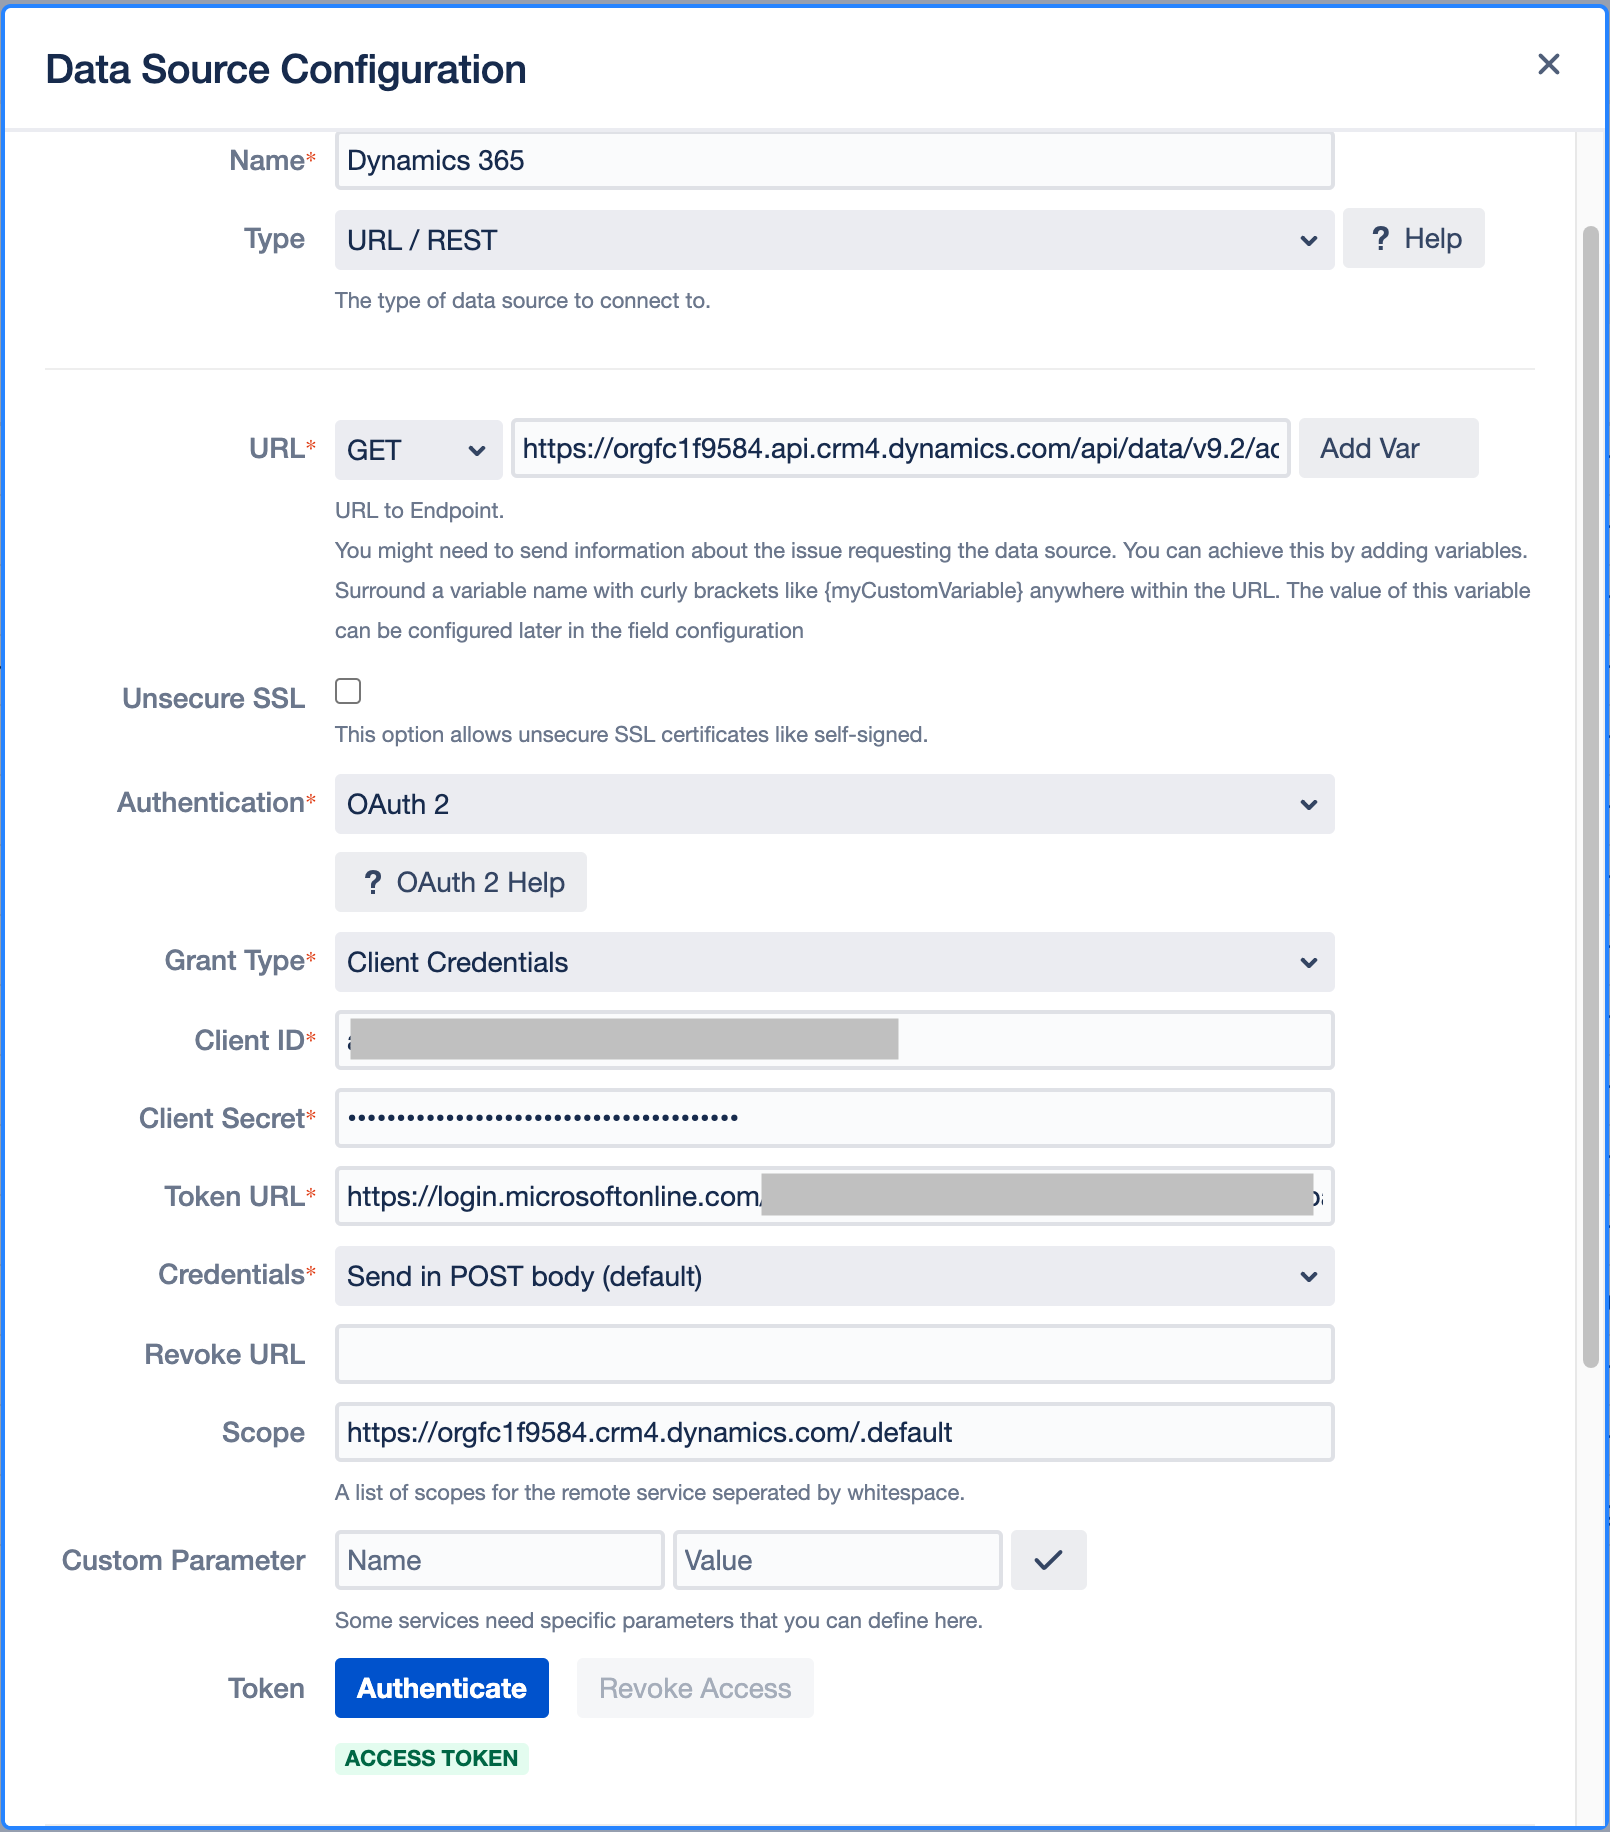
Setup External Data
Create New Data Source
Create a new data source under External Data for Jira Fields > Data Sources > Add Data Source.
Authentication:
Select Authentication OAuth2 > Grant Type > Client Credentials
Client ID & Client Secret
Enter the Client ID, which you can find under Overview > Application (client) ID
The Client Secret is the secret value created in the Certificates & secrets section. Please insert the noted value here.
Endpoints
Endpoints are service specific URLs for receiving an access token. Since we are using the client credentials flow, we only need the token endpoint.
Token Endpoints:
Token Url: https://login.microsoftonline.com/{tenant}/oauth2/v2.0/token
Scopes
Scopes define the permission to specific parts of the data. Since we are using the Client Credentials Flow, we simply set the scope to:
https://{businessunit}.{XXX}.dynamics.com/.default
In our example it is resolved as follows : https://orgfc1f9584.crm4.dynamics.com/.default. You can also find the correct host later under URL, Web API endpoint.
Make sure that an administrator grants you the required permissions that you need for setting up the Azure backend configuration.
Authenticate
Click Authenticate to retrieve your access token.
URL
To find the Web API URL for your environment:
-
Sign into Power Apps, and select your environment from the top-right corner.
-
Select the Settings button in the top-right corner, and select Developer resources.
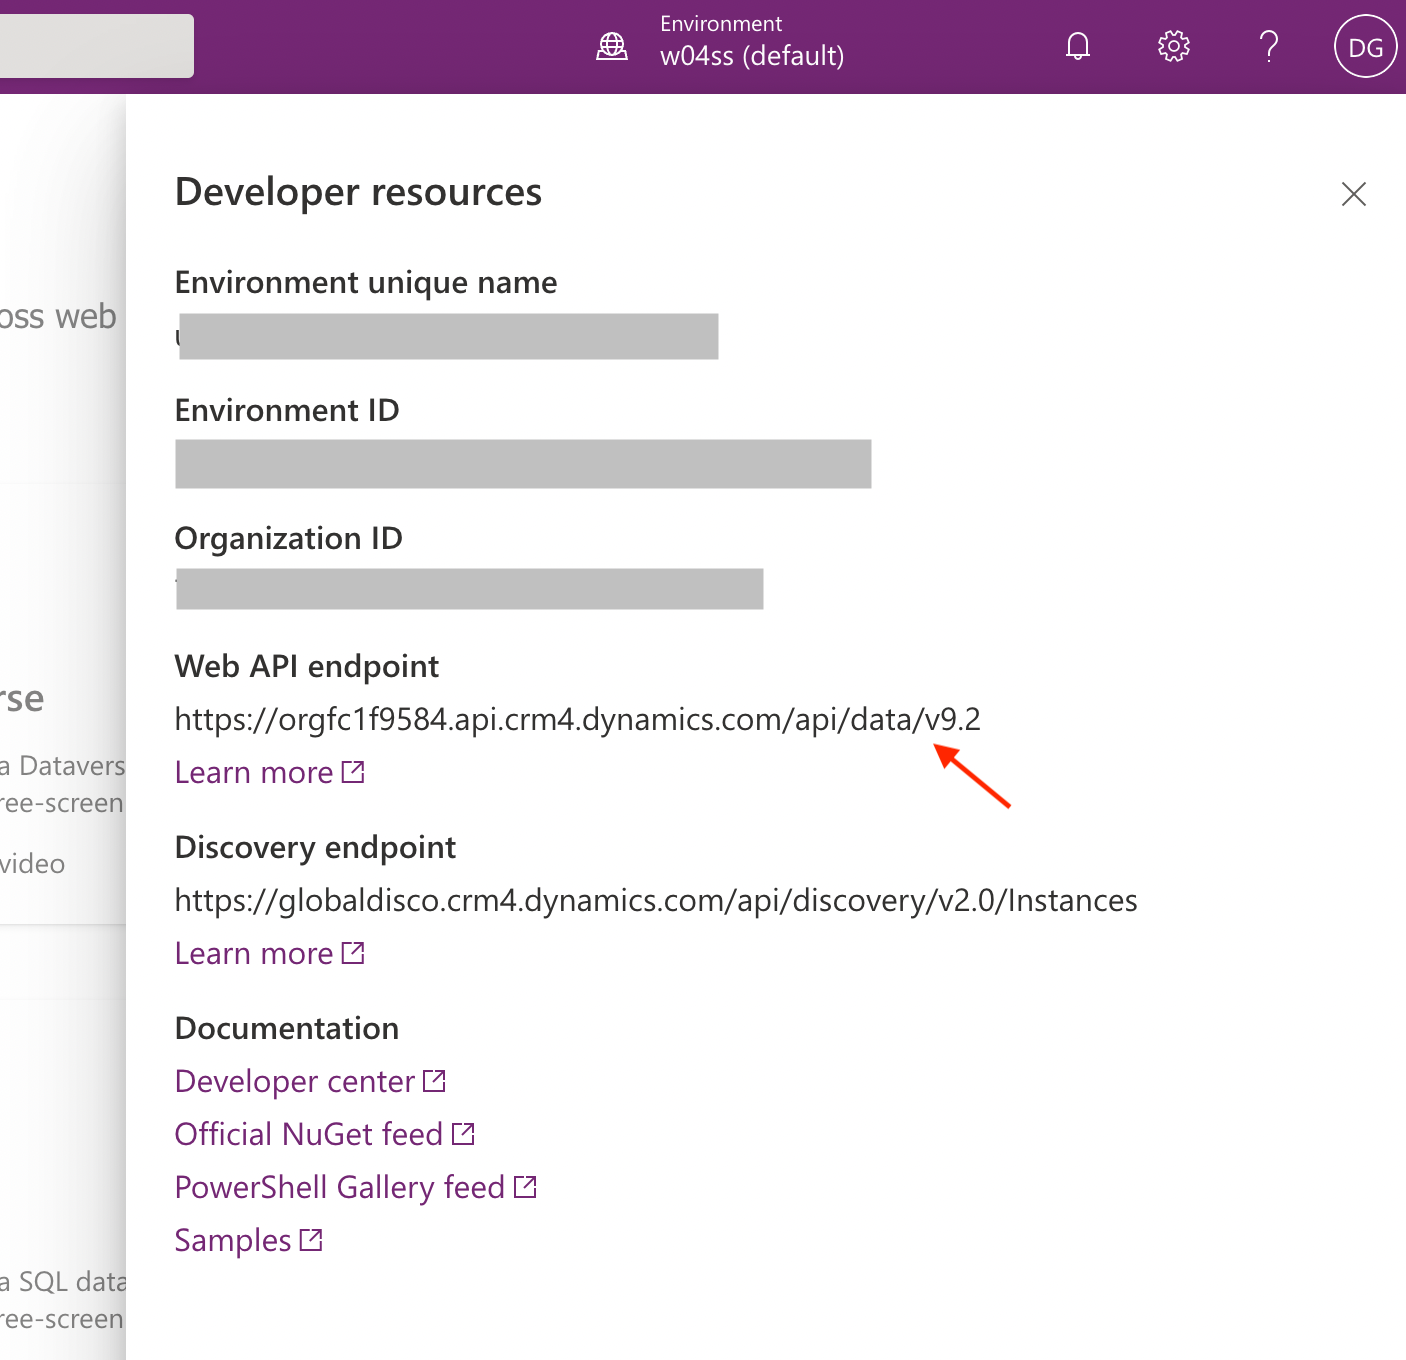
Example query: (Microsoft Documentation)
https://{Your Web API endpoint}/accounts?$select=name
In our example:
https://orgfc1f9584.api.crm4.dynamics.com/api/data/v9.2/accounts?$select=name
Result:
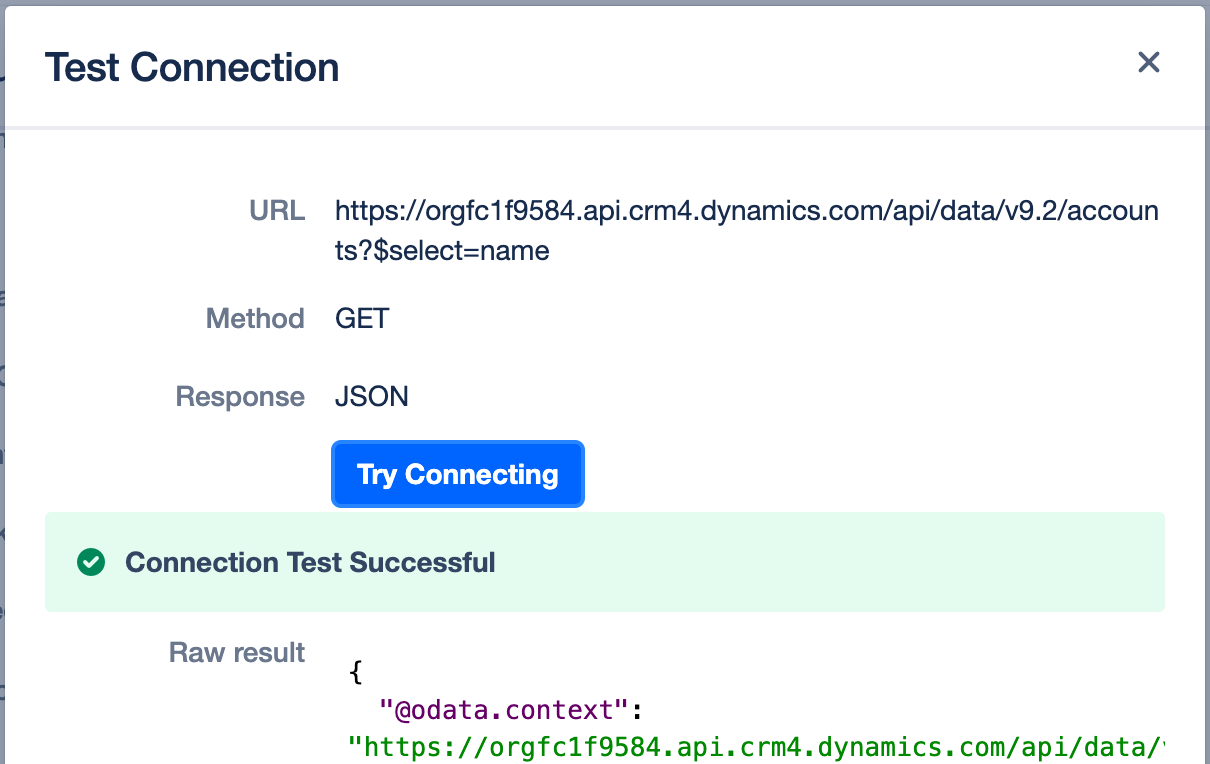
Save and test the data source to ensure that everything works as intended.