
In case you have a custom domain Salesforce setup you cannot use the built-in Salesforce connector that the app provides. Also, if you want more control over the setup, this is a good alternative approach.
Create a New Connected App
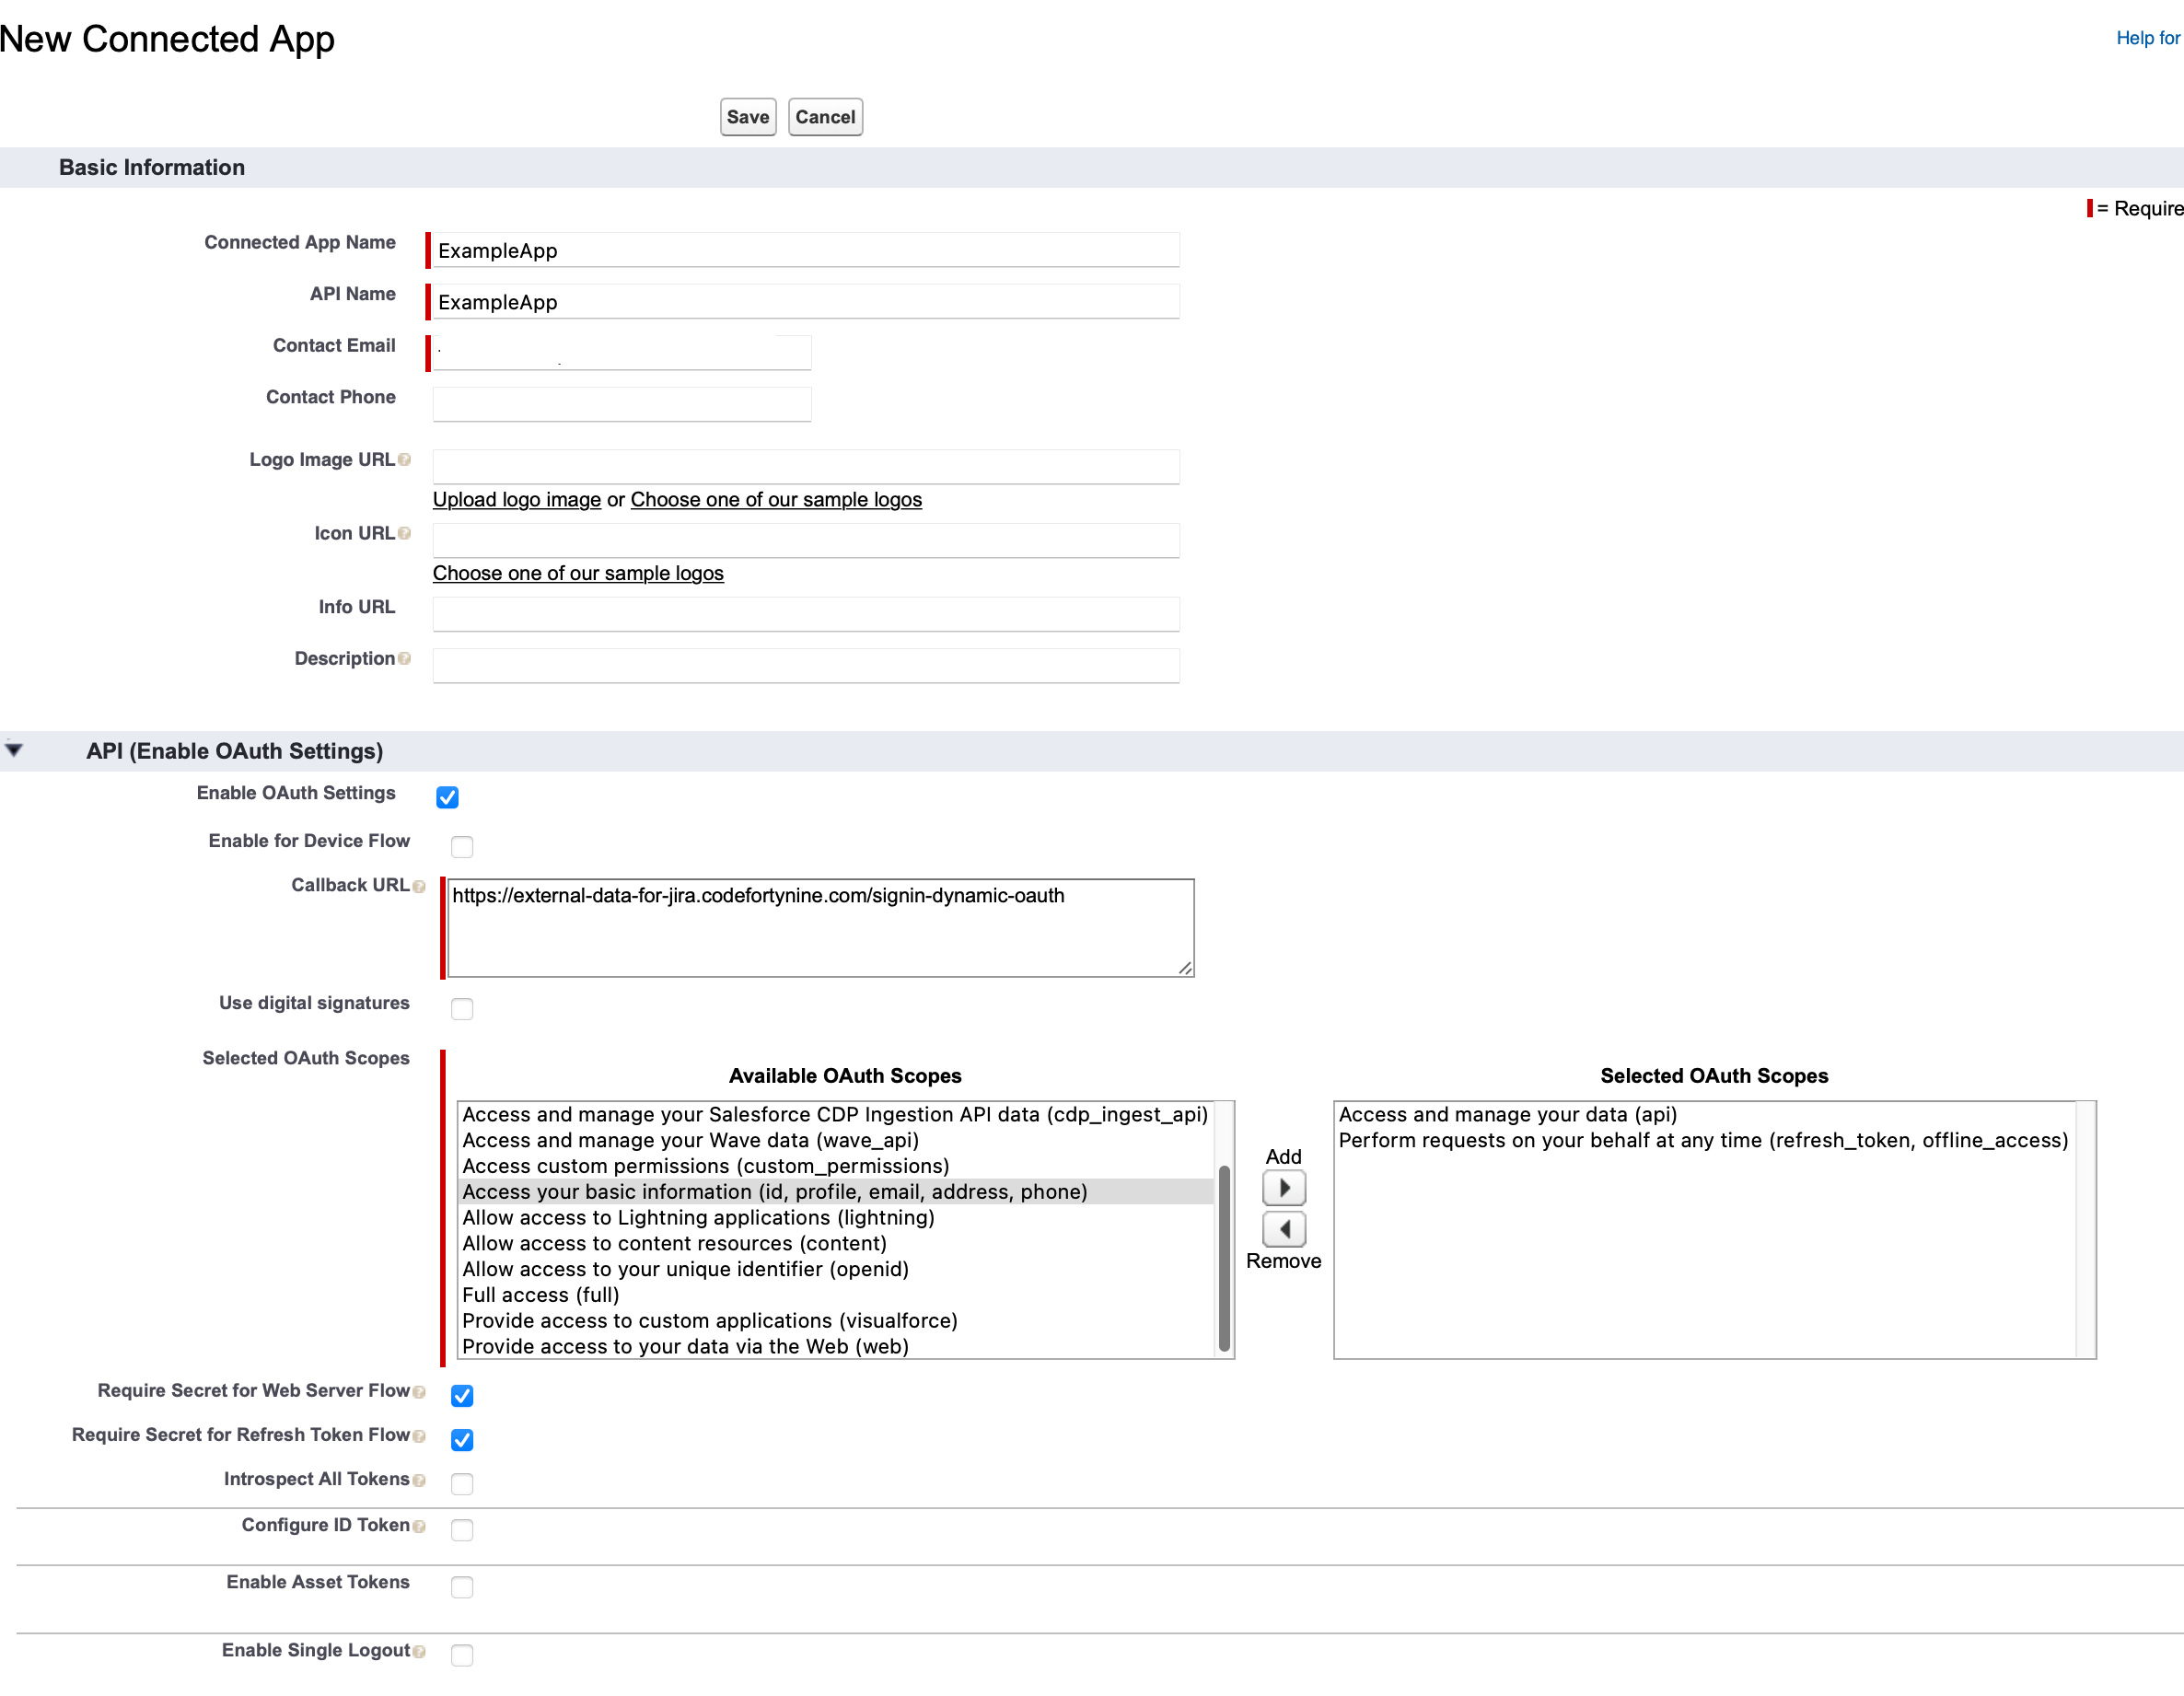
Start by creating a New Connected App in the App Manager.
You will need to fill in all the required fields. The Callback URL must be set. You find the value in the data source configuration.
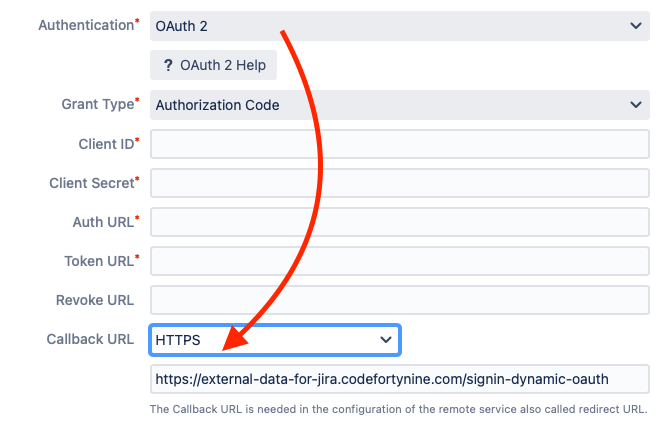
In this example use https://external-data-for-jira.codefortynine.com/signin-dynamic-oauth. Also make sure to add at least the following OAuth scopes:
-
Access and manage your data (API)
-
Perform requests on your behalf at any time (refresh_token, offline_access)
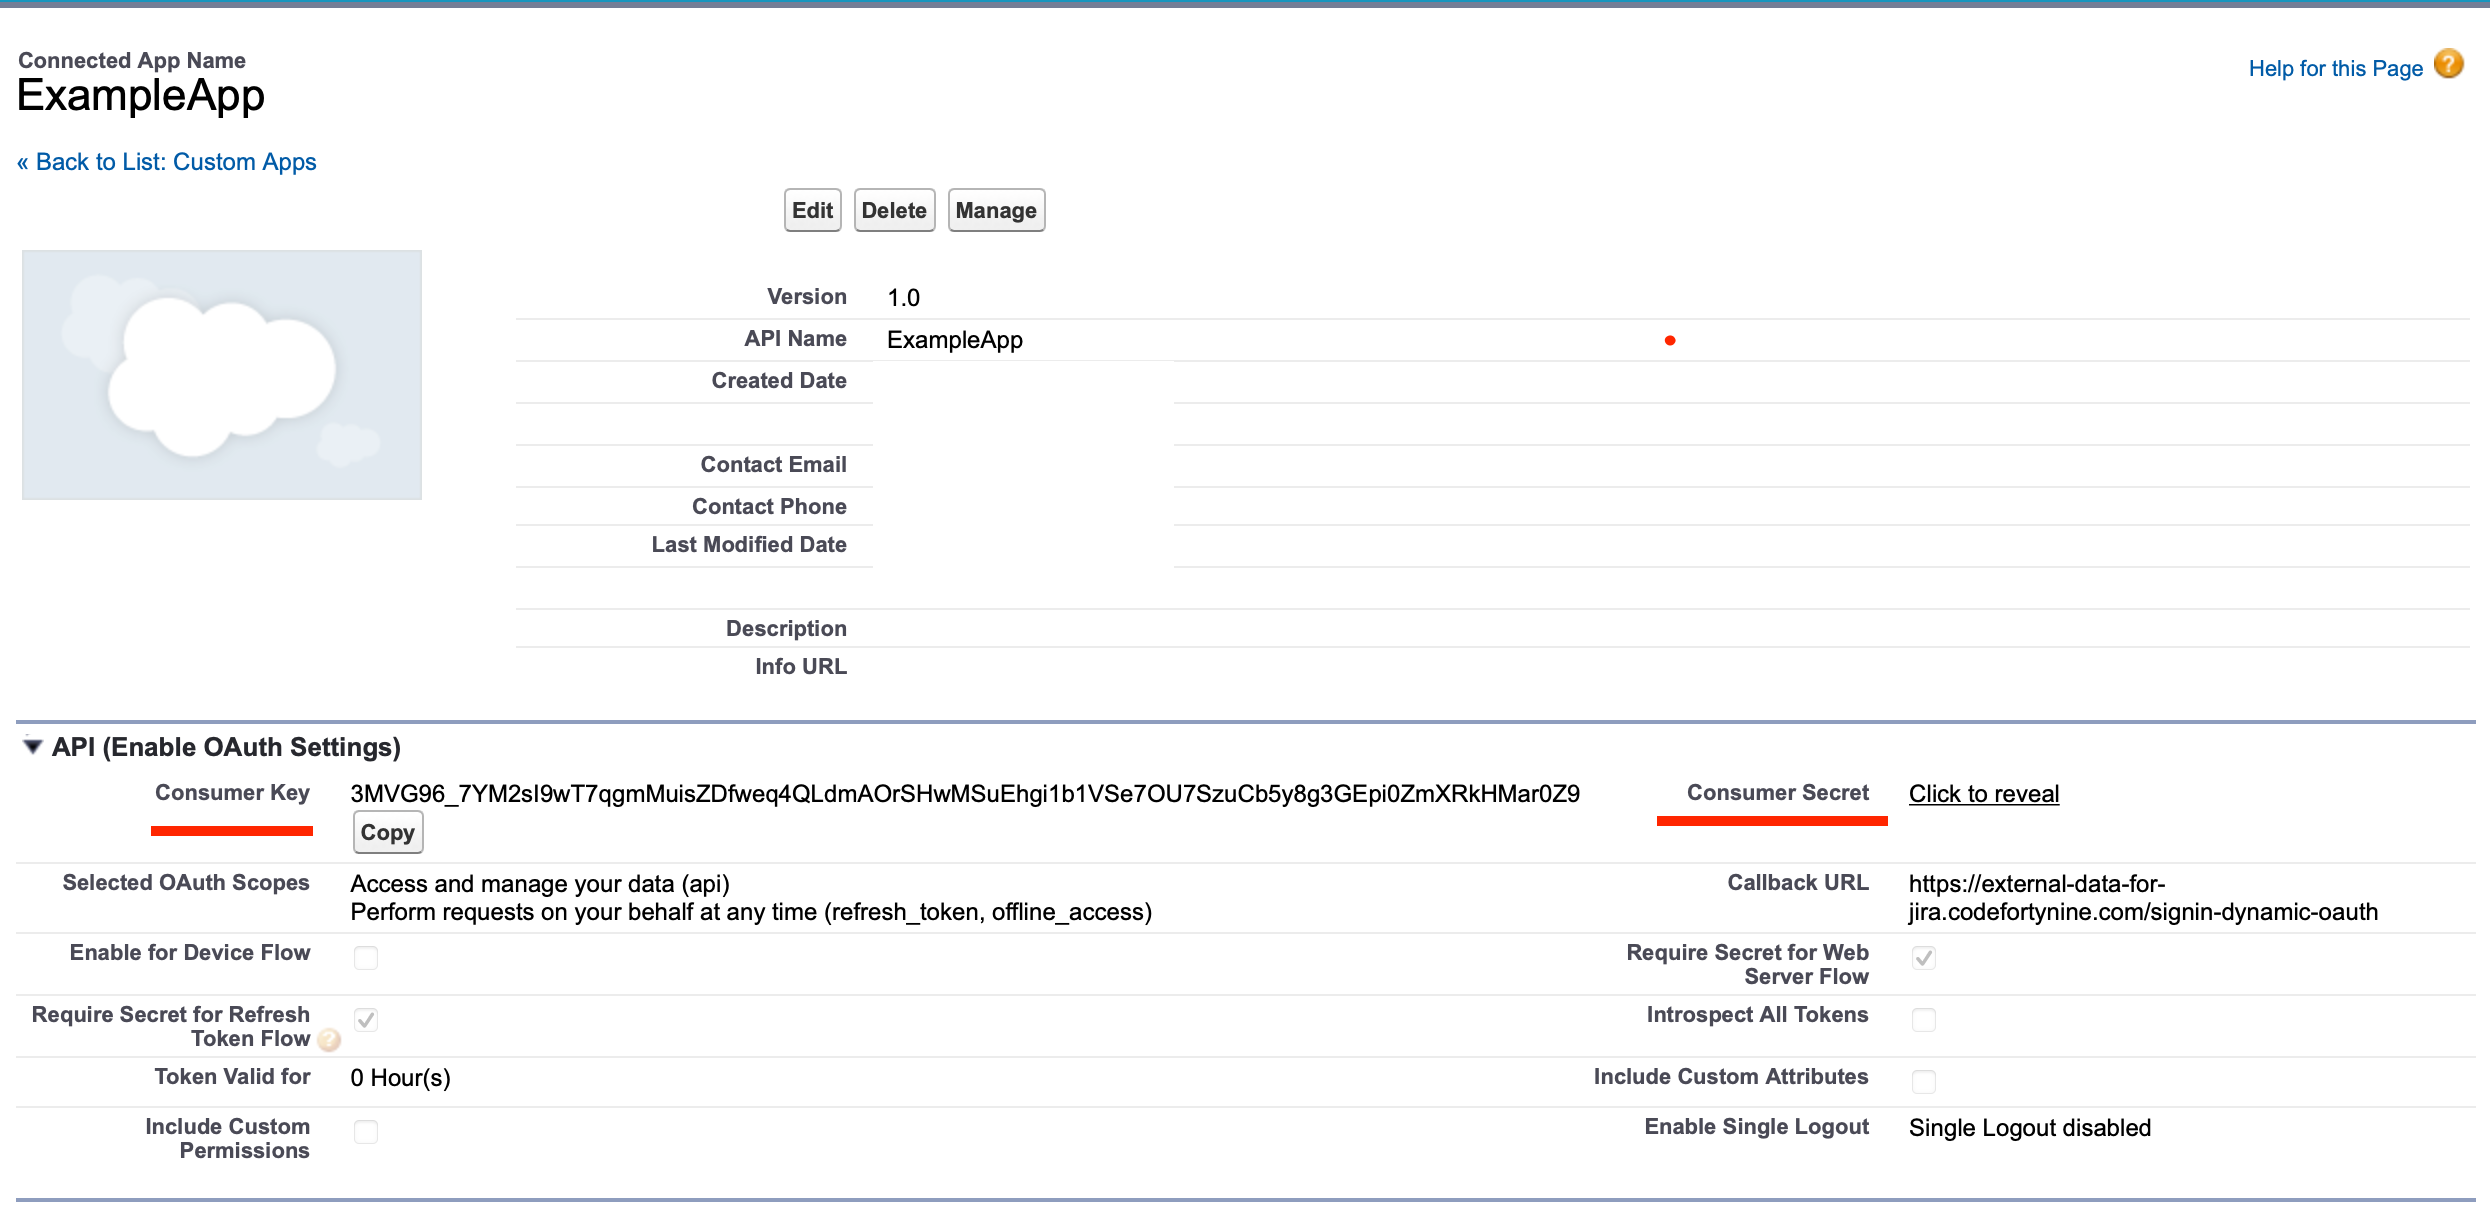
Now you can save the newly created app and enter view mode.

In this view, you can copy the Consumer Key and the Consumer Secret that you need to set up the data source later.
Data Source
Start setting up the data source configuration by using the URL / REST type.
A good URL to test is https://xxx.salesforce.com/services/data/v45.0/query/?q=Select name from account. The xxx is your instance ID and can be found in the company information or when hovering your avatar while logged in.
Select OAuth 2 as the Authentication method ad Authorization Code as the Grant Type.
Now copy the Consumer Key into the Client ID field and the Consumer Secret into the Client Secret field.
For the Auth & Token URL we are using the defaults, but these URLs may differ depending on your custom domain setup.
https://login.salesforce.com/services/oauth2/authorize
https://login.salesforce.com/services/oauth2/token

# In case you use a sandbox Instance use the following endpoints
https://test.salesforce.com/services/oauth2/authorize
https://test.salesforce.com/services/oauth2/token
Now you should be able to press Authenticate and approve the requested permissions. If everything went well you should see a green Access Token and Refresh Token label at the bottom. Now you can save the data source and test the connection.

Limitations
The maximum number of rows returned by SOQL over the REST API is 2,000 per request. You can work around this limitation by using a Paginated Data Source.