Zoho Setup
-
Go to https://accounts.zoho.com/developerconsole and click
GET STARTED -
Create a
Server-based Applicationand use a descriptive client name likeExternal Data Example -
Enter any kind of Homepage URL like
https://external-data-for-jira.codefortynine.com -
Depending on your data residency add the appropriate Authorised Redirect URIs. In this example:
https://external-data-for-confluence.codefortynine.com/signin-dynamic-oauth
5. Copy the Client ID& Client Secret
External Data Configuration
-
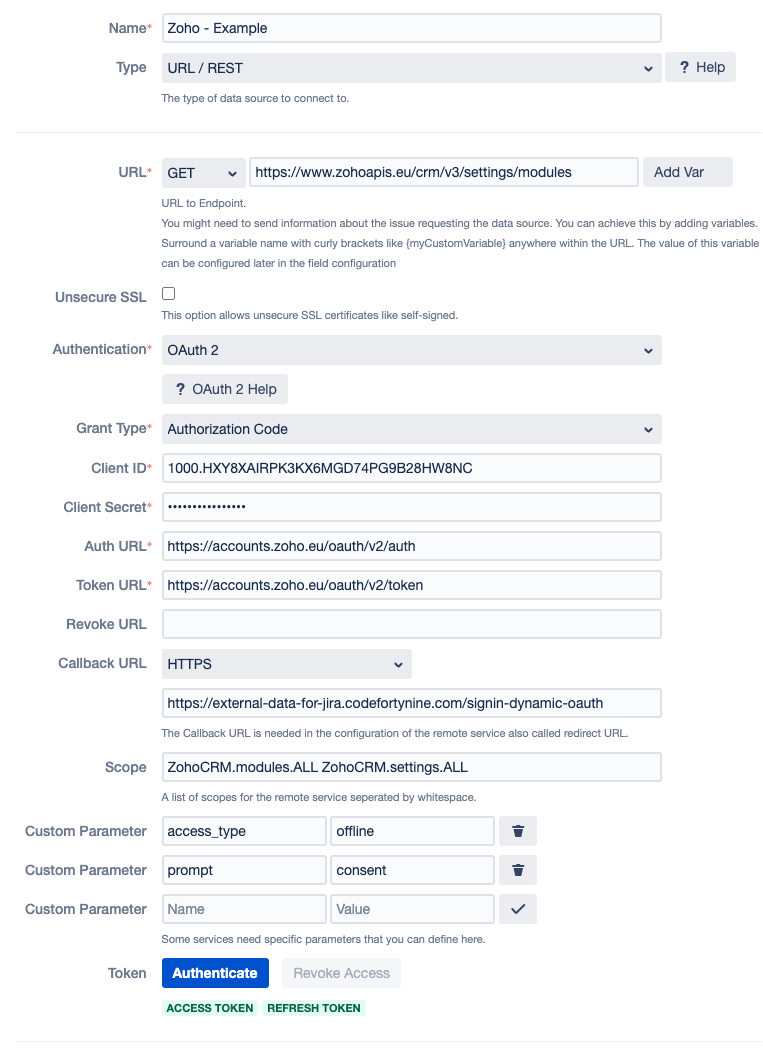
Create a new data source and name it like
Zoho Example -
In this example the data source will load all available modules. To achieve this enter the following into the
URLfield:https://www.zohoapis.eu/crm/v3/settings/modules -
Switch Authentication to
OAuth 2andGrant TypetoAuthorization Code -
Enter the
Client ID&Client Secretyou have noted from the Zoho setup step -
Use the following based on your Zoho domain: In this example
eu
Auth URL:https://accounts.zoho.eu/oauth/v2/authToken URL:
https://accounts.zoho.eu/oauth/v2/token
-
Switch the
Callback URLtoHTTPS -
Enter the following
Scope- this might be different depending on the resource you want to accessZohoCRM.modules.ALL ZohoCRM.settings.ALL
-
Enter the following
Customer Paramtersaccess_type offline prompt consent
-
Save the data source.
-
Reopen the data source in edit mode and press
Authenticateand follow the steps. -
Below the button you should see
Access Token&Refresh Tokenin green -
Save the data source.
-
Test the data source
Field Configuration Example