
Info Panel
Access up-To-Date External Data Directly on Your Issue Interface
Info panels are configurable sections within a Jira issue that display dynamic information based on the values of other fields in that issue. The information displayed can be fetched from external data systems and customized using HTML and Mustache syntax for a tailored view of relevant data directly in your Jira interface. Info panels can also be combined with Search Field and native custom fields to handle more complex use cases.
Functional Highlights
Quick Access to Relevant Data: Access up-to-date data directly on your Issue interface.
Contextual Information: Display context-specific data without leaving the Jira environment.
Tailored Data Presentation: Customize the panel layout and data display to your needs with HTML and CSS.
Configuration Guide
Quick Video-Tutorial
This concise video tutorial will navigate you through the set-up and configure an Info Panel, to display detailed user information in our Jira Issue after performing a user search.
https://www.youtube.com/watch?v=-spfBhJFQ8gStep-by-Step Configuration Walkthrough
In the following instructions, we will show in detail how to configure Field Option Sync so that it meets the requirements of your project.
Example Use Case: Let's assume there is already a custom field (customfield_10010) of type select list which is populated with the usernames of the data source. After selecting a value in an issue, we want to show the user's details in an info panel.
Adding a Data Source
First, we have to select the data source for which we want to create a Field Option Sync configuration. Once we've selected the data source, the URL is displayed below, along with a preview of the rendered data.
In our setup examples, we will use a data source with the following JSON result (you can generate this data source sample in the Settings tab):
{
  "userlist": [
    {
      "id": 1,
      "name": "Mario Speedwagon",
      "username": "mario"
    },
    {
      "id": 2,
      "name": "Anna Sthesia",
      "username": "anna"
    }
  ]
}
Context Filter
The context filter is a mechanism used to dynamically select and display specific data from an external data source based on the values of other fields in a Jira issue. It uses JSONPath expressions to filter and retrieve relevant data.
Example: In our use case, we want to display user details in the info panel. Therefore, we need to select a value based on the username.
For a better understanding of the mechanism, let’s try selecting a specific entry first:
$.userlist[?(@.username=='mario')]This expression selects an entry from the list with the username equal to mario.
Now, let's select the entry based on the selection value:
$.userlist[?(@.username=='{$.issue.fields.customfield_10010.value}')]This expression dynamically selects the entry where the username matches the value selected in customfield_10010.
Note: If the custom field is not a select list but a normal text field, the .value must be removed.
$.userlist[?(@.username=='{$.issue.fields.customfield_10010}')]For more examples and details on this topic, please refer to the Context Filter section of the documentation.
Force List Result
The "Force List Result" option is designed to maintain consistency when your context filter returns a mix of single or multiple elements. Without this option, it can be challenging to construct JSONPath selections when only a single element is returned. By enabling this option, the result is always treated as a list, ensuring uniformity and simplifying subsequent JSONPath operations.
Using Templates
You can also try to use our custom GPT to create a template for you. As always with AI. Use with caution!
The template feature allows you to customize how the data retrieved from an external source is displayed in a Jira issue. By using HTML and CSS, you can format your data in a way that is clear and easily accessible. All of AUI's CSS classes can be used within the template, so that your Info Panel integrates in well with the JIRA interface.
The selected entry from the context filter can be used with the mustache syntax. In mustache syntax, placeholders are defined using double curly braces ({{ }}).
Example:
<table class="aui aui-table-list">
    <tr><td>User ID</td><td>{{ id }}<td></tr>
    <tr><td>Full Name</td><td>{{ name }}<td></tr>
    <tr><td>Username</td><td>{{ username }}<td></tr>
</table>
Please refer to the Template Syntax section for more details on creating more complex templates and the Advanced Tables section for creating rich tables.
No Result Template
Optionally, you can set up a no result template that is displayed if a panel cannot be rendered due to an empty result or a missing dependency.
You can use HTML and CSS in the template field. There are some fixed keywords like error and field that you can use with the mustache syntax.
Example:
<div class="aui-message aui-message-info">
    <p>No details found for <strong>{{ field }}</strong></p>
    <small>Reason: {{ error }}</small>
</div>
For more information on creating complex templates, please refer to the Template Syntax section of our documentation.
Note: Please ensure that your template does not contain unintended spaces. Including any extra spaces (represented by ' ') in the No Result Template can prevent the warning message from appearing.
Data Source Error Template
The Data Source Error Template is an optional feature that allows you to specify which template should be displayed if a panel cannot be displayed due to an error in the data source.
As with the other two template options, you can also use HTML and CSS in the template field here.
Additionally, you can use the following fixed keywords with the Mustache syntax:
Variable | Description |
|---|---|
{{ field }} | The name of the |
{{ code }} | The HTML status code of the error. This value is only present in web based data sources. |
{{ error }} | The original readable error message |
Example:
<div class="aui-message aui-message-warning">
    <p>Error for <strong>{{ field }}</strong>
    {{#code}}Code <strong>{{ code }}</strong></p>{{/code}}
    <small>Reason: {{ error }}</small>
</div>
For more information on creating complex templates, please refer to the Template Syntax section of our documentation.
Filter Options
Filter Match
A filter match set to any includes records that meet at least one of the specified conditions, while a filter match set to all includes only those records that meet every specified condition. Use "any” for broader results and "all" for more precise filtering.
Filter by…
You can filter by Projects, Issue Types or Request Types using the drop-down selection.
Jira Service Management
Jira Service Management consists of:
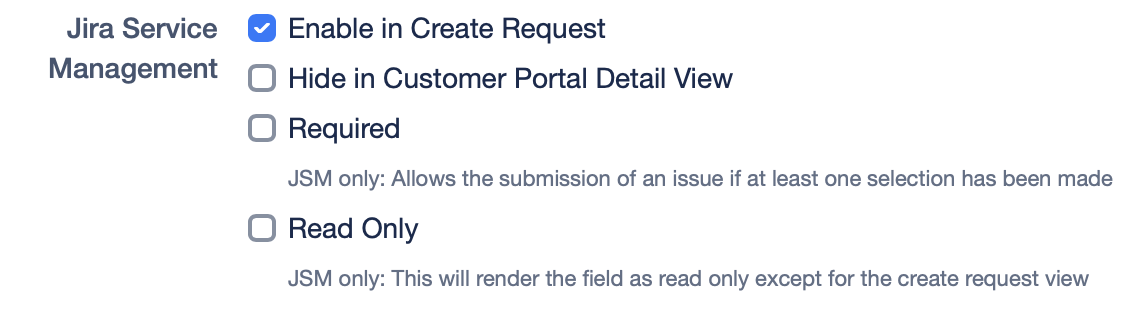
Enable in Create Request
Enables this field on the create request screen of the Jira Service Management customer portal. You can use filter section to define which Request types shows this field.Hide in Customer Portal Detail View
This option hides the JSM fields in the Customer Portal Detail View. However, if 'Enable in Create Request' is selected, users can still select the JSM field when creating a request, but it will not be visible in the Portal Detail View.Required
This will allow the user to submit the issue only if one selection has been madeRead Only
This will render the field as read only except for the create request view
Positioning
Display Order
When using multiple info panels in combination with search fields you might need to rearrange them. By default, fields are arranged by name in ascending order. To change the default order, please enter a new value in the Position field. The field with the lowest number always appears at the top.
Panel Placement Left Side / Right Side
There are also two options available for placing an info panel in the issue view:
Context (right side) within an Issue
Content View (left side) within an Issue
Note: If you select Context (right side), the created Info Panel can be found in a context panel on the right side in each issue view.
In addition, you can enable Jira Service Management Create Request to display this field to your customers at the time of creation.
The placement in Context (right side) is also supported in the Jira Mobile app.
For more information on this topic, please refer to the Panel Placement section.
Data Flow
Selecting the appropriate field configuration type is crucial. To illustrate how the field type interacts with your external data sources, the following diagram provides a visual representation of the trigger mechanism and data processing flow for the current field configuration:
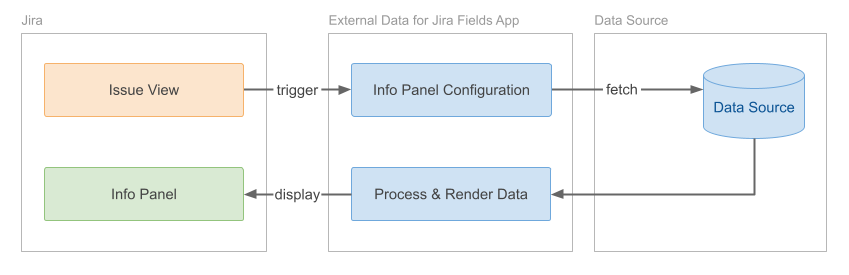
If you are unsure whether you have selected the correct field type, you may find our Field Configurations Comparison page helpful, which lists process diagrams and sample use cases for each field type.