
Actions - Asset Migration Tool
Configuring a New Action in External Data for Jira
The "Actions" tab allows users to define and manage specific actions related to migrating data from Jira's External Asset Platform Field to the new Extension Asset Field provided by External Data for Jira. This section will guide you through the process of configuring a new action.
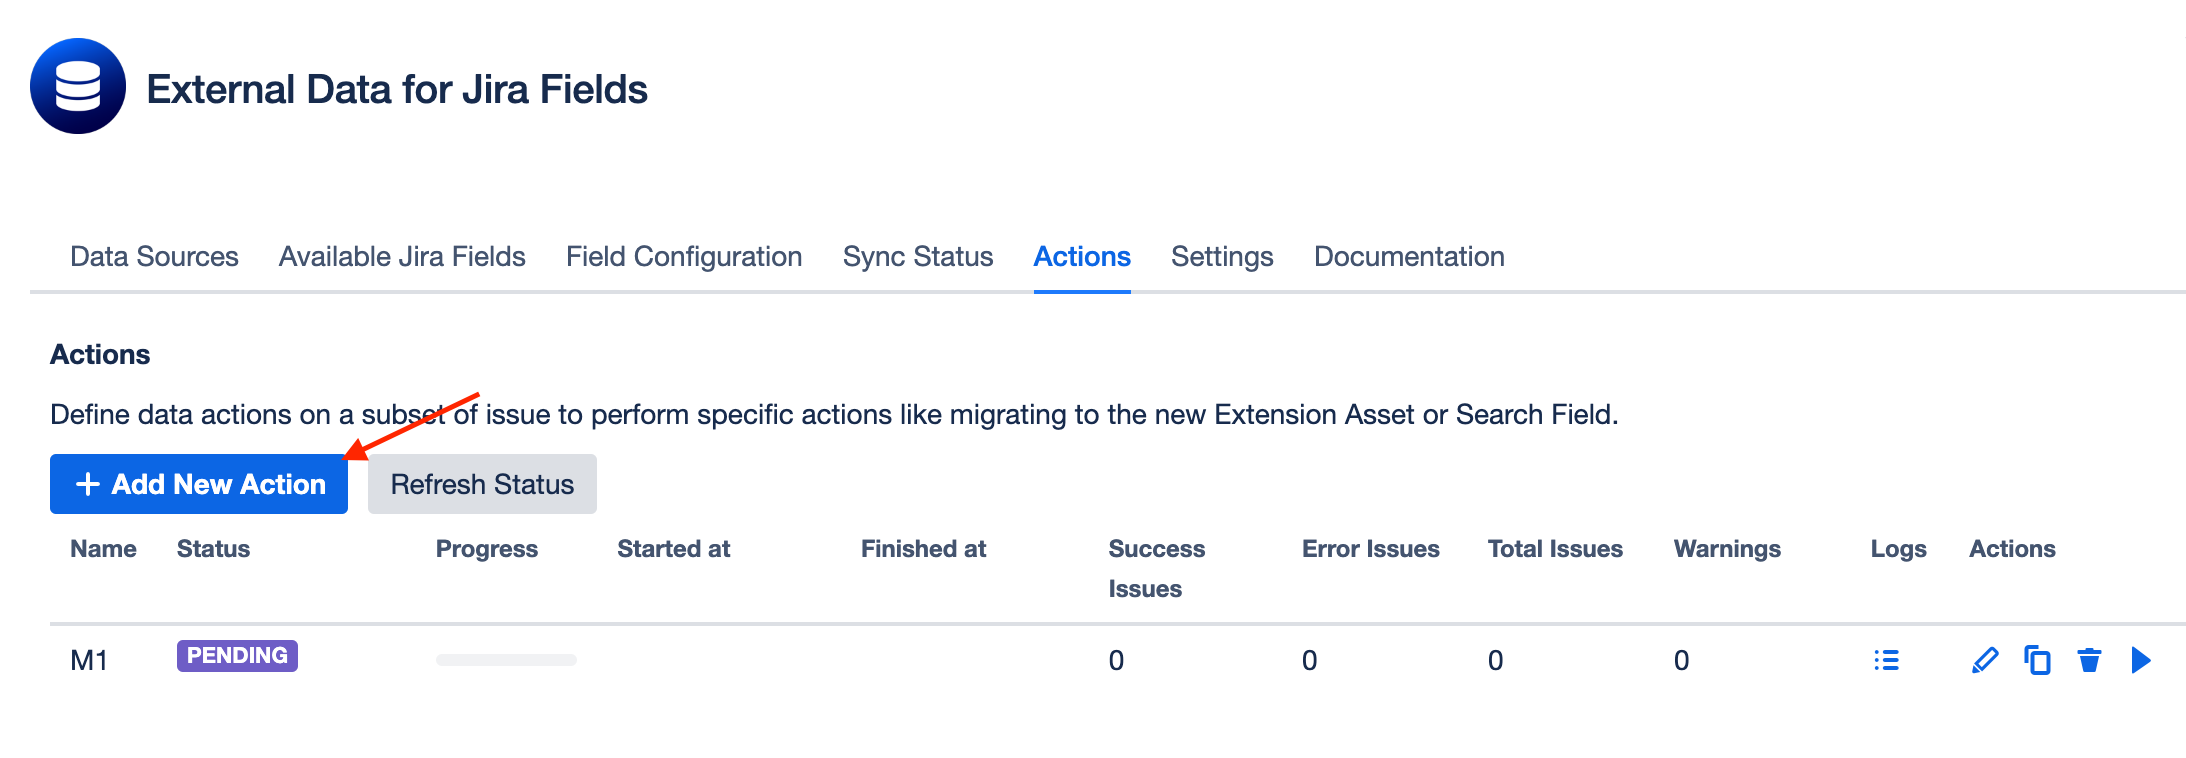
Access the Actions Tab
Navigate to the "Actions" tab within the External Data for Jira Fields interface and click on the "+ Add New Action" button to open the Action Configuration form.
Fill Out the Action Configuration Form
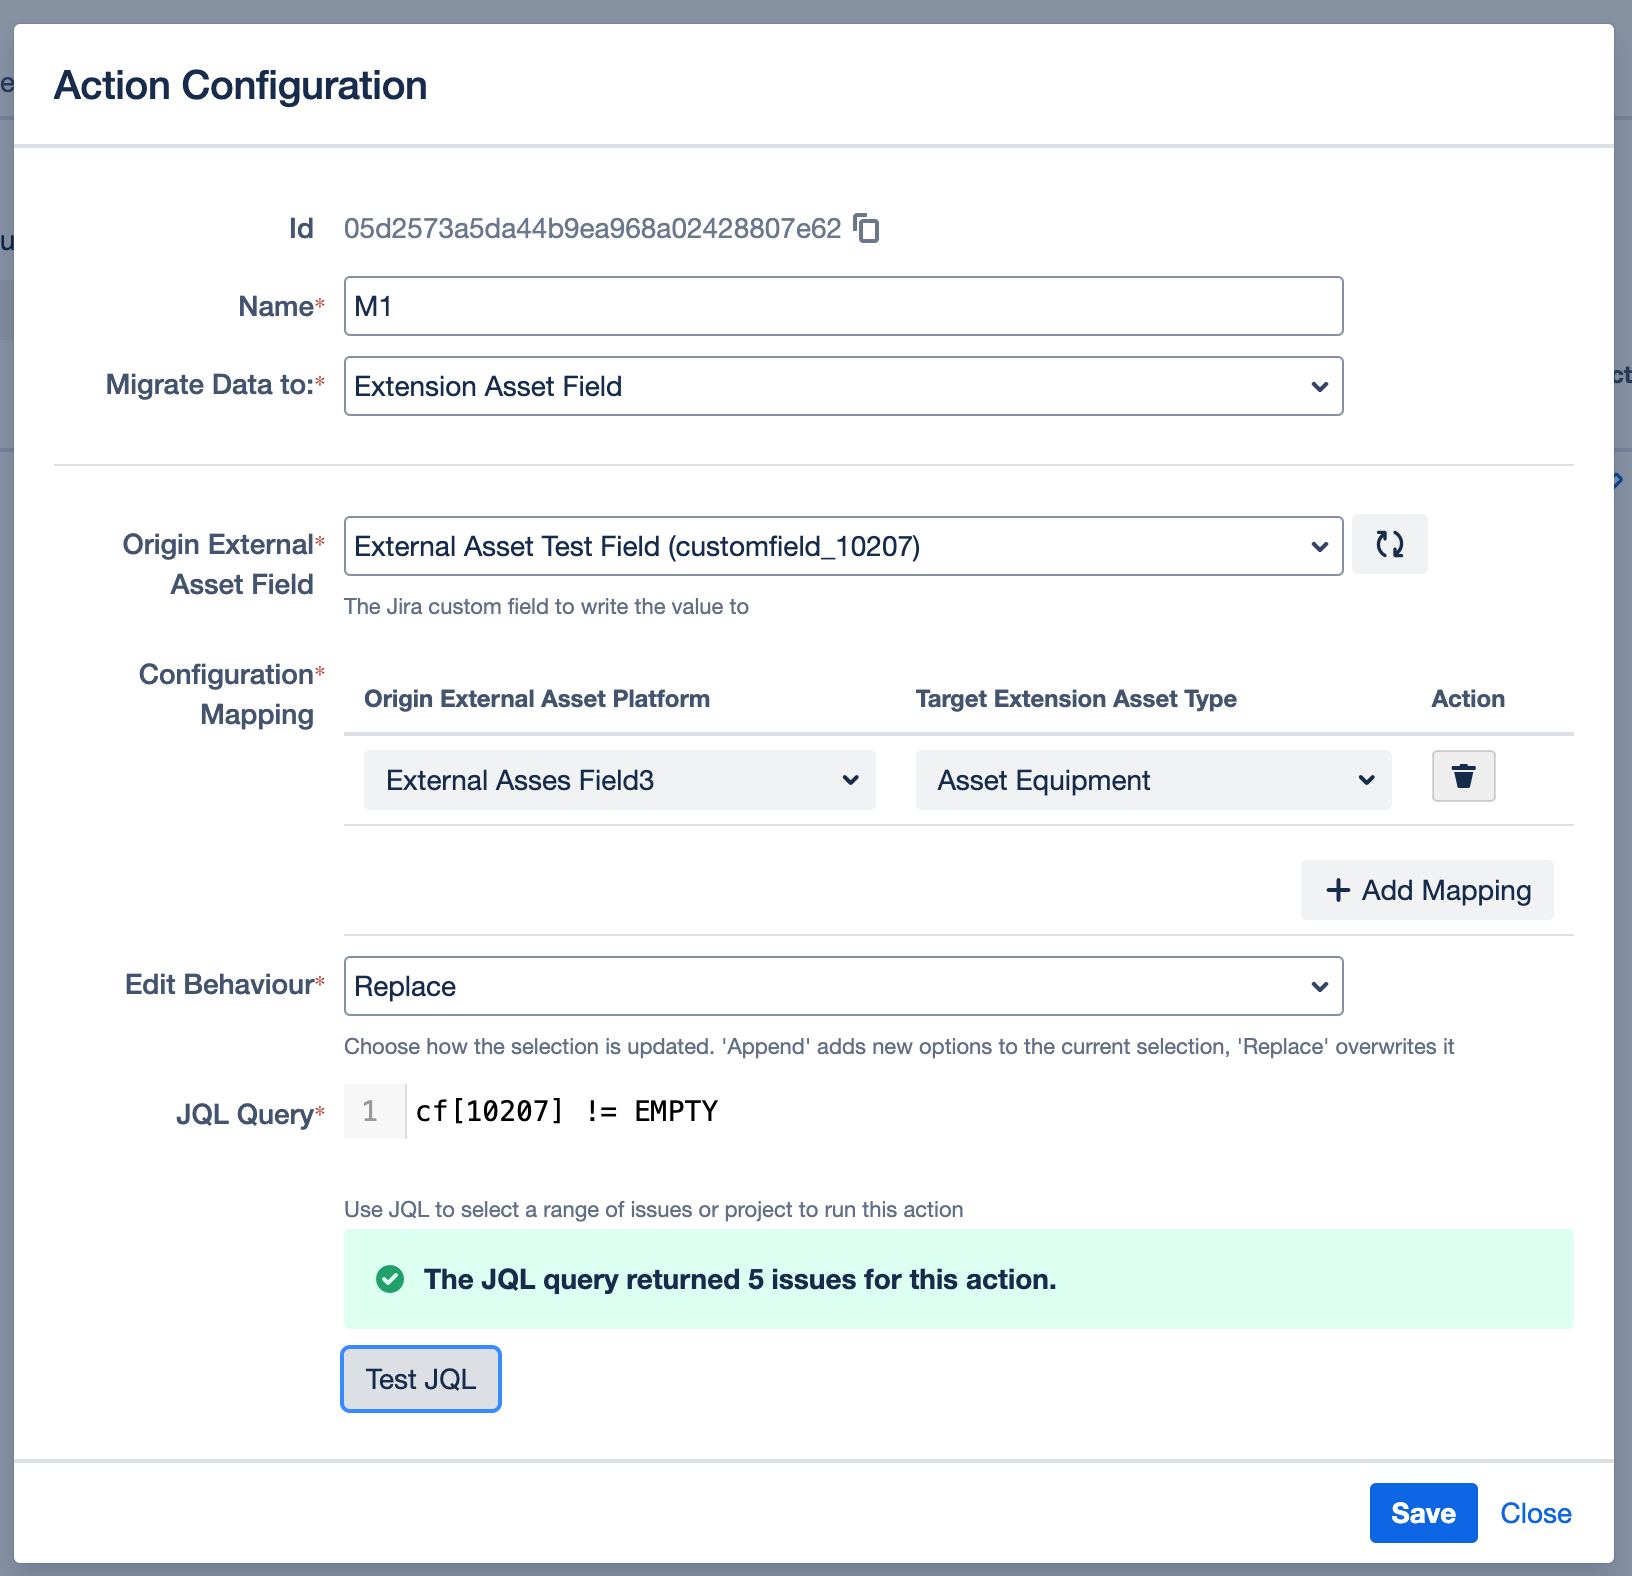
Name
Enter a descriptive name for the action. This will help you identify the action later.
Migrate Data to
Currently, the only available option is "Extension Asset Field." This option is designed to migrate data from Jira's External Asset Platform Field to the new Extension Asset Field.
Origin External Asset Field
Select the Jira External Asset Platform Field that you want to migrate. This dropdown allows you to choose the specific field in your Jira instance.
Configuration Mapping
The selected Origin External Asset Platform Field may contain multiple asset types. You need to map these types you want to migrate to the corresponding asset types in the new Extension Asset Field provided by the app. Use the "Add Mapping" button to map each type accordingly.
For more information on how to create an Extension Asset Type, please refer to our documentation here.
Edit Behaviour
Choose whether to "Append Missing" items or "Replace" the data in the new Extension Asset Field:
Append Missing: Adds any new items found during migration to the existing data.
Replace: Overwrites the existing data in the new field with the migrated data.
JQL Query
Define a JQL query to specify which issues should undergo the migration. By default, the query filters out issues where the Origin External Asset Field is empty (e.g., cf[10207] != EMPTY). You can customize this query to target specific projects, issue types, or other criteria.
Hint: It's recommended to first define a JQL query that selects a small number of issues. This allows you to validate the migration process on a limited scope before applying it to a larger set of issues.
Test JQL
Before saving the configuration, you must validate the JQL query by clicking the "Test JQL" button. The system will display the number of issues that match the query, confirming that your query is correctly formulated.
Save the Configuration
Once the form is filled out and the JQL query is validated, click "Save" to store the new action configuration.
An example configuration might look like this:
Managing Actions in External Data for Jira
Once an action is configured and saved, it appears in the "Actions" tab, where you can view and manage it. This section will explain the available options for managing your actions.
Action Overview
After saving an action, it does not start automatically. You have the flexibility to review and modify the configuration before initiating the action. The action list displays the following columns:
Name: The name of the action.
Status: The current status of the action.
Progress: Visual indication of the action's progress.
Started at: The timestamp when the action was started.
Finished at: The timestamp when the action was completed.
Success Issues: The number of issues successfully processed.
Error Issues: The number of issues that encountered errors during processing.
Total Issues: The total number of issues involved in the action.
Warnings: Any warnings generated during the action.
Logs: Access logs related to the action.
Available Actions for Each Task
For each action listed, you have the following management options on the right side:
Logs
Opens a popup displaying logs related to the action. This is useful for troubleshooting and tracking the action's progress.Edit
Allows you to edit the action's configuration. This option is only available if the action has not been started.Copy Action
Creates a copy of the existing configuration and opens it in the configuration form. This is helpful if you need to create a similar action with slight modifications.Delete
Permanently removes the action configuration.Start
Initiates the action. Once started, the configuration becomes locked and cannot be edited.
Pausing, Resuming, and Stopping Actions
Pause: Once an action is running, you can pause it. This temporarily halts the action.
Resume: If an action is paused, you can resume it from where it left off.
Stop: Stops a running action. Once stopped, the action cannot be resumed and is marked as finished.
Action Statuses
After starting an action, it progresses through several statuses:
Pending: The action has been configured but not yet started.
Waiting: The action is queued and waiting to begin.
Gathering: The action is in the process of gathering the necessary data.
In Progress: The action is currently being executed.
Finished: The action has completed successfully.
Failed: The action encountered an error and did not complete.
Deleting Completed or Failed Actions
After an action is finished (either successfully or due to failure), you can delete the configuration if it is no longer needed. This helps keep the Actions tab organized and focused on active tasks.