Integrate your external assets into Jira, making them easily searchable and linkable through a dedicated custom field. In this guide, we will walk you through the setup of a search field for the External Data for Jira Extension App.
How it Works
During setup, a separate field must be configured for each asset type, suitably called Asset Type.
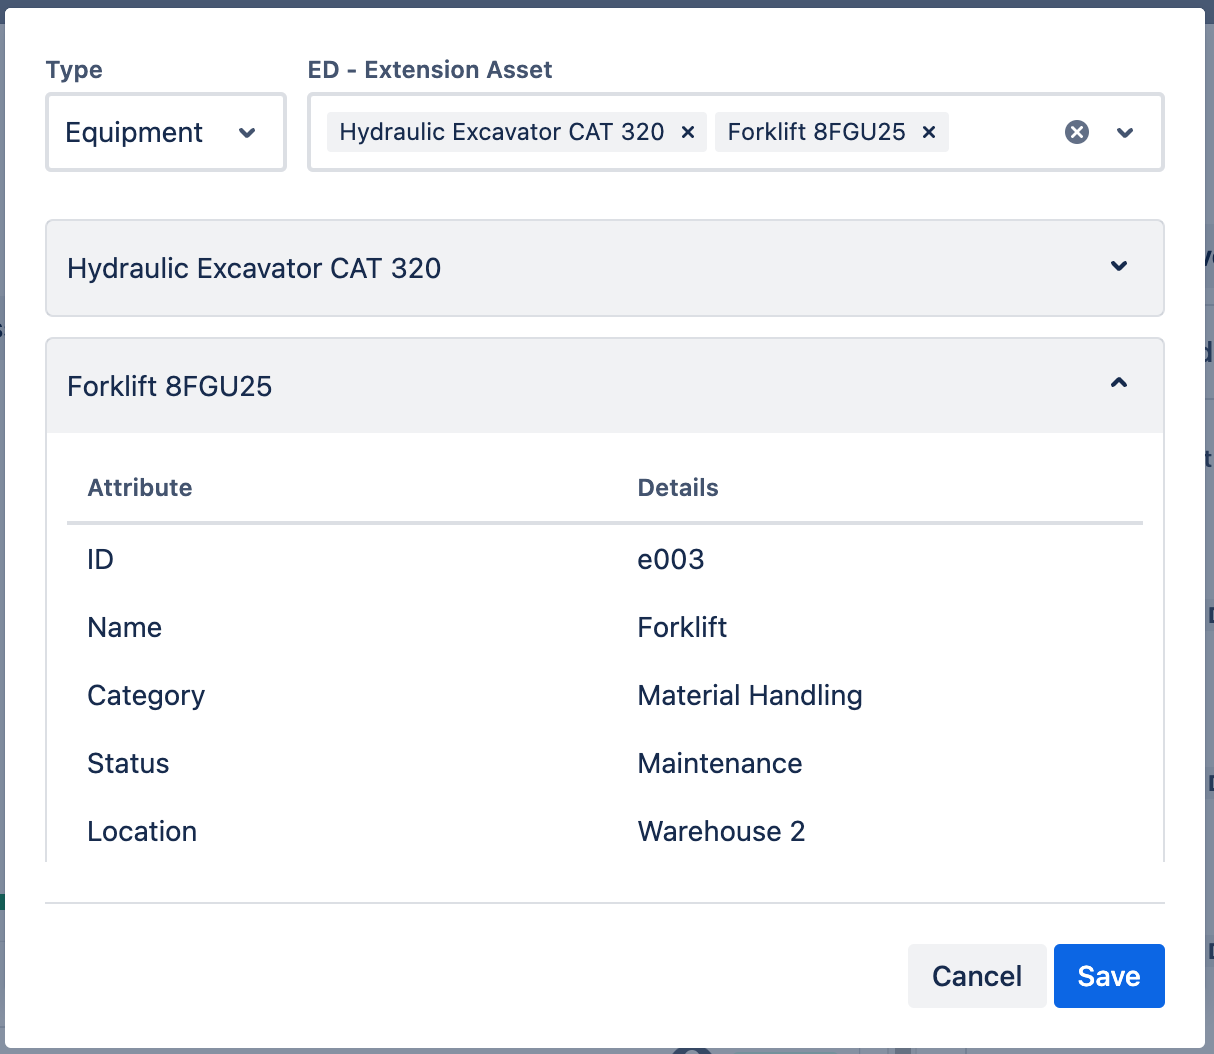
It is possible to link multiple asset types to the same custom Asset Field. To create multiple asset types, you need to add another field configuration with a unique Type Key. This configuration enables the inclusion of multiple asset types within the same target Jira Field.
For an optimal configuration of each asset type, three key components must be defined:
Data Source: Specifies the source from which the assets are obtained.
Selection Method: Defines the method for selecting assets from the data source.
Detail Template: Determines a layout that defines how the detailed information for each selected asset will be displayed.
Creating a New Custom Field
First, we need to create a new custom field. Navigate to Manage Jira Fields in the main app and select + Add Custom Field. When the "Create new custom field" modal appears, choose External Data - Asset Field as the field type. Alternatively, this field can also be set up via the Jira settings.
Create a New Field Configuration for Each Asset Type
-
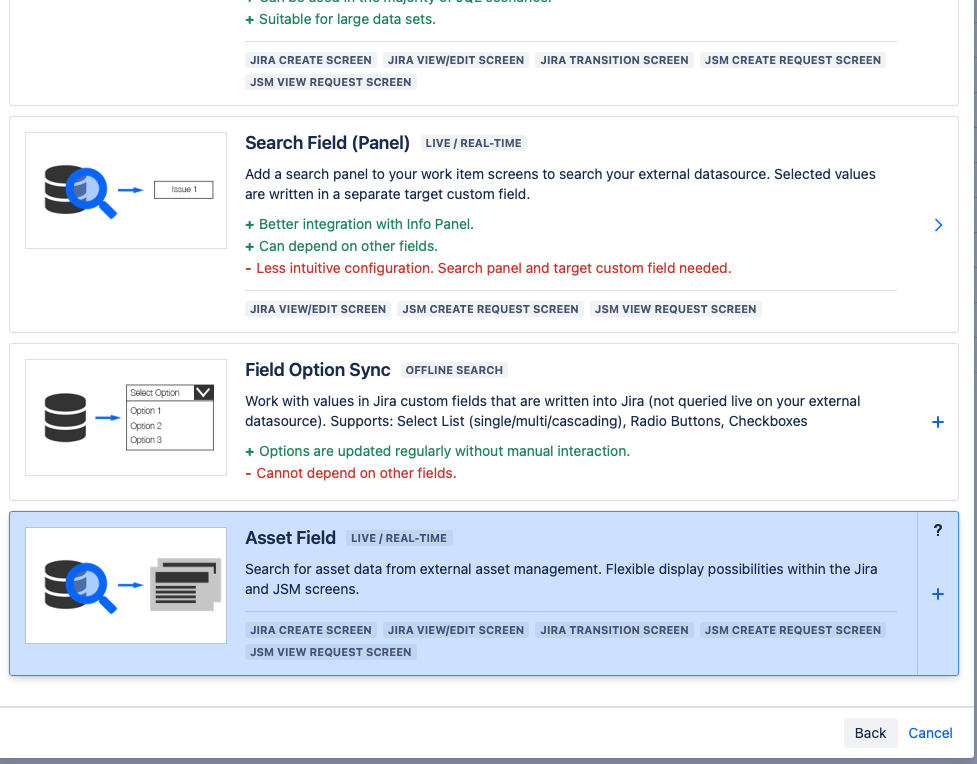
Go to Field Configuration > + Add Configuration > Search & Select
-
Select Asset Field
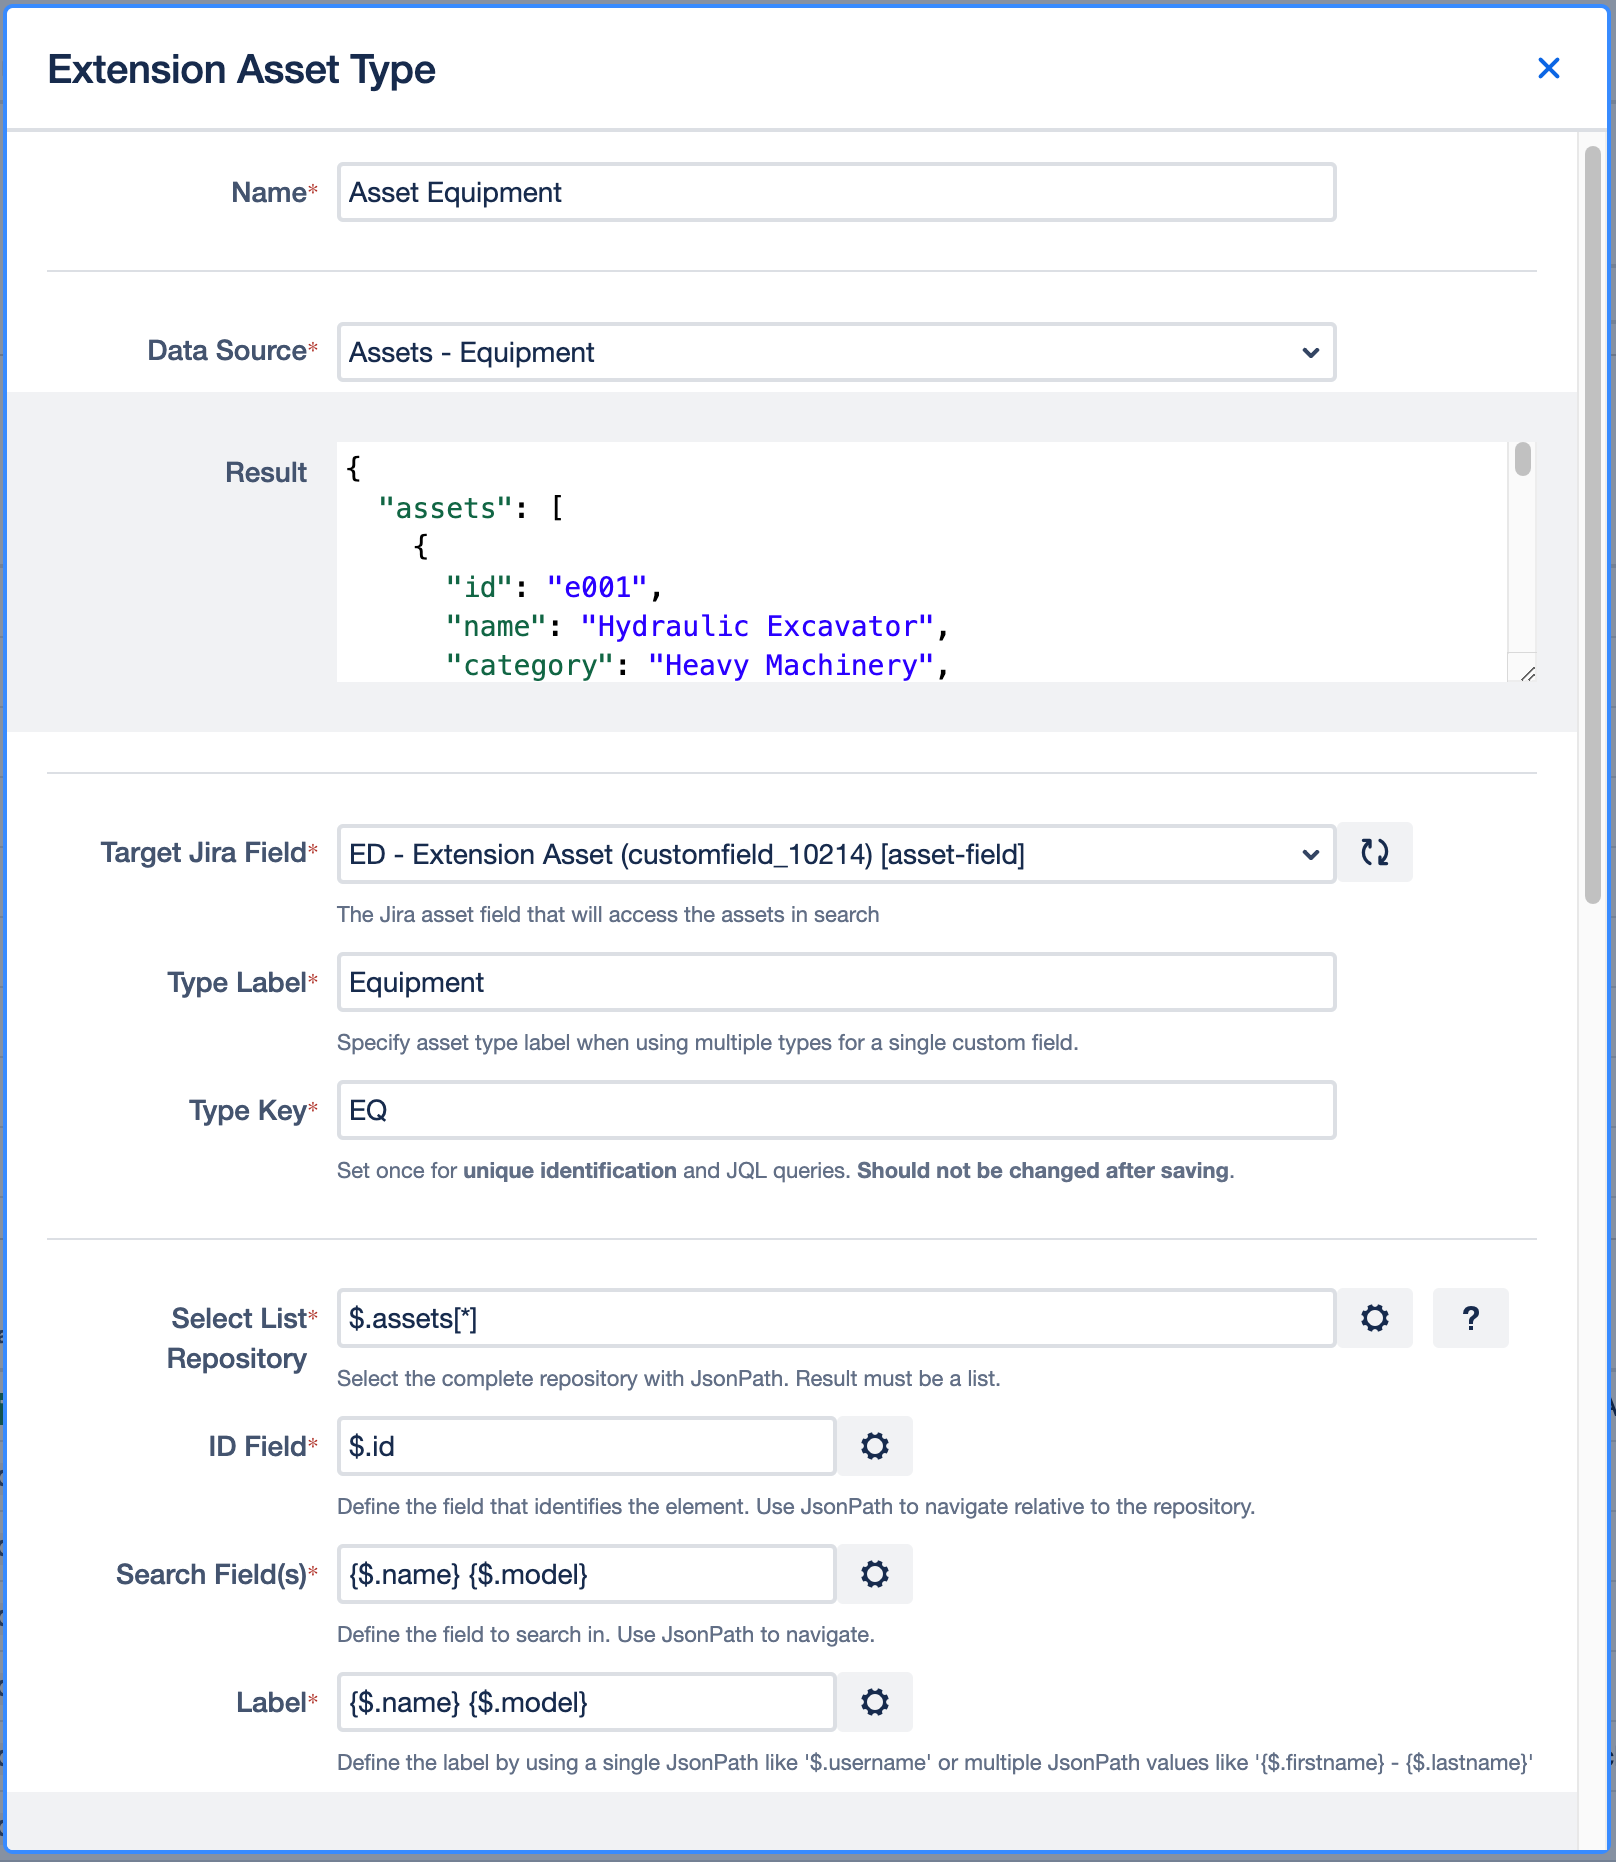
Data Source
After you have selected a data source, the unprocessed results of your selection are displayed below the input field.
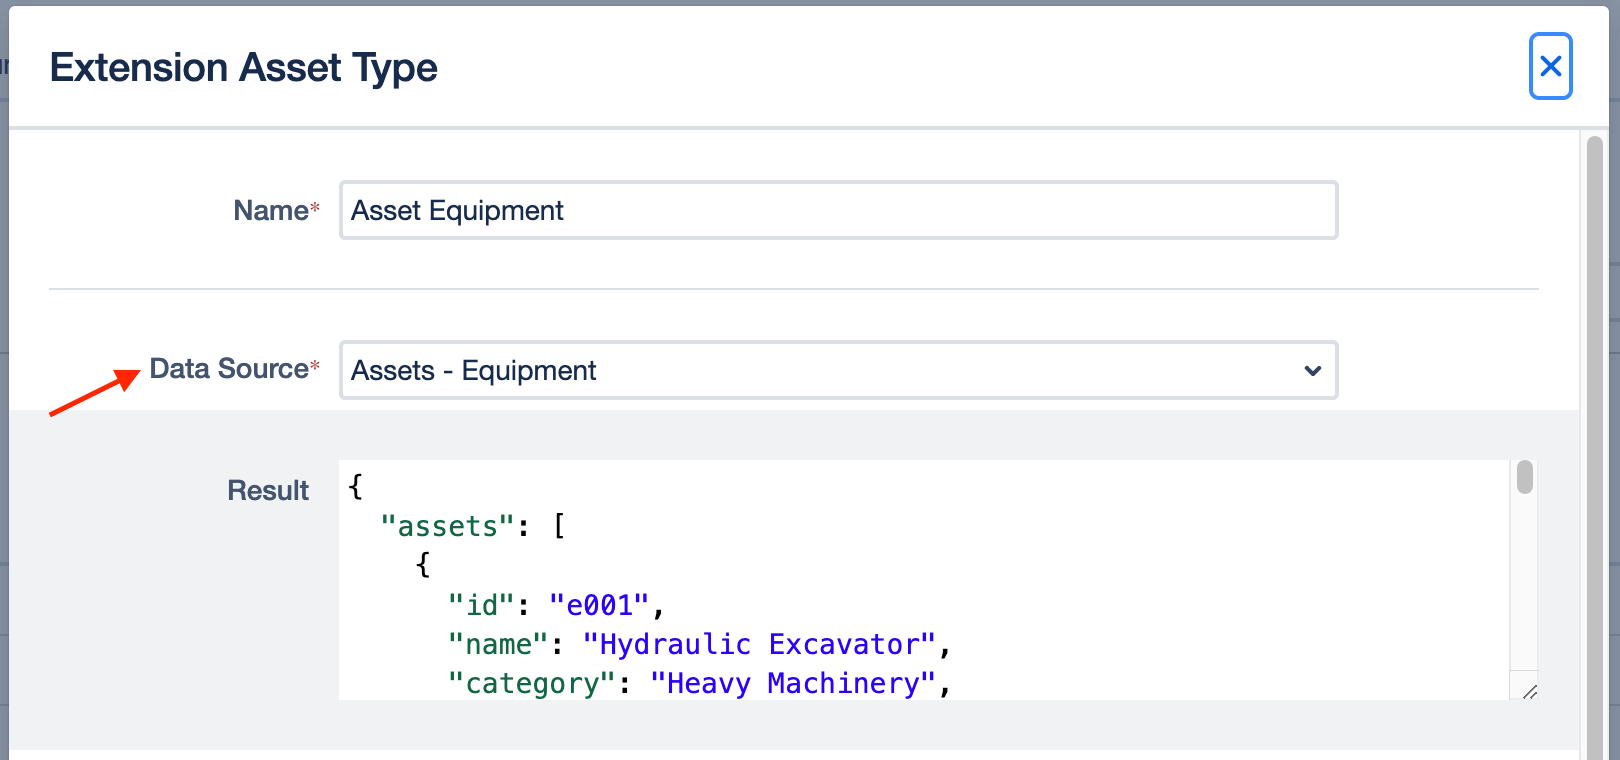
Example:
{
  "assets": [
    {
      "id": "e001",
      "name": "Hydraulic Excavator",
      "category": "Heavy Machinery",
      "status": "Available",
      "location": "Warehouse 1",
      "manufacturer": "Caterpillar",
      "model": "CAT 320",
      "year": 2018,
      "lastMaintenanceDate": "2023-03-15"
    },
    {
      "id": "e002",
      "name": "Electric Generator",
      "category": "Power Supply",
      "status": "In Use",
      "location": "Site 4",
      "manufacturer": "Honda",
      "model": "EU2200i",
      "year": 2020,
      "lastMaintenanceDate": "2023-02-20"
    }
  ]
}
Target Jira Field
The Target Jira Field specifies the custom field in Jira to which the configuration will be assigned.

Type Label
Assign a Label to the Asset Type
Example:
Equipment
Type Key
Establish a key for unique identification and JQL queries.
Example:
EQ
Select List Repository
Add the JSON path including the name of your data list here. Please make sure to not just select a single value.
Example:
$.assets[*]
ID Field
ID is the unique identifier that identifies an item within your data set (must be a unique number or string).
This field is used to identify a selected value later. You can use the same JSON path in the value field and the search field.
Example:
$.id
Search Field(s)
Define the underlying field value(s) (again, as JSON path) that you want to use as basis for the search. Field values should always refer to the values in your data source.
(When a user starts typing in the search field, only the respective value(s) will be displayed as matches)
Example:
$.name
or
{$.name} {$.model}
Using multiple fields like this will let you search in name & model.
Label
Define JSON path(s) to the values in your data source that are supposed to be displayed as selected values.
Example:
$.name
or
{$.name} {$.model}
The configuration for our example should now look like this:
Detail Template
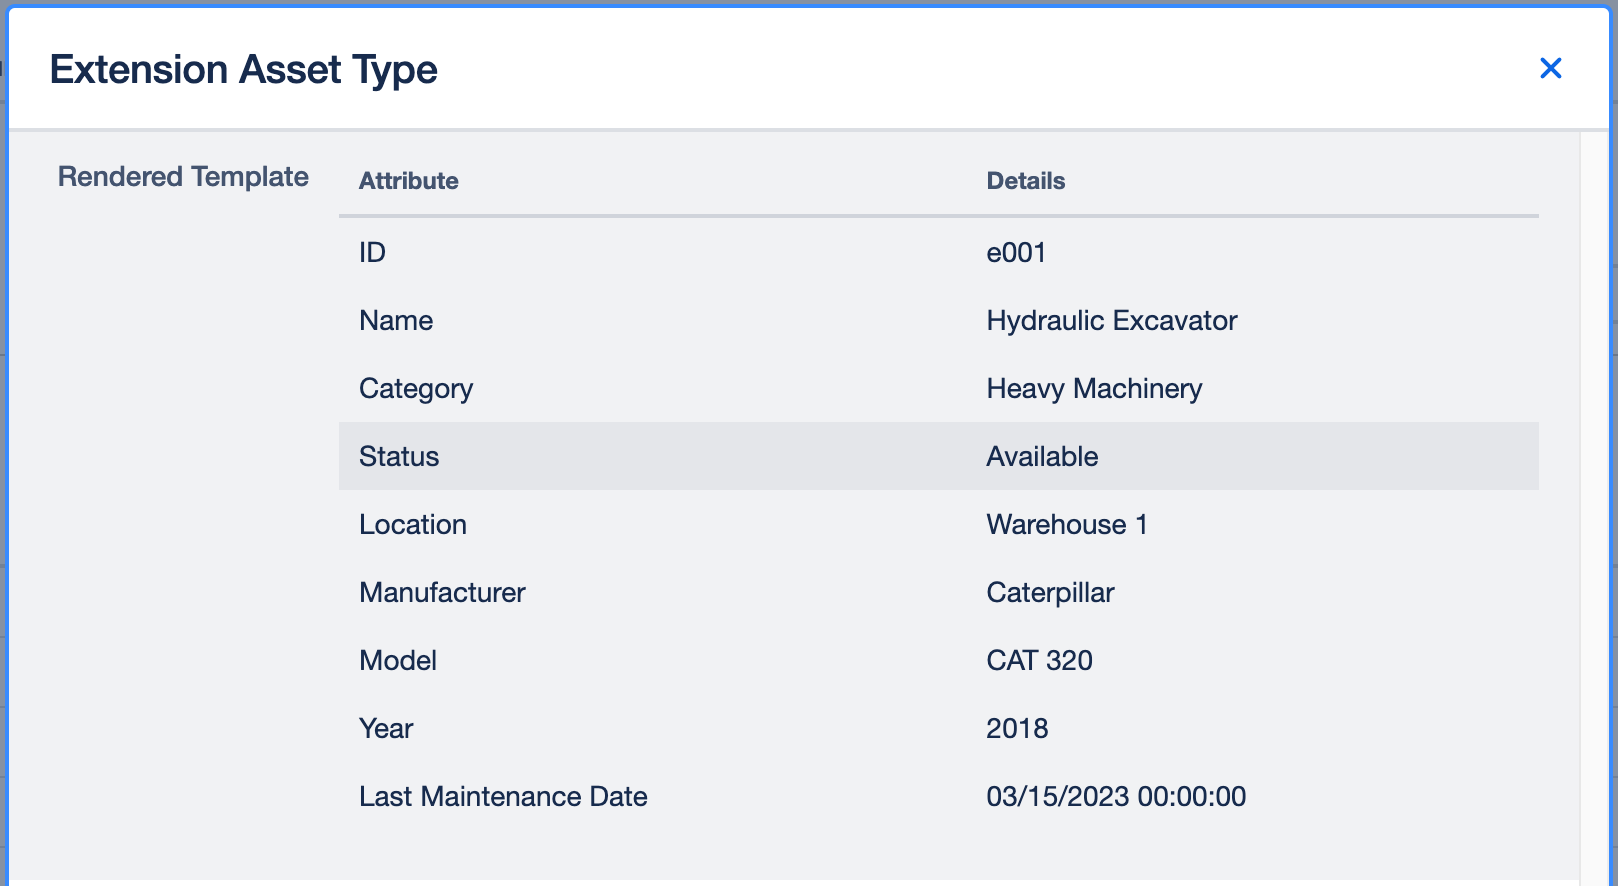
Here you can use HTML to display the result the way you want with maximal flexibility. The selected asset can be used with the mustache syntax. All CSS classes from AUI can be used inside the template to fit well into JIRA.
To show all values from the example we use the following template:
<table class="aui aui-table-list">
  <thead>
    <tr>
      <th>Attribute</th>
      <th>Details</th>
    </tr>
  </thead>
  <tbody>
    <tr>
      <td>ID</td>
      <td>{{ id }}</td>
    </tr>
    <tr>
      <td>Name</td>
      <td>{{ name }}</td>
    </tr>
    <tr>
      <td>Category</td>
      <td>{{ category }}</td>
    </tr>
    <tr>
      <td>Status</td>
      <td>{{ status }}</td>
    </tr>
    <tr>
      <td>Location</td>
      <td>{{ location }}</td>
    </tr>
    <tr>
      <td>Manufacturer</td>
      <td>{{ manufacturer }}</td>
    </tr>
    <tr>
      <td>Model</td>
      <td>{{ model }}</td>
    </tr>
    <tr>
      <td>Year</td>
      <td>{{ year }}</td>
    </tr>
    <tr>
      <td>Last Maintenance Date</td>
      <td>{{ lastMaintenanceDate }}</td>
    </tr>
  </tbody>
</table>
See the Template Syntax section for more details on creating more complex templates and the Advanced Tables section for creating rich tables.