
Setting up Your Connection to Snipe-IT
Set up your connection to Snipe-IT in Jira. Follow our comprehensive guide for a smooth and efficient integration process.
Do you already have an installation of the asset management tool Snipe-IT? If not, you can get one here.
If yes, you can continue with the following steps to connect Snipe-IT with Jira.
Make sure your Snipe-IT instance is available publicly or alternatively available for the IPs listed under the Show advanced settings > Use static IP
Follow these instructions to generate an API key in the Snipe-IT web interface. We suggest using a service account to generate the API key.
Required permissions and language
The account used for generating the API key needs to be a superuser, or requires at least the following Snipe-IT permissions:
View permission for asset groups that should be displayed in Jira
Checkout/Checkin permissions for asset groups that should be assignable via Jira
View permission for Users
View permissions for Categories
It is also mandatory for the account to use the English language as preferred language. This can be edited directly in Snipe-IT, under “Edit Your Profile”.
Go to the configuration screen:
Either by clicking on the Configure button in the app listing
Or under Settings ⚙️ > Marketplace apps > Snipe-IT for Jira > Configuration
Enter the publicly accessible URL of your Snipe-IT instance and the API key
Click Save
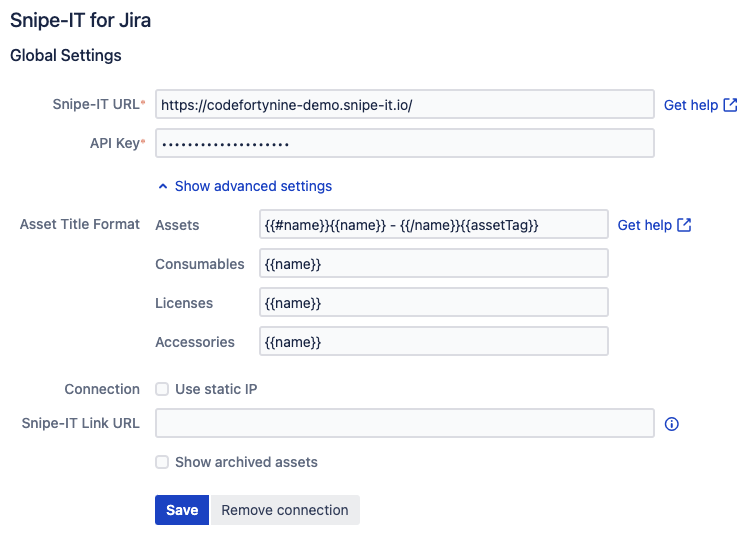
If you have a firewall on your Snipe-IT instance enable Use static IP under Show advanced settings and allowlist the IPs listed there in the firewall of your Snipe-IT instance.
The firewall should also allow the HTTP method PATCH, because some of the Snipe-IT APIs use this method to perform partial updates.