Try out Snipe-IT for Jira
You can test Snipe-IT for Jira outside your existing Jira and Snipe-IT instances. The following instructions explain how to set up a Jira test instance and link it to a demo instance of Snipe-IT.
Requirements
If you have a Jira Premium or Enterprise plan, you can also use a sandbox instance
We recommend using a Jira Service Management space to test all the features
Snipe-IT developer demo instance credentials and API Key
Setup
Install the app
Within your Jira instance, navigate to Apps > Explore more apps.
Search for the Snipe-IT for Jira app using the search field.
Open the details page of the app.
Click Try it free. (The trial will run for at least 30 days and the app is free for up to 10 users)
Set up your Connection to Snipe-IT
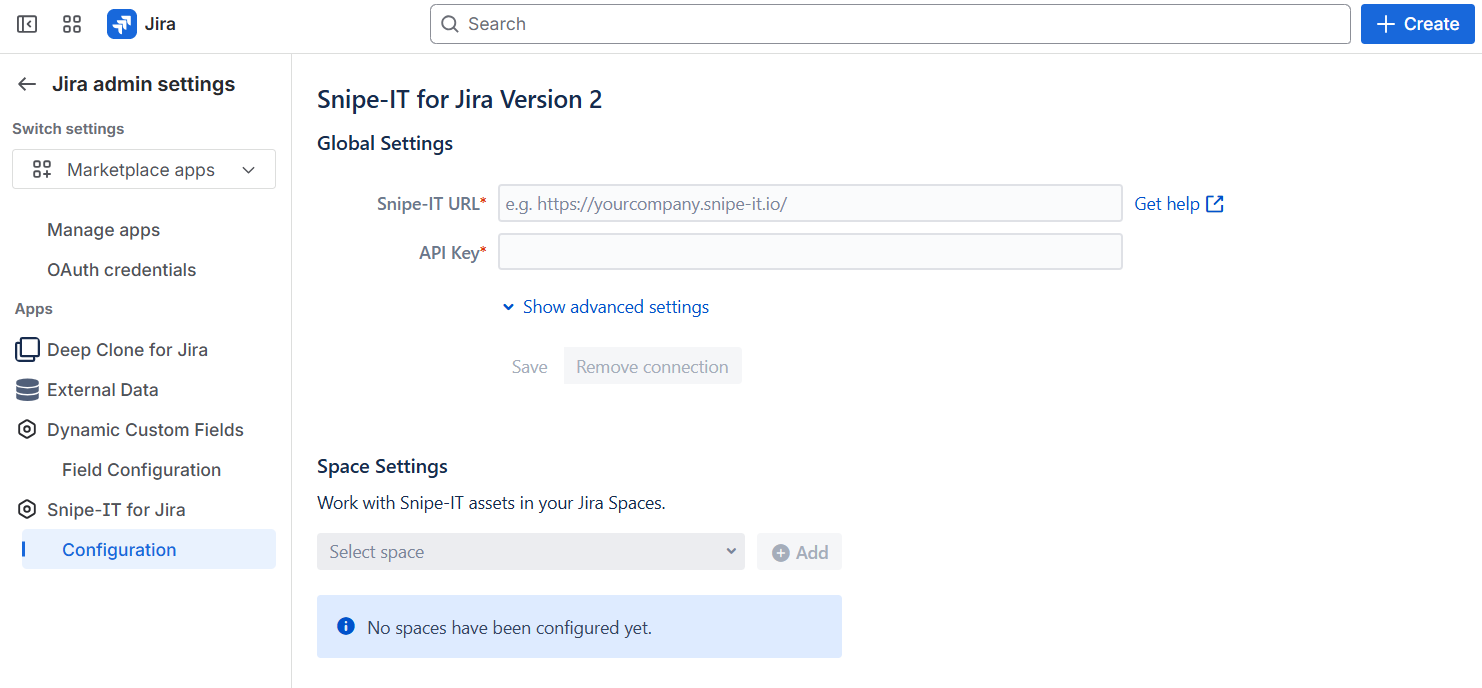
Go to the configuration screen:
Either by clicking on the Configure button in the app listing
Or under Settings ⚙️ > Marketplace apps > Snipe-IT for Jira > Configuration
Enter the URL (https://develop.snipeitapp.com/) of the demo Snipe-IT instance
Enter the following API key
CODEeyJ0eXAiOiJKV1QiLCJhbGciOiJSUzI1NiJ9.eyJhdWQiOiIxIiwianRpIjoiY2Q1YmI1ZjEwNzg3YWM2NzUyZjc2NjYzNjYwNjVhYjg4MDllYWFjZGQzMjkxYWRhMTZiMTQ4N2Y2NjFlOTAwNDdlNWE4OGVhZjlhYzUyZTIiLCJpYXQiOjE3NTAyNzczNjkuNDExMDQ1LCJuYmYiOjE3NTAyNzczNjkuNDExMDQ5LCJleHAiOjIzODE0MjkzNjkuMzg5NDM1LCJzdWIiOiIxIiwic2NvcGVzIjpbXX0.JbGxp5PvAakXkSdD2xgKJOjgBZ-29A8N-JPyH-iiR3twUCFgKL-0XJTqvZ7h86BPDWGk6GBm9NfoQbcJ1BPGuQU_6uLFHDOwyzIhTgvCxsj4Jq6PanmpCkjfopThJYxiHRBCrilAgma_PVe-3clnEHSYwuOw-jaQQ-mWF_bNqWwfqv8Wui8Vi-LgaumZWANdFd-WGFvGwEKsrbbfq0r1i3HhyfsntJAqj_0oKEj_tDWAl8B4u-2EYdMcgISPlhptC2ZeZBJq6j57aVpn0ux_DwJcPU98J_6-iR48qAWaTZNpDalKPasx5mwlANH8lAkXH2rJNAIWoexNX1iKMBwevTnInVkBgwi5VNamueMRcpsOyeI5JKGyxtczCN2jFfiqGsDZcNTMs7PjaI74cPeSnqvQ9IVPoiZL8D91k2yWOszZKh5fkFtTUTWKHEFjhepr10LI8wy_V-oHgOcAcd3zYFc8rGoDUkMc6lMbLEC7nCGx3G3zqoZ3L-0D3xn59T8mW99F1twtOTc_QGSMhG5xM5zSypGYZ_HGt221iTskfR4JI7rHDMbsLnYpP5W4R48BErP2ylbmSK1VZCBL6cTIypJK8-zKtTD9vsFNRI3DCBpq2j1SrMyEAOEfLJkMWmGgQgDPC-tkjK3h4FTB_IyXVDnZ7_EmJdSjJT6Y6nFWME4Click Check connection and Save

Once you confirm the URL and API key by clicking on Check connection and Save, the app will check if it can connect to the Snipe-IT instance and proceed to sync all assets with Jira. Depending on how many assets are currently in the demo instance, this can take some time.
Now you can try all Snipe-IT for Jira features. With a Jira Service Management Space, you can try to embed the Linked assets field into a request form and other possibilities in the service desk portal.

