
Set up your connection to Snipe-IT in Jira. Follow our comprehensive guide for a smooth and efficient integration process.
Do you already have an installation of the asset management tool Snipe-IT? If not, you can get one here.
If yes, you can continue with the following steps to connect Snipe-IT with Jira.
-
Make sure your Snipe-IT instance is available publicly or alternatively available for the IPs listed under the Show advanced settings > Use static IP
-
Follow these instructions to generate an API key in the Snipe-IT web interface. We suggest using a service account to generate the API key.
Required permissions and language
The account used for generating the API key needs to be a superuser, or requires at least the following Snipe-IT permissions:
-
View permission for asset groups that should be displayed in Jira
-
Checkout/Checkin permissions for asset groups that should be assignable via Jira
-
View permission for Users
-
View permissions for Categories
It is also mandatory for the account to use the English language as preferred language. This can be edited directly in Snipe-IT, under “Edit Your Profile”.
-
Go to the configuration screen:
-
Either by clicking on the Configure button in the app listing
-
Or under Settings ⚙️ > Marketplace apps > Snipe-IT for Jira > Configuration
-
-
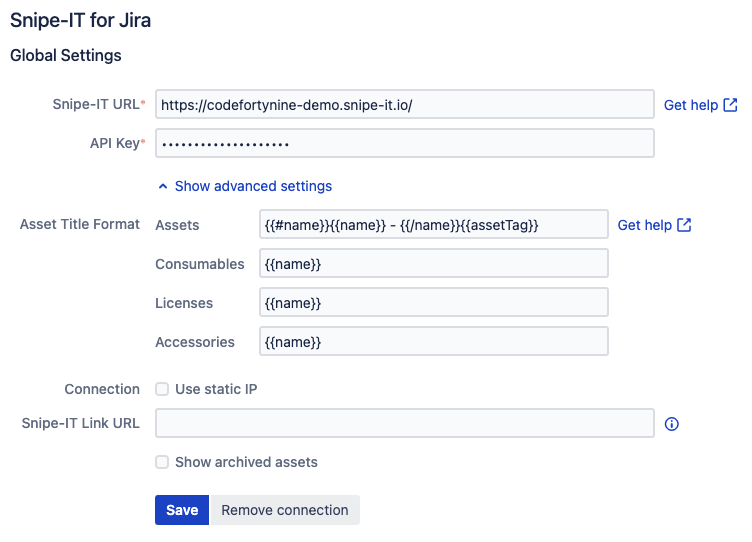
Enter the publicly accessible URL of your Snipe-IT instance and the API key
-
Click Save
If you have a firewall on your Snipe-IT instance enable Use static IP under Show advanced settings and allowlist the IPs listed there in the firewall of your Snipe-IT instance.
The firewall should also allow the HTTP method PATCH, because some of the Snipe-IT APIs use this method to perform partial updates.