
You can trigger a Deep Clone workflow action from Jira Automation:
With Status Change
Scenario: The workflow transition triggers a clone action when the status of a work item changes (e.g. from Open -> In Progress).
Step by step
In your Jira workflow:
-
Create a Jira workflow and add any required work item statuses and transitions.
-
Click on the transition that should trigger the clone action (e.g. from Any status -> In Progress)
-
Click the + icon next to Perform actions.
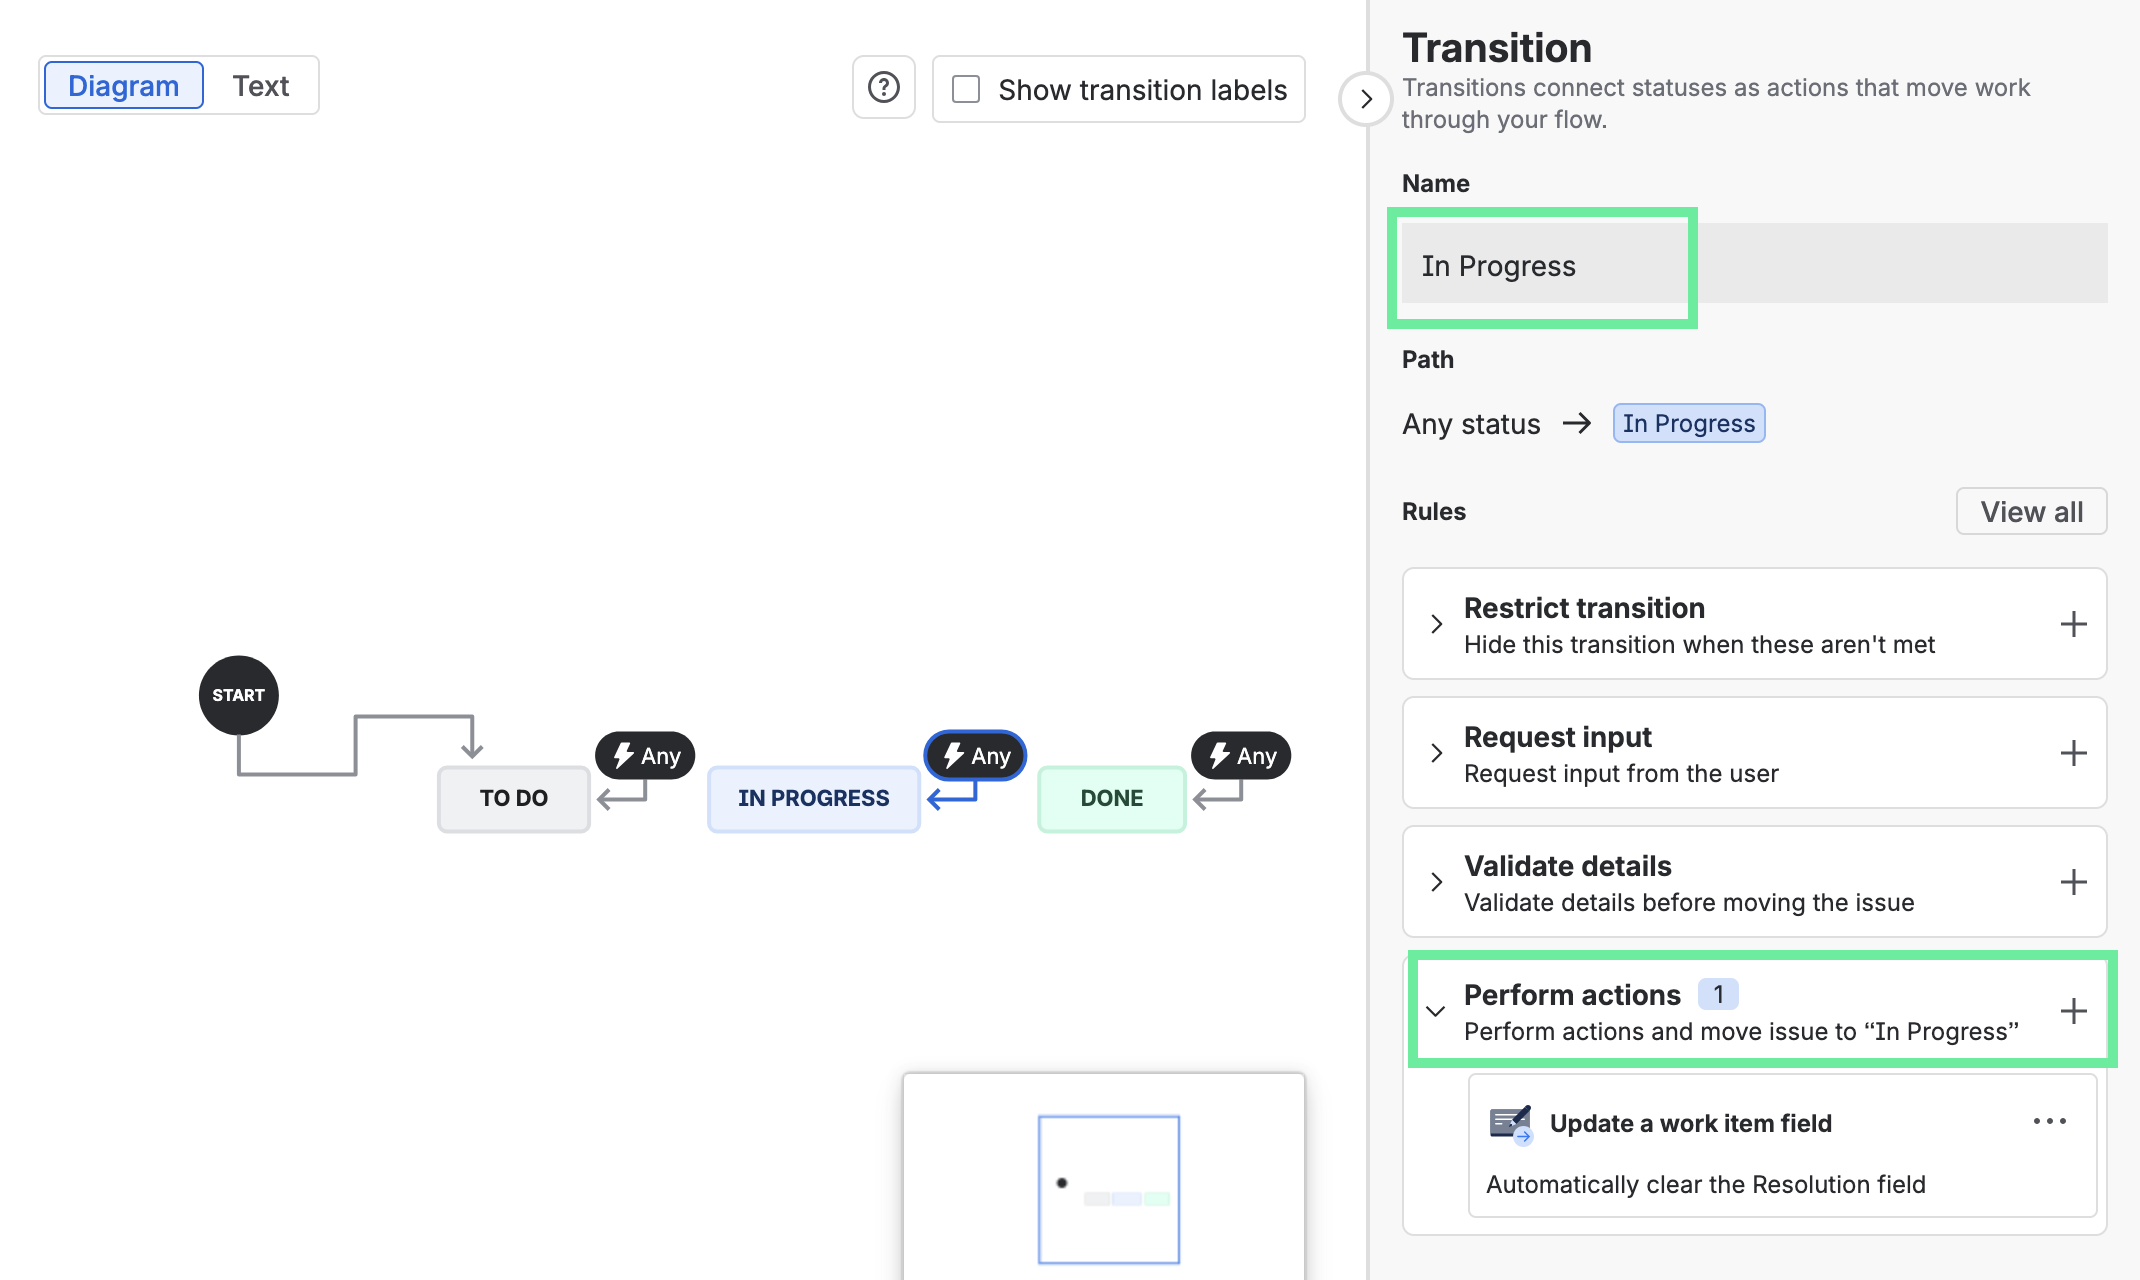
-
Select Deep Clone for Single Clone or Deep Clone (Epic / Tree).
-
Configure your clone.
-
Click Add.
-
Click Update workflow.
In your Jira automation:
-
Create a Jira automation with a trigger and any steps that you want to execute before the work item clone.
-
Add and configure a Condition step that should initiate cloning.
-
Add a Transition work item action.
-
Select the Destination status that should trigger the clone, e.g. In Progress.
-
Save and enable your Jira automation.
Done! Jira automation now triggers a Deep Clone action when a work item changes to a specific status.
Without Status Change (“Looping Transition”)
Scenario: The workflow transition triggers a clone action without changing the work item status.
Set up a Jira workflow with a (global) looping transition triggered by Jira automation (i.e. a transition from Any status ->To itself). In a looping transition, the origin and destination statuses are the same. This approach is recommended for Epic/Tree Clones.
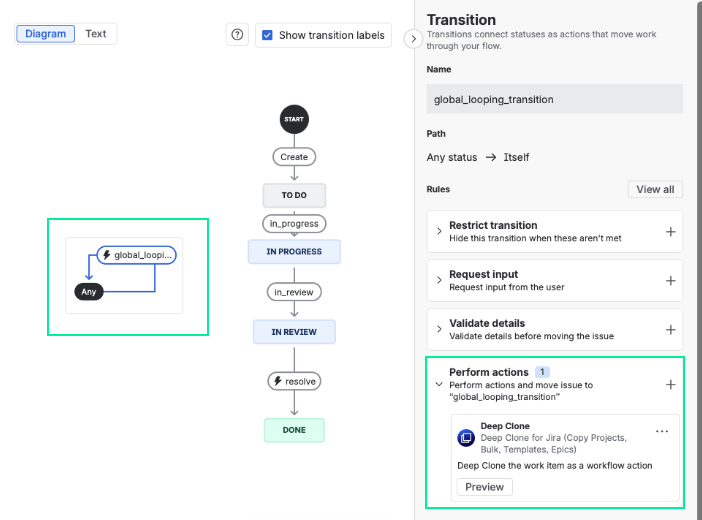
Step by step
In your Jira workflow:
-
Make sure no specific transition between two statuses is selected, then click Add transition.
-
Select Any status ->To itself (= looping transition) and give your transition a Name.
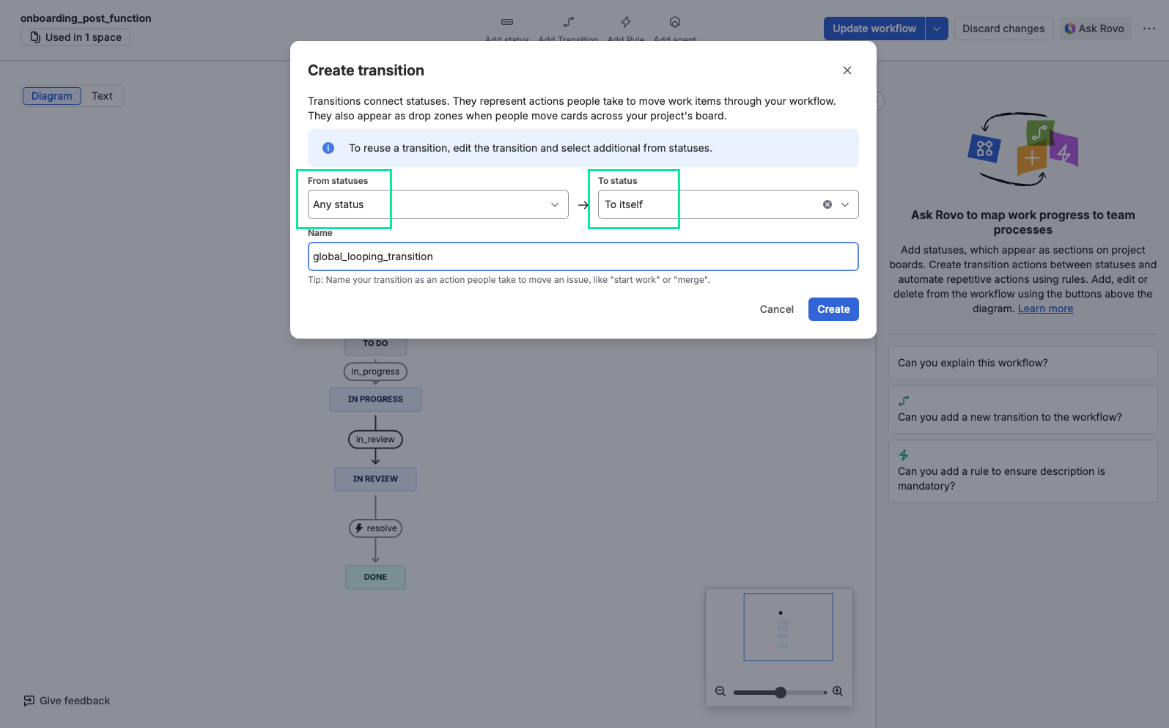
-
Click the + icon next to Perform actions.
-
Select Deep Clone for Single Clone or Deep Clone (Epic / Tree).
-
Configure your clone.
-
Click Add.
-
Click Update workflow.
In your Jira automation:
-
Create a Jira automation with a trigger and any steps that you want to execute before the work item clone.
-
Add and configure a Condition step that should initiate cloning.
-
Add a Transition work item action.
-
Select Same status (loop) as Destination status.
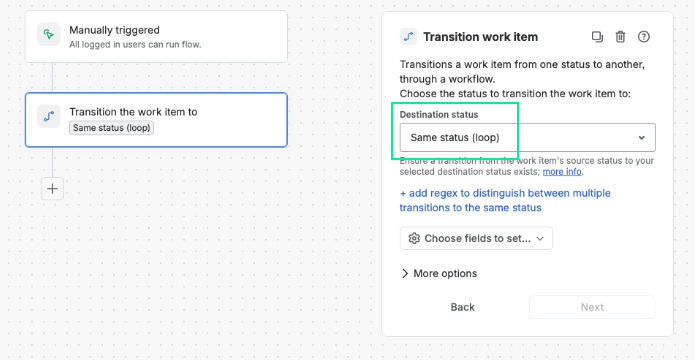
-
Save and enable your Jira automation.
Done! Jira automation now triggers a Deep Clone action without requiring a work item status change.
Turn off notifications
When using looping transitions, you might want to trigger your Deep Clone workflow action from Jira automation without sending email notifications.
Here’s how:
Step by step
-
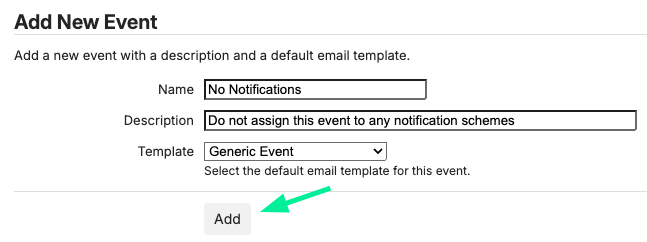
Create a "No Notifications” event under ⚙️ Settings > System > Events.
-
Create a looping transition in the relevant workflow(s). (Only required if there isn’t already an existing path to transition the work items to the same status.)
-
Select Add Transition
-
Select From status, then select Any status for the action to be available from all statuses, or select the specific status you want to loop.
-
Select To status, and choose To itself.
-
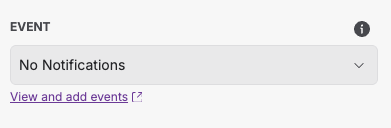
Select the previously created Event under Event.
-
Give the transition a name, then select Create.
-
-
Create a Jira Automation flow
-
Select a Scheduled trigger and configure it to a suitable schedule for your use case.
-
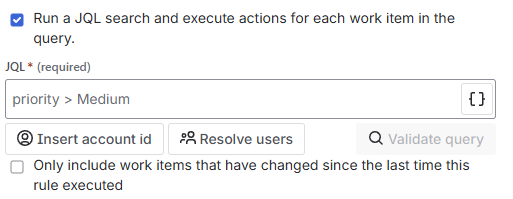
Select Run a JQL search […] and enter a JQL that includes all work items that you want to have updated. Additionally, unselect Only include work items that have changed […].
-
Add a Transition work item action.
-
Select Same status (loop) for Destination status.
-
Turn the rule on.
-
Done! Your workflow action now runs without sending email notifications.
Make sure that your automation rule doesn’t cause a loop that creates infinite clones. Work items that are created with Deep Clone can trigger automations of “Work item updated” rules.
-
Global looping transitions can be removed from the work item view by restricting the transition from all users.
-
If Deep Clone and Automation overwrite each other, you could insert a ‘refetch work item data’ action immediately after the trigger in Automation for Jira. In ‘more options’ you can manually configure a delay which would solve your problem.
-
Read more about creating global looping transitions in the Atlassian Community.
-
Read more about Jira workflows in the Atlassian documentation.
-
Read more about Jira automation in the Atlassian documentation.
Make sure that the Jira automation rule is either global or, if it’s a “Space (Project) rule”, within the target space where the cloned work item is created.
Beware of infinite loops between Jira automation and any Workflow Post Functions, possibly triggered by Jira automation as well.
