
Use Deep Clone for Jira for cloning work items and spaces from one Jira Cloud instance to another. The Instance Clone feature is available for all clone types (Single Clone, Bulk Clone, Epic/Tree Clone, Space Clone (Project Clone), Post-Function Clone, Presets).
Preparation
If you want to clone between two instances, the first thing you have to do is set up a connection between your instances.
Setup instance connection
Follow the instructions below to configure instance clone from, e.g., first-instance.atlassian.net to second-instance.atlassian.net:
-
Ensure you have admin permissions in both instances
-
In
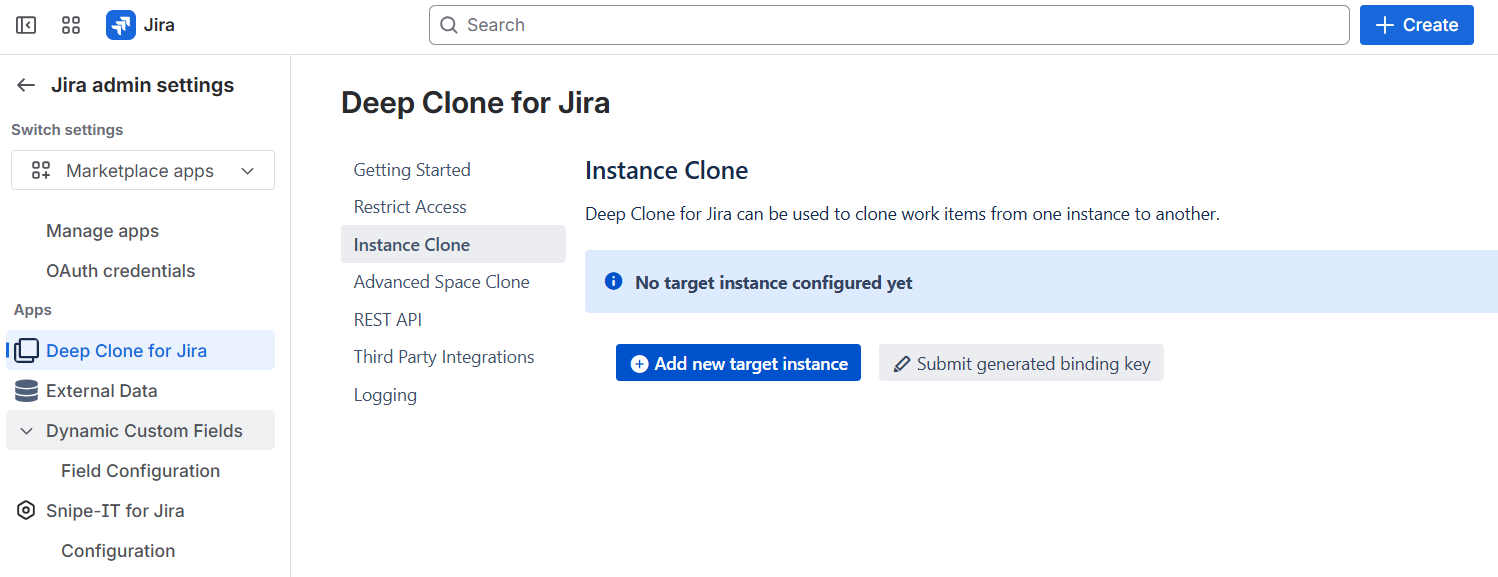
first-instance.atlassian.net, go to ⚙️ Settings > Marketplace apps > Deep Clone for Jira > Instance Clone
-
Click on Add new target instance and enter the complete URL of the target instance, i.e.,
https://second-instance.atlassian.net -
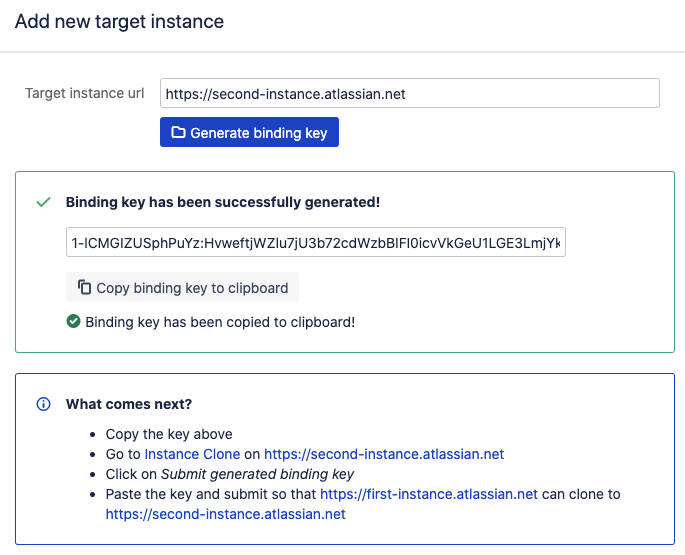
Generate a binding key
-
Follow the instructions in What comes next? to finish connecting the two instances. If there is an error while submitting the key on the second instance, please generate another key and closely verify that the provided URL is correct
-
The instance
first-instance.atlassian.netis now able to clone tosecond-instance.atlassian.net. The other way around can be setup by clicking on Add as target instance onsecond-instance.atlassian.net. Both instances are able to disable this connection at any time

-
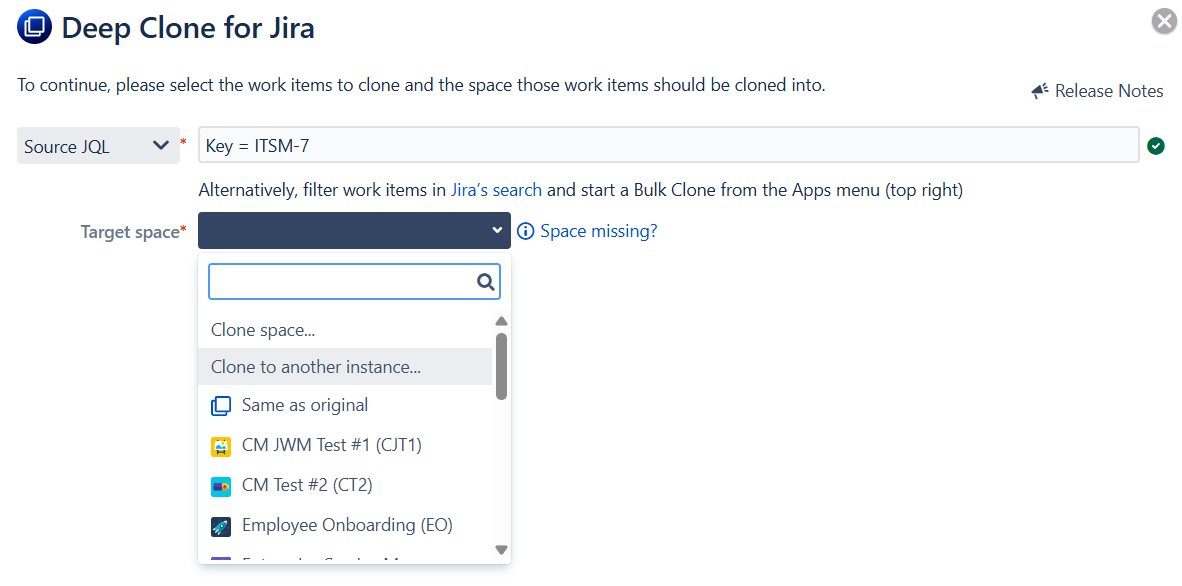
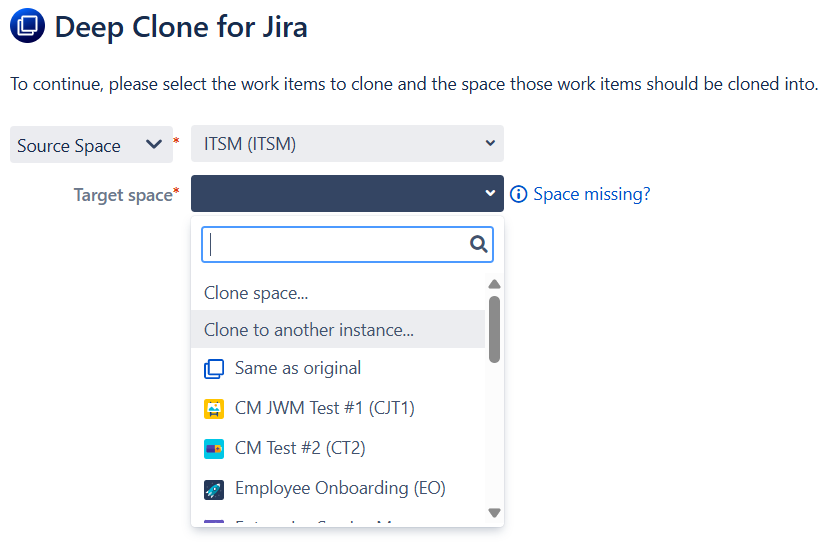
In the Clone dialog, you can now select Clone to another instance… in the Target Space dropdown to clone from one instance to the other
Step by step
Once the connection is set up, you can clone to another instance from the clone dialog of all clone types.
-
Open the clone dialog depending on your clone type.
How do I open the clone dialog?
Single Clone or Epic Clone / Tree Clone
-
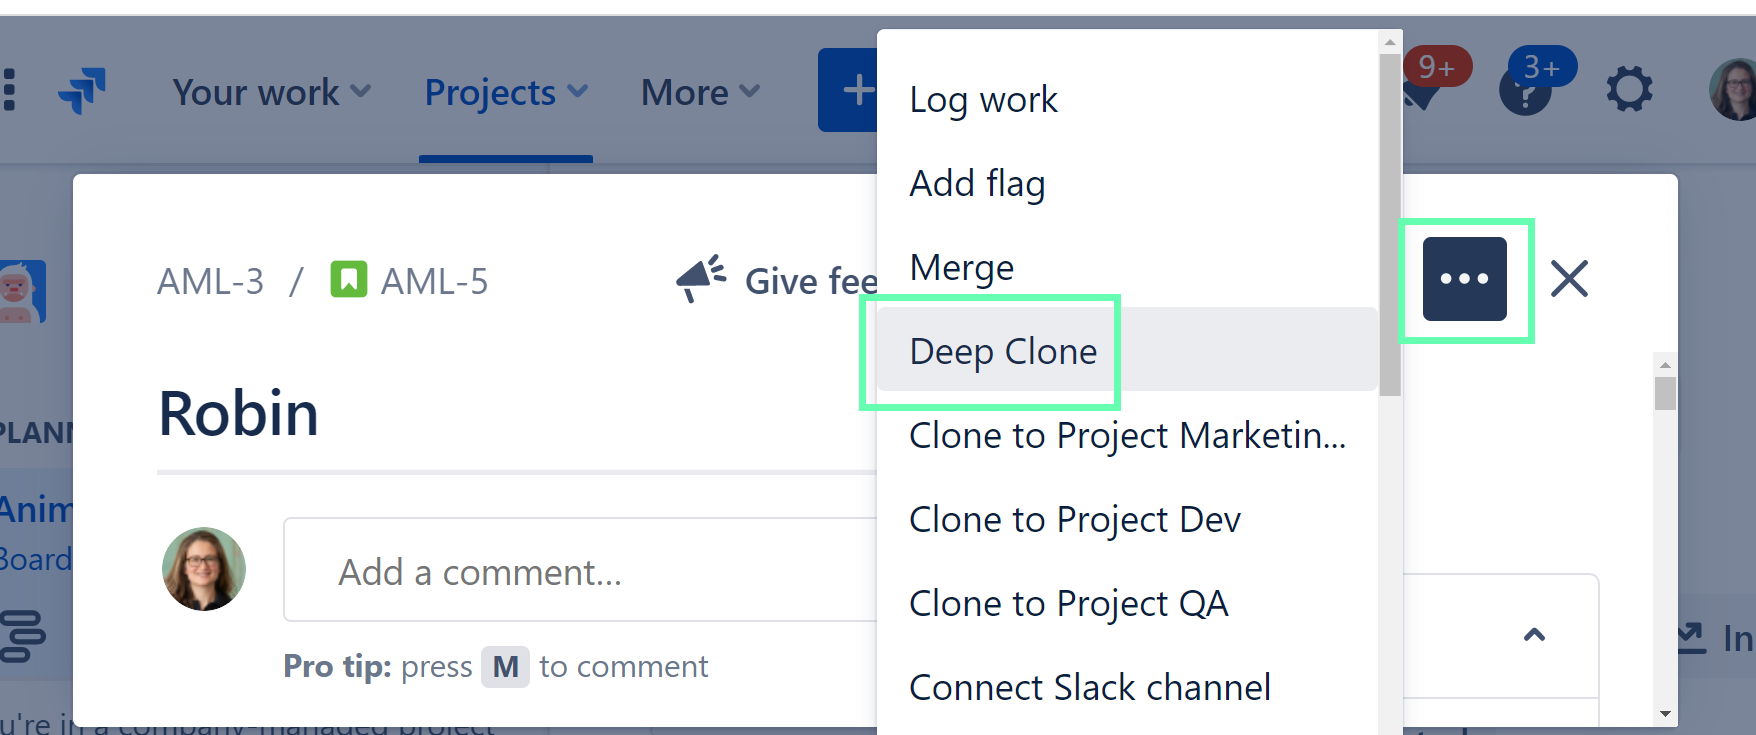
Navigate to the work item you want to Clone.
-
Click on the top right Actions menu ••• > Deep Clone.
Bulk Clone
There are two ways to open the Bulk Clone dialog:
From search results
-
Click 🔍 Search > 🔍 View all work items or Filters > 🔍 Search work items.
-
Filter the work items you want to Bulk Clone as needed.
-
Open the Apps dropdown menu (top-right) and select Bulk Clone (Deep Clone).

From Apps > Deep Clone
-
Select Apps > Deep Clone for Jira on the Main Sidebar on the left
-
Click Bulk Clone in the header of Clone Features page.
-
Filter the work items you want to bulk clone by selecting a filter or space, or by entering a JQL query.
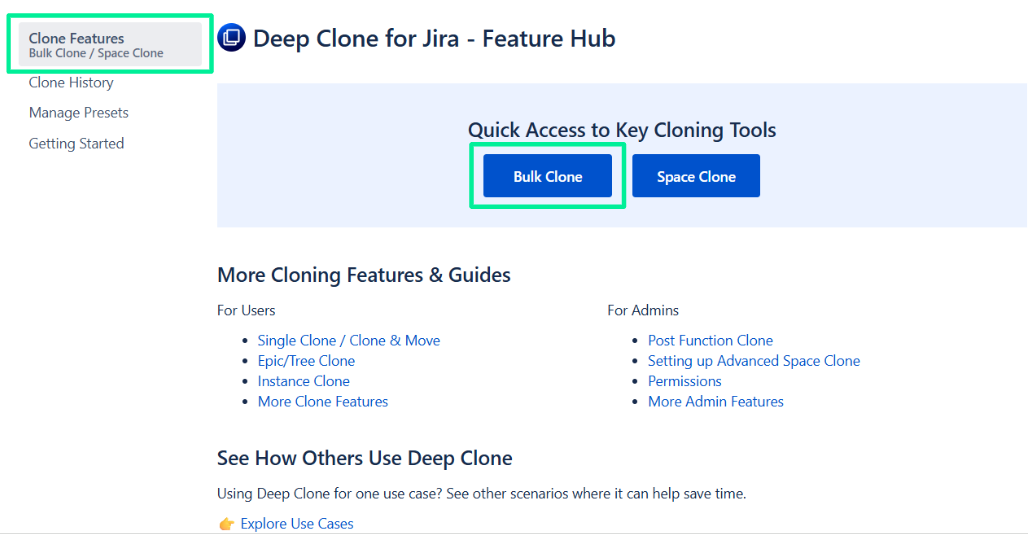
Space Clone
-
Select Apps > Deep Clone for Jira on the main sidebar on the left
-
Click Space Clone in the header of Clone Features page.
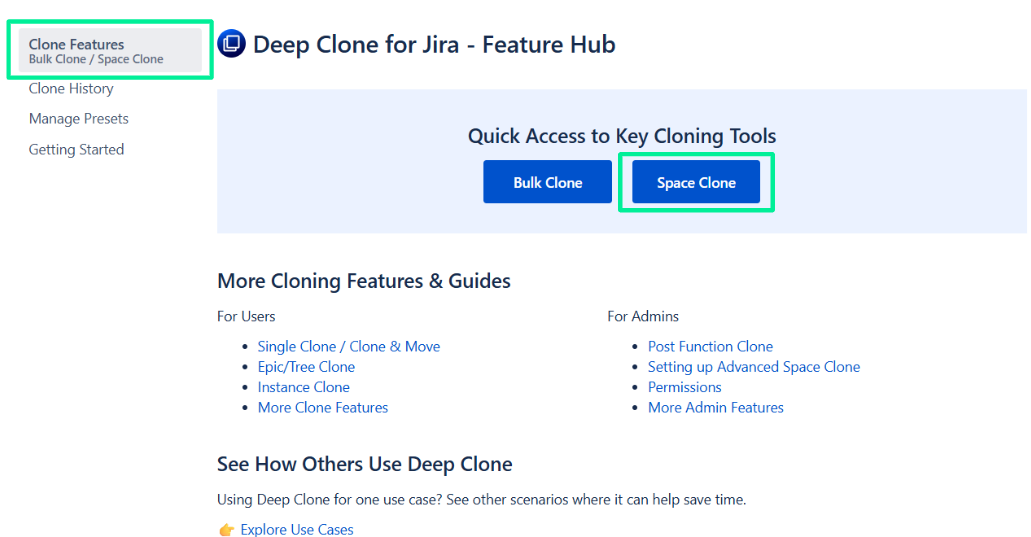
Select Apps > Deep Clone for Jira on the main sidebar on the left
Click Space Clone in the header of Clone Features page.
-
Select Clone to another instance in the Target space dropdown
Done! You have set up your instance clone.
Cloning Reporters, @ Mentions, and Other User Values Between Instances
Deep Clone for Jira is able to clone user values between Jira instances, if the Jira user is available in both instances and connected to the same email address.
What happens if a Jira user is not available in the target instance?
-
If the reporter is not available in the target instance, Deep Clone sets the user who performed the clone as reporter.
-
If the assignee is not available in the target instance, Deep Clone sets the default assignee in the clone.
-
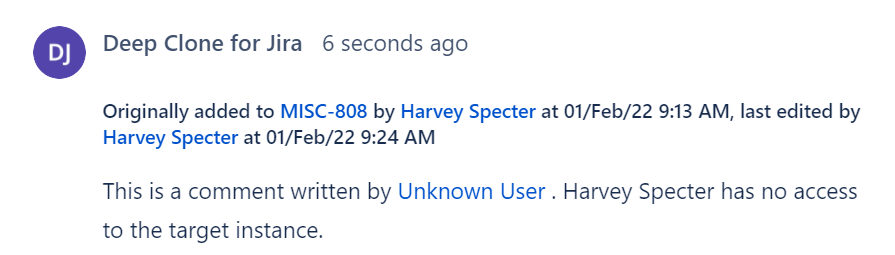
If the commenter is not available as a user, the creator of the comment is “Deep Clone for Jira”. A web-link to the user of the original work item in the source instance is provided, to track who originally created the comment.
-
If the cloned comment contains a @mention to a user who does not exist in the target instance, the mention will be displayed as “unknown user” or “user”.
There are additional considerations when cloning across instances:
-
Request types and work item types need to be available in the target space
-
If the language settings on target and source instance differ, you need to temporarily change the default language of your profile, so languages match.
Read More