
Setting up Your Connection to Jamf
Create a Jamf Pro User
To set up the connection between Jamf and Jira, you need to configure user credentials in the app configuration. We strongly recommend creating a separate service user that is solely used by the app or other integrations instead of using an account of a real user or admin.
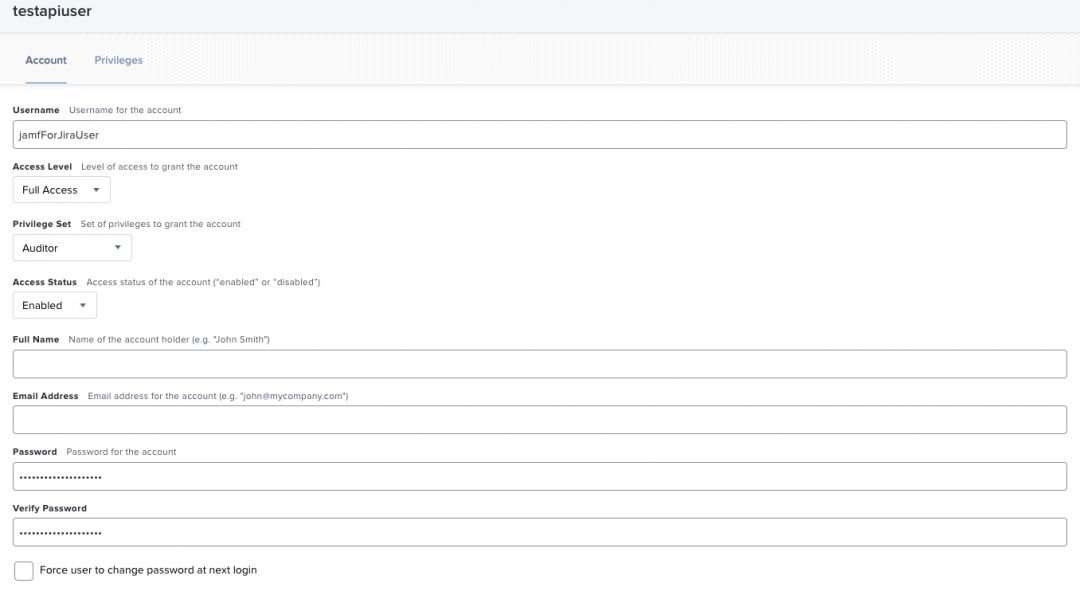
In your Jamf Pro instance, navigate to Jamf Pro User Accounts & Groups within the Settings page.

Create a new standard user with full access enabled and the “Auditor” privilege set. Optional fields like “Full Name” or “Email Address” do not have to be filled. Take note of the password used.
Configure Jamf for Jira
Within Jira, proceed to configure the app either by clicking on the Configure button in the app listing or navigating to the Jamf configuration in the Jira app setting menu.
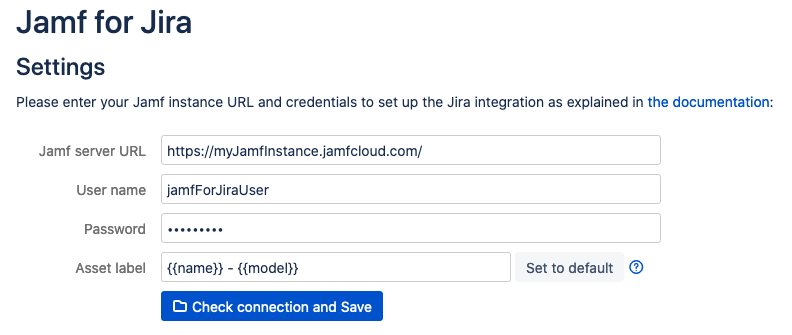
Configure the URL to your Jamf instance and the name and password of the dedicated user you created. Click on Check connection and Save 📁 . The app will check if it can connect to your Jamf instance and proceed to sync all assets with Jira.
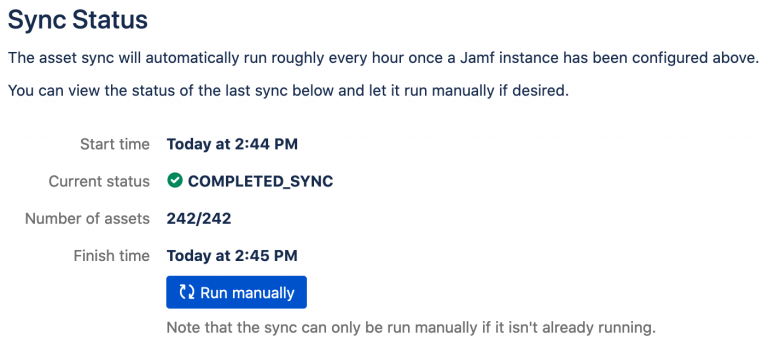
Assets will be synced from Jamf to Jira every hour. You can also start a sync manually by clicking on the Run manually 🔁 button.