
Initial Configuration
After having installed the Add-on from the Atlassian Marketplace, you first need to do some general configuration.
Requirements:
Confluence admin permissions to configure the app in Jira.
Slack admin permissions to create a new Incoming Webhook.
Instructions:
Generate a Slack Incoming Webhook URL via this link
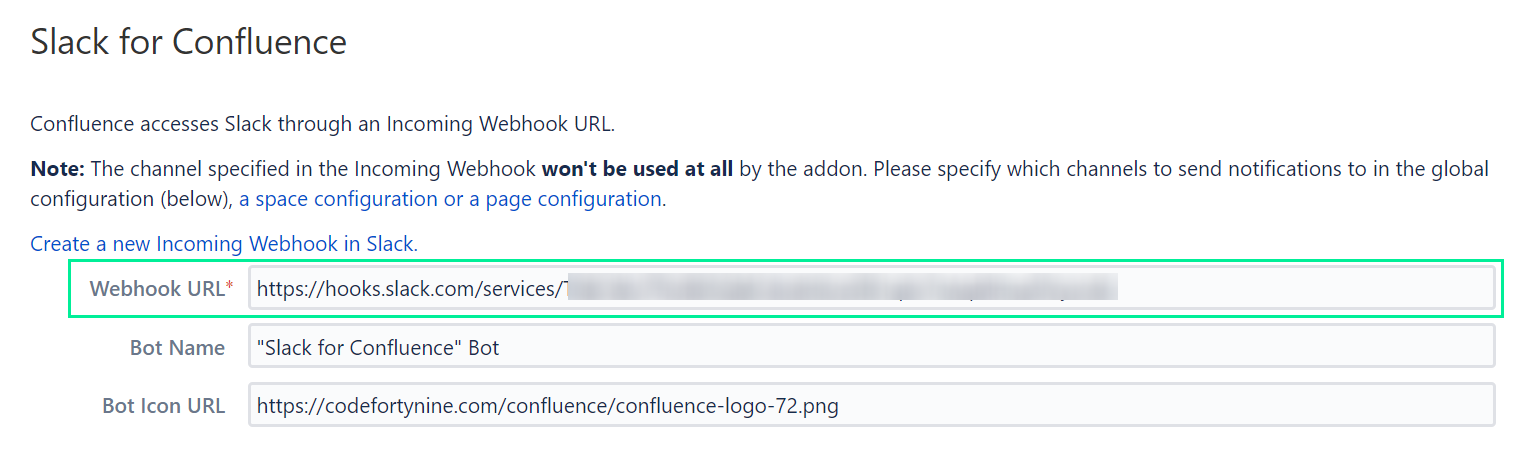
Copy the Slack Incoming Webhook URL and head to Confluence settings > Configuration > Slack for Confluence
Paste a Slack Incoming Webhook URL into the form in the Slack for Confluence configuration.
Make sure to use a public channel for the Webhook – e.g., #general
The exact channel and other settings like bot icon and name in the Incoming Webhook don’t matter, as all of them get overridden within Slack for Confluence.

You can also modify the Bot’s name, icon, and the appearance of the notifications within Slack in the Global Configuration.
To try out sending notifications, specify one or more channels under Global notifications. Note that all updates throughout the entire Confluence installation will be propagated with notifications to those channels and users, so it might not be reasonable to use this with big Confluence installations. You can configure more fine-grained notifications in the scope of a Space, Page, or User as described below.