This guide explains how to connect to Snowflake using the OAuth Authorization Code Flow, which offers improved security and supports automatic token refresh.
1. Configure Snowflake OAuth for custom clients
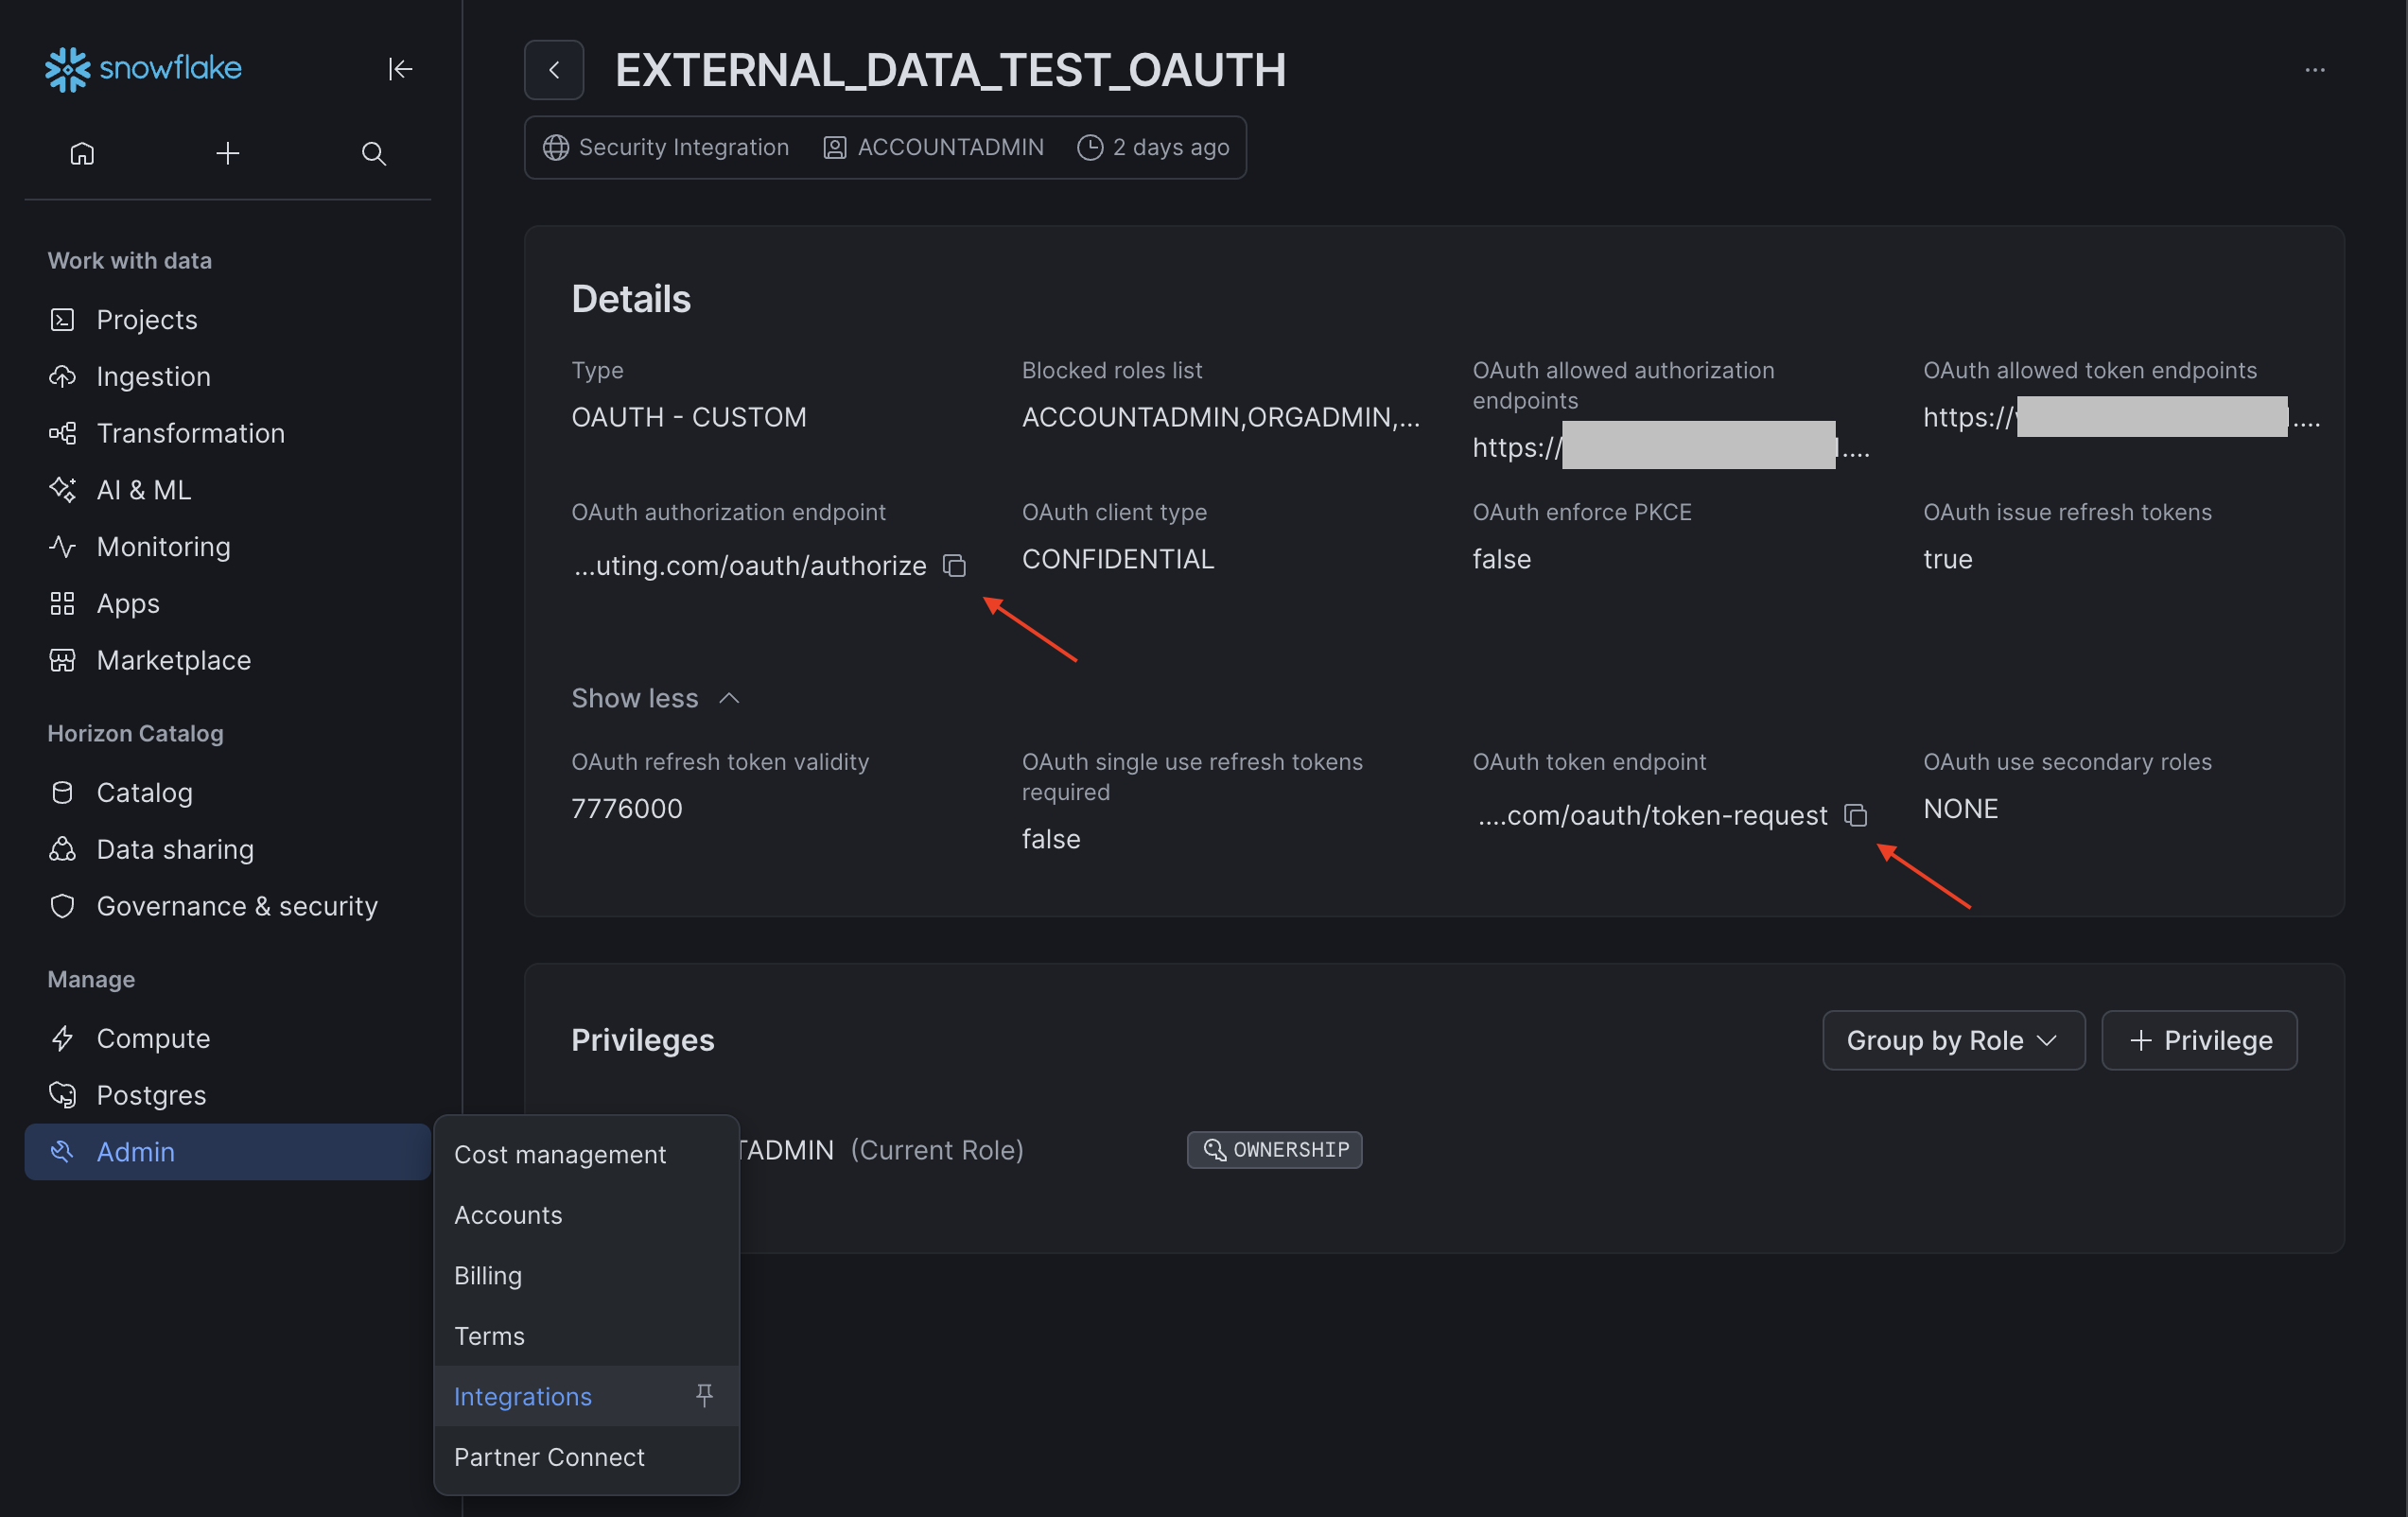
Before configuring the datasource in our app, create a Security Integration in Snowflake to enable OAuth access for the app. Run the following command in your Snowflake worksheet (account admin role recommended), adjusting the name and OAUTH_REDIRECT_URI as needed. Find the correct OAUTH_REDIRECT_URI when creating a new Datasource in External Data of type Database - Snowflake (OAuth) under the “Callback URL” section.
CREATE SECURITY INTEGRATION external_data_oauth
  TYPE = OAUTH
  OAUTH_CLIENT = CUSTOM
  OAUTH_CLIENT_TYPE = 'CONFIDENTIAL'
  OAUTH_REDIRECT_URI = '<call-back-url-from-datasource-configuration>'
  ENABLED = TRUE
  OAUTH_ISSUE_REFRESH_TOKENS = TRUE
  OAUTH_ENFORCE_PKCE = FALSE;
Retrieve credentials:
-
Client ID: Run
DESCRIBE SECURITY INTEGRATION external_data_oauth;and find the OAUTH_CLIENT_ID property. -
Client Secret: Run
SELECT SYSTEM$SHOW_OAUTH_CLIENT_SECRETS('EXTERNAL_DATA_OAUTH');.
2. Setup External Data for Jira Fields
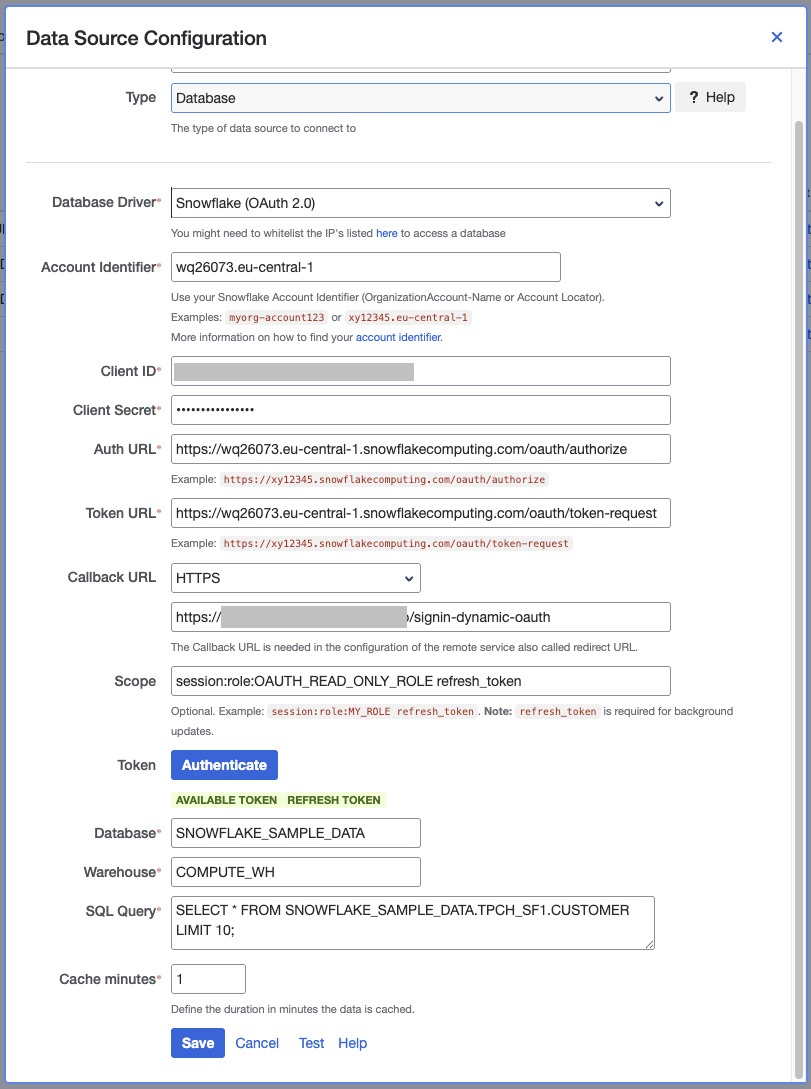
Go to External Data for Confluence -> Data Sources -> Add Data Source
Start setting up the data source configuration by using the Database type and the Snowflake (OAuth) Database Driver.
Account Indentifier
Use your Snowflake Account Identifier (OrganizationAccount-Name or Account Locator).
Examples: myorg-account123 or xy12345.eu-central-1
Client ID and Client Secret
Insert the Client ID and Client Secret retrieved from the Retrieve credentials section.
Auth URL and Token URL
Find the URLs on the Snowflake integration detail page.
Example:
-
Auth Url:
https://xy12345.eu-central-1.snowflakecomputing.com/oauth/authorize -
Token URL:
https://xy12345.eu-central-1.snowflakecomputing.com/oauth/token-request
Callback URL
Here is the callback URL required to create the integration on Snowflake
Scope
Add role and refresh token scopes.
Example: session:role:OAUTH_READ_ONLY_ROLE refresh_token
Authenticate
Trigger the process by clicking Authenticate. A new window will open for service login. Ensure the login account has admin permissions if required. After logging in, consent to the previously defined scopes. The window will close, and a green badge Authenticated will appear below the button.
Database and Warehouse
Specify the database and warehouse to query.
Example:
-
Database:
SNOWFLAKE_SAMPLE_DATA -
Warehouse:
COMPUTE_WH
SQL Query
Define your SQL query.
Example: Select * from "TPCH_SF1"."REGION"
The SQL query supports variables like {myVariable}. You can customize variable names to fit your needs and assign their values in the field configuration.
Further reading: How to use a Variable with a Data Source Using Variables with Lists in SQL Queries
Save and test the data source to confirm it works as expected.