
Deep Clone and Jira Automation can work in both directions:
-
Jira automation can trigger a Deep Clone action
-
work items created by a Deep Clone can trigger a Jira automation
This page describes how to trigger a Jira automation once a work item has been created by Deep Clone. You can achieve this by connecting your Jira automation to the Deep Clone configuration dialog using an incoming webhook.
Step by step
In your Jira automation:
-
Add the Incoming webhook trigger.
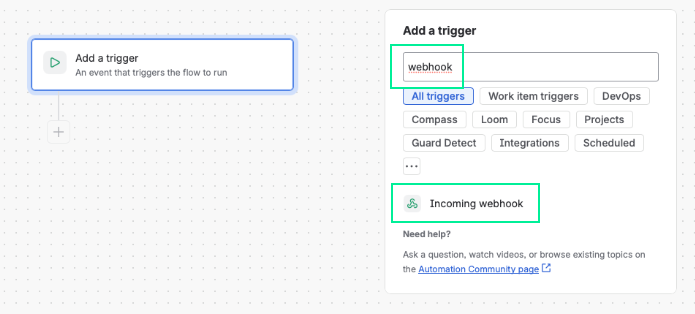
-
Click Next.
-
Add any action.
-
Save your Jira Automation without enabling it.
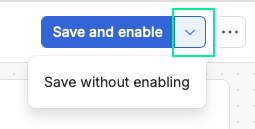
-
Click on the Incoming Webhook tile and generate your secret:
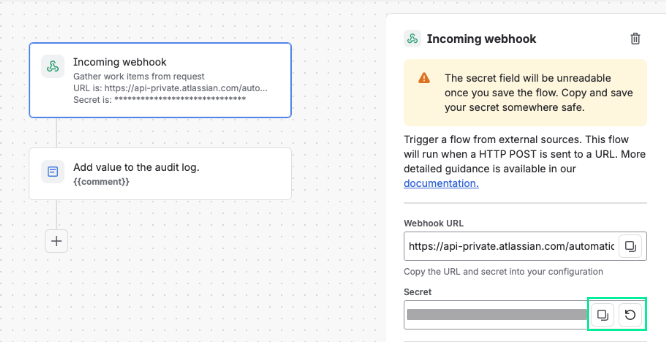
-
Copy your Webhook URL and Secret.
In the Deep Clone configuration:
-
Open your Deep Clone preset or configuration dialog, depending on the clone type that should trigger your Jira automation.
-
Expand More Options.
-
Enable Trigger Jira Automation Incoming Webhook on the cloned issue and paste your webhookURL/secret.
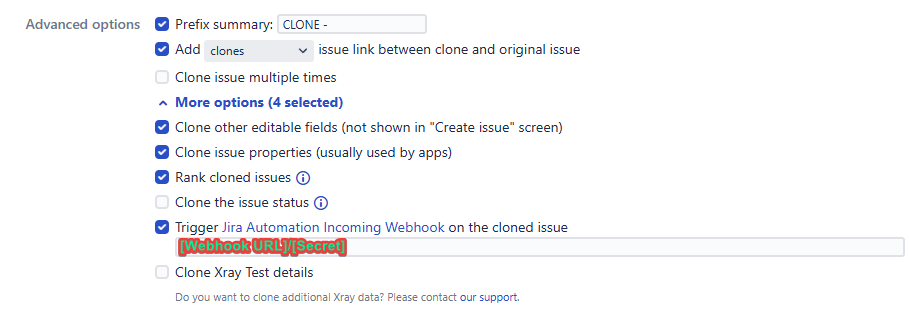
In your Jira automation:
-
Switch your Jira Automation to Enabled.

Done! Your Jira automation now executes its actions whenever a work item is cloned based on the configuration to which you added the webhook.
What happens when a work item is cloned?
Once a work item is cloned (based on the configuration to which you added the webhook), the following process starts:
-
Work item is cloned
-
Webhook triggers Jira automation
Automation action is executed
